

6. Deploy your own app
Apps you build yourself can also be built and deployed directly on tidoly.
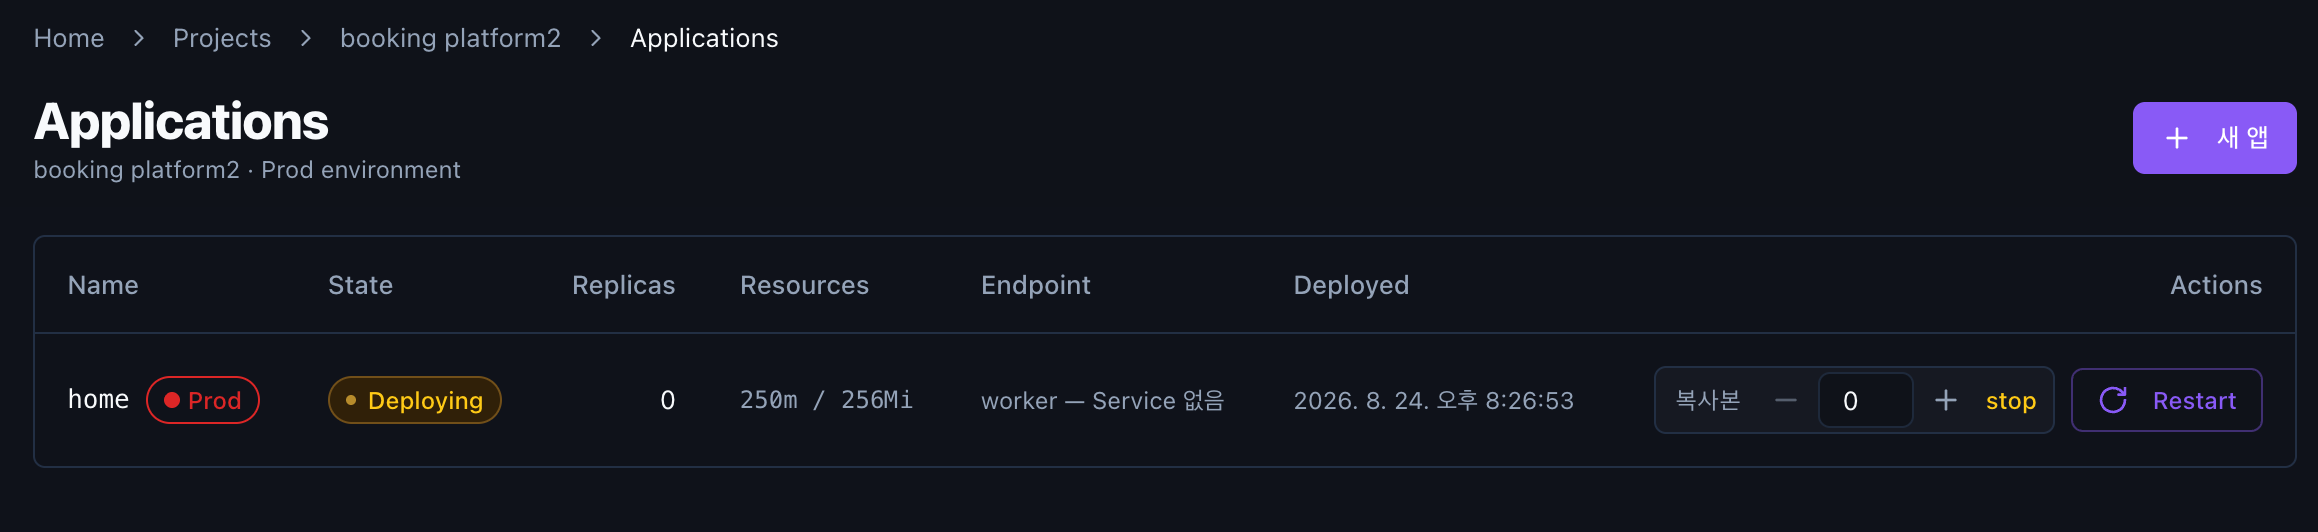
Project → Applications
You can connect a Git repository and push your code, or use images and files you have already built.
Steps to deploy an app
When creating an app for the first time, proceed in the following order.
1. Create the app
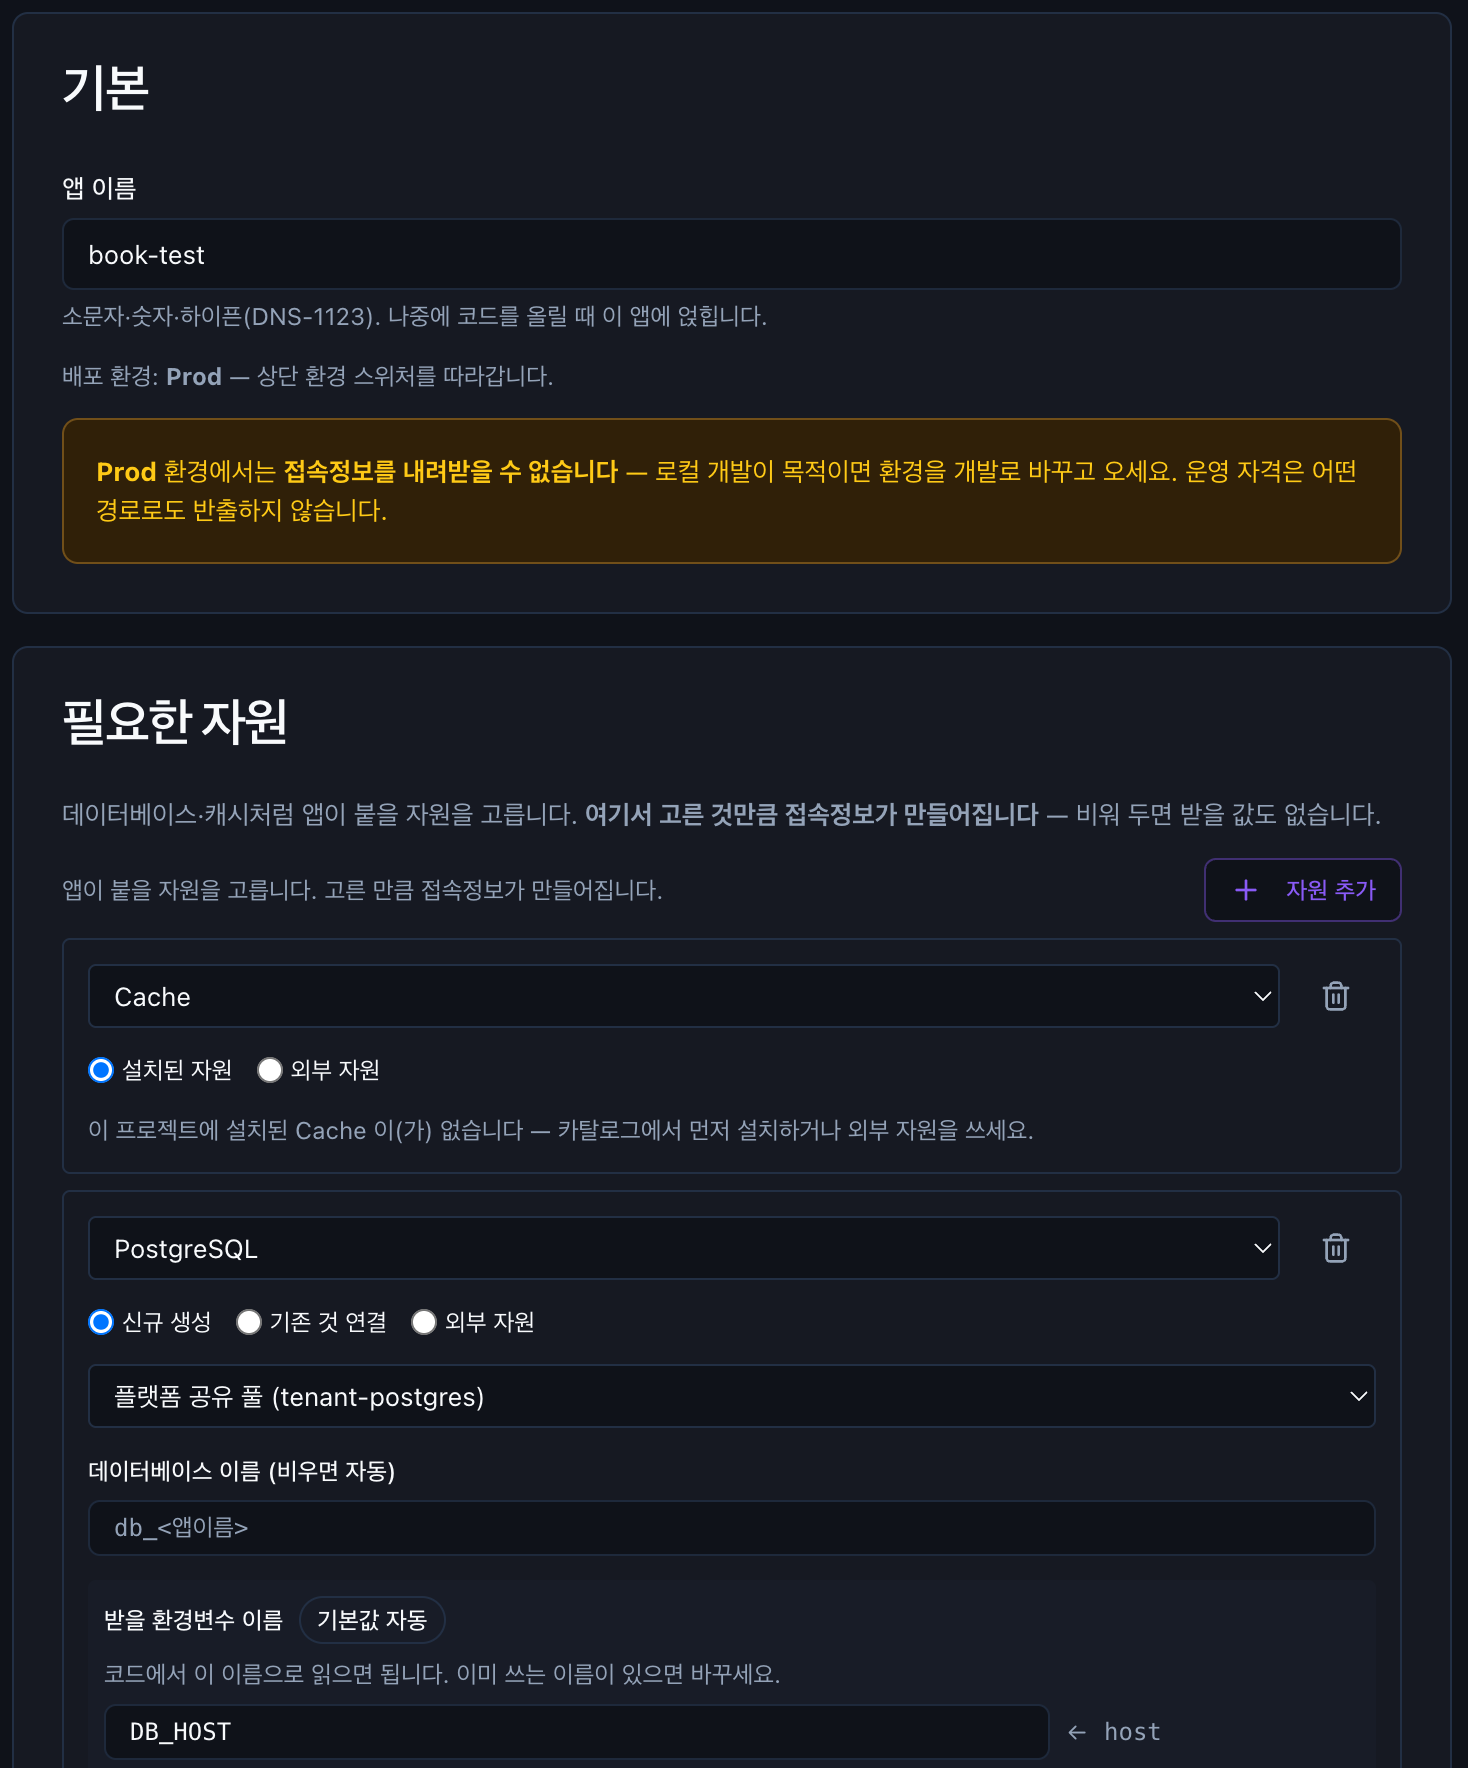
Click 새 앱 (New app) and select the app name and the resources to connect.
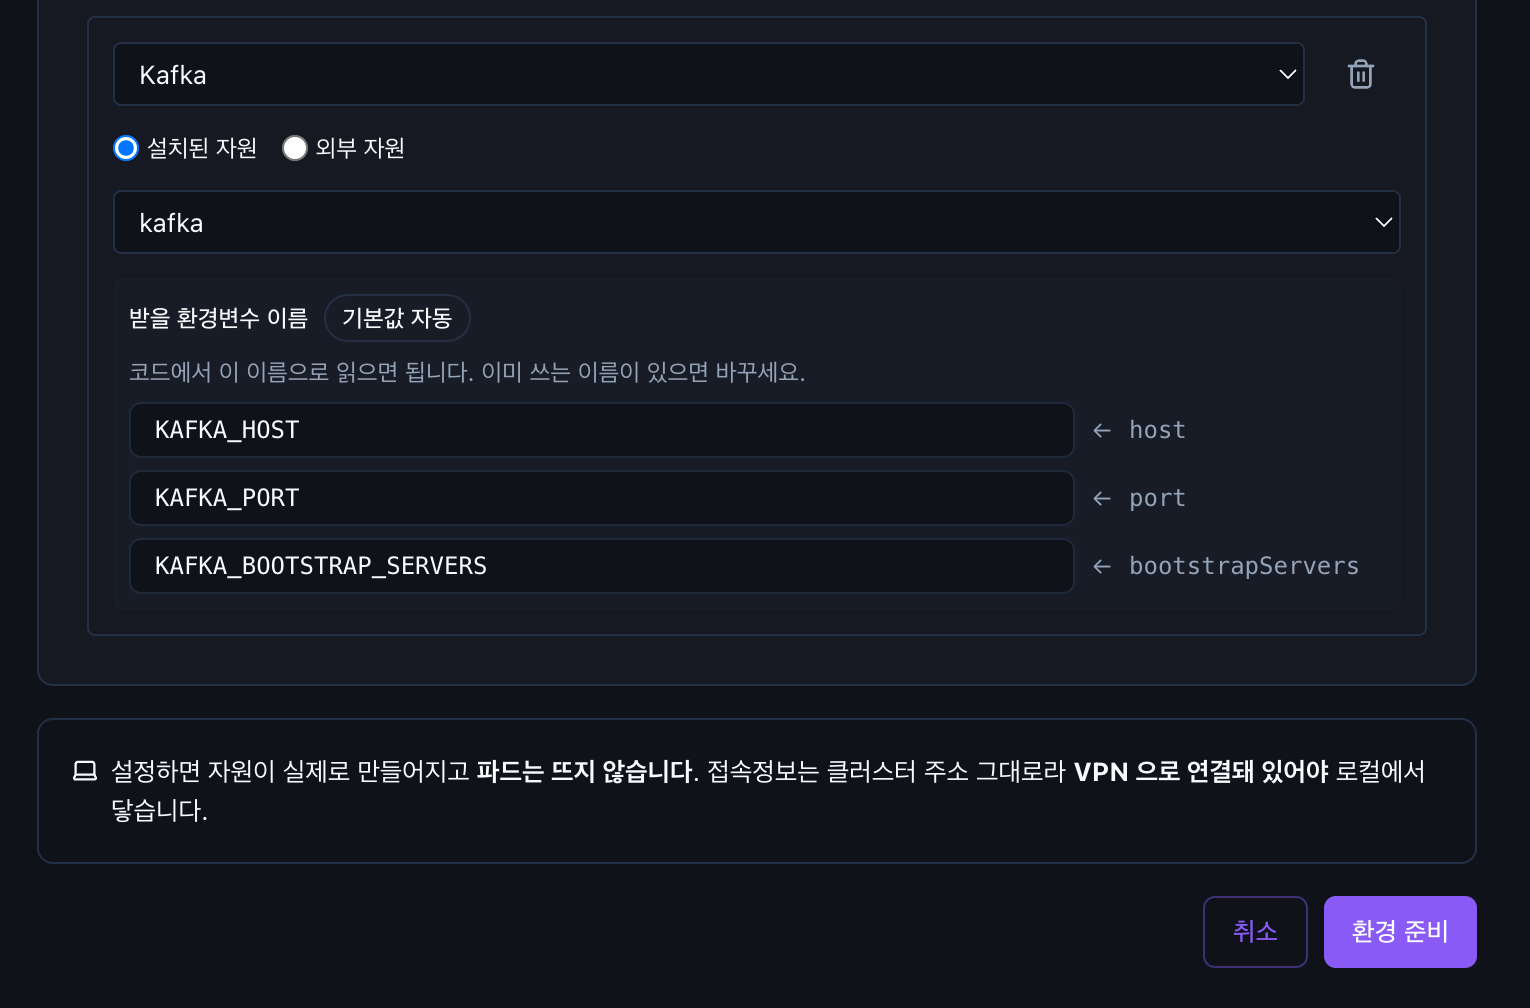
2. Prepare the runtime environment
The selected resources are created, and the connection info and environment variables the app will use are prepared.
The app is not run yet at this stage.
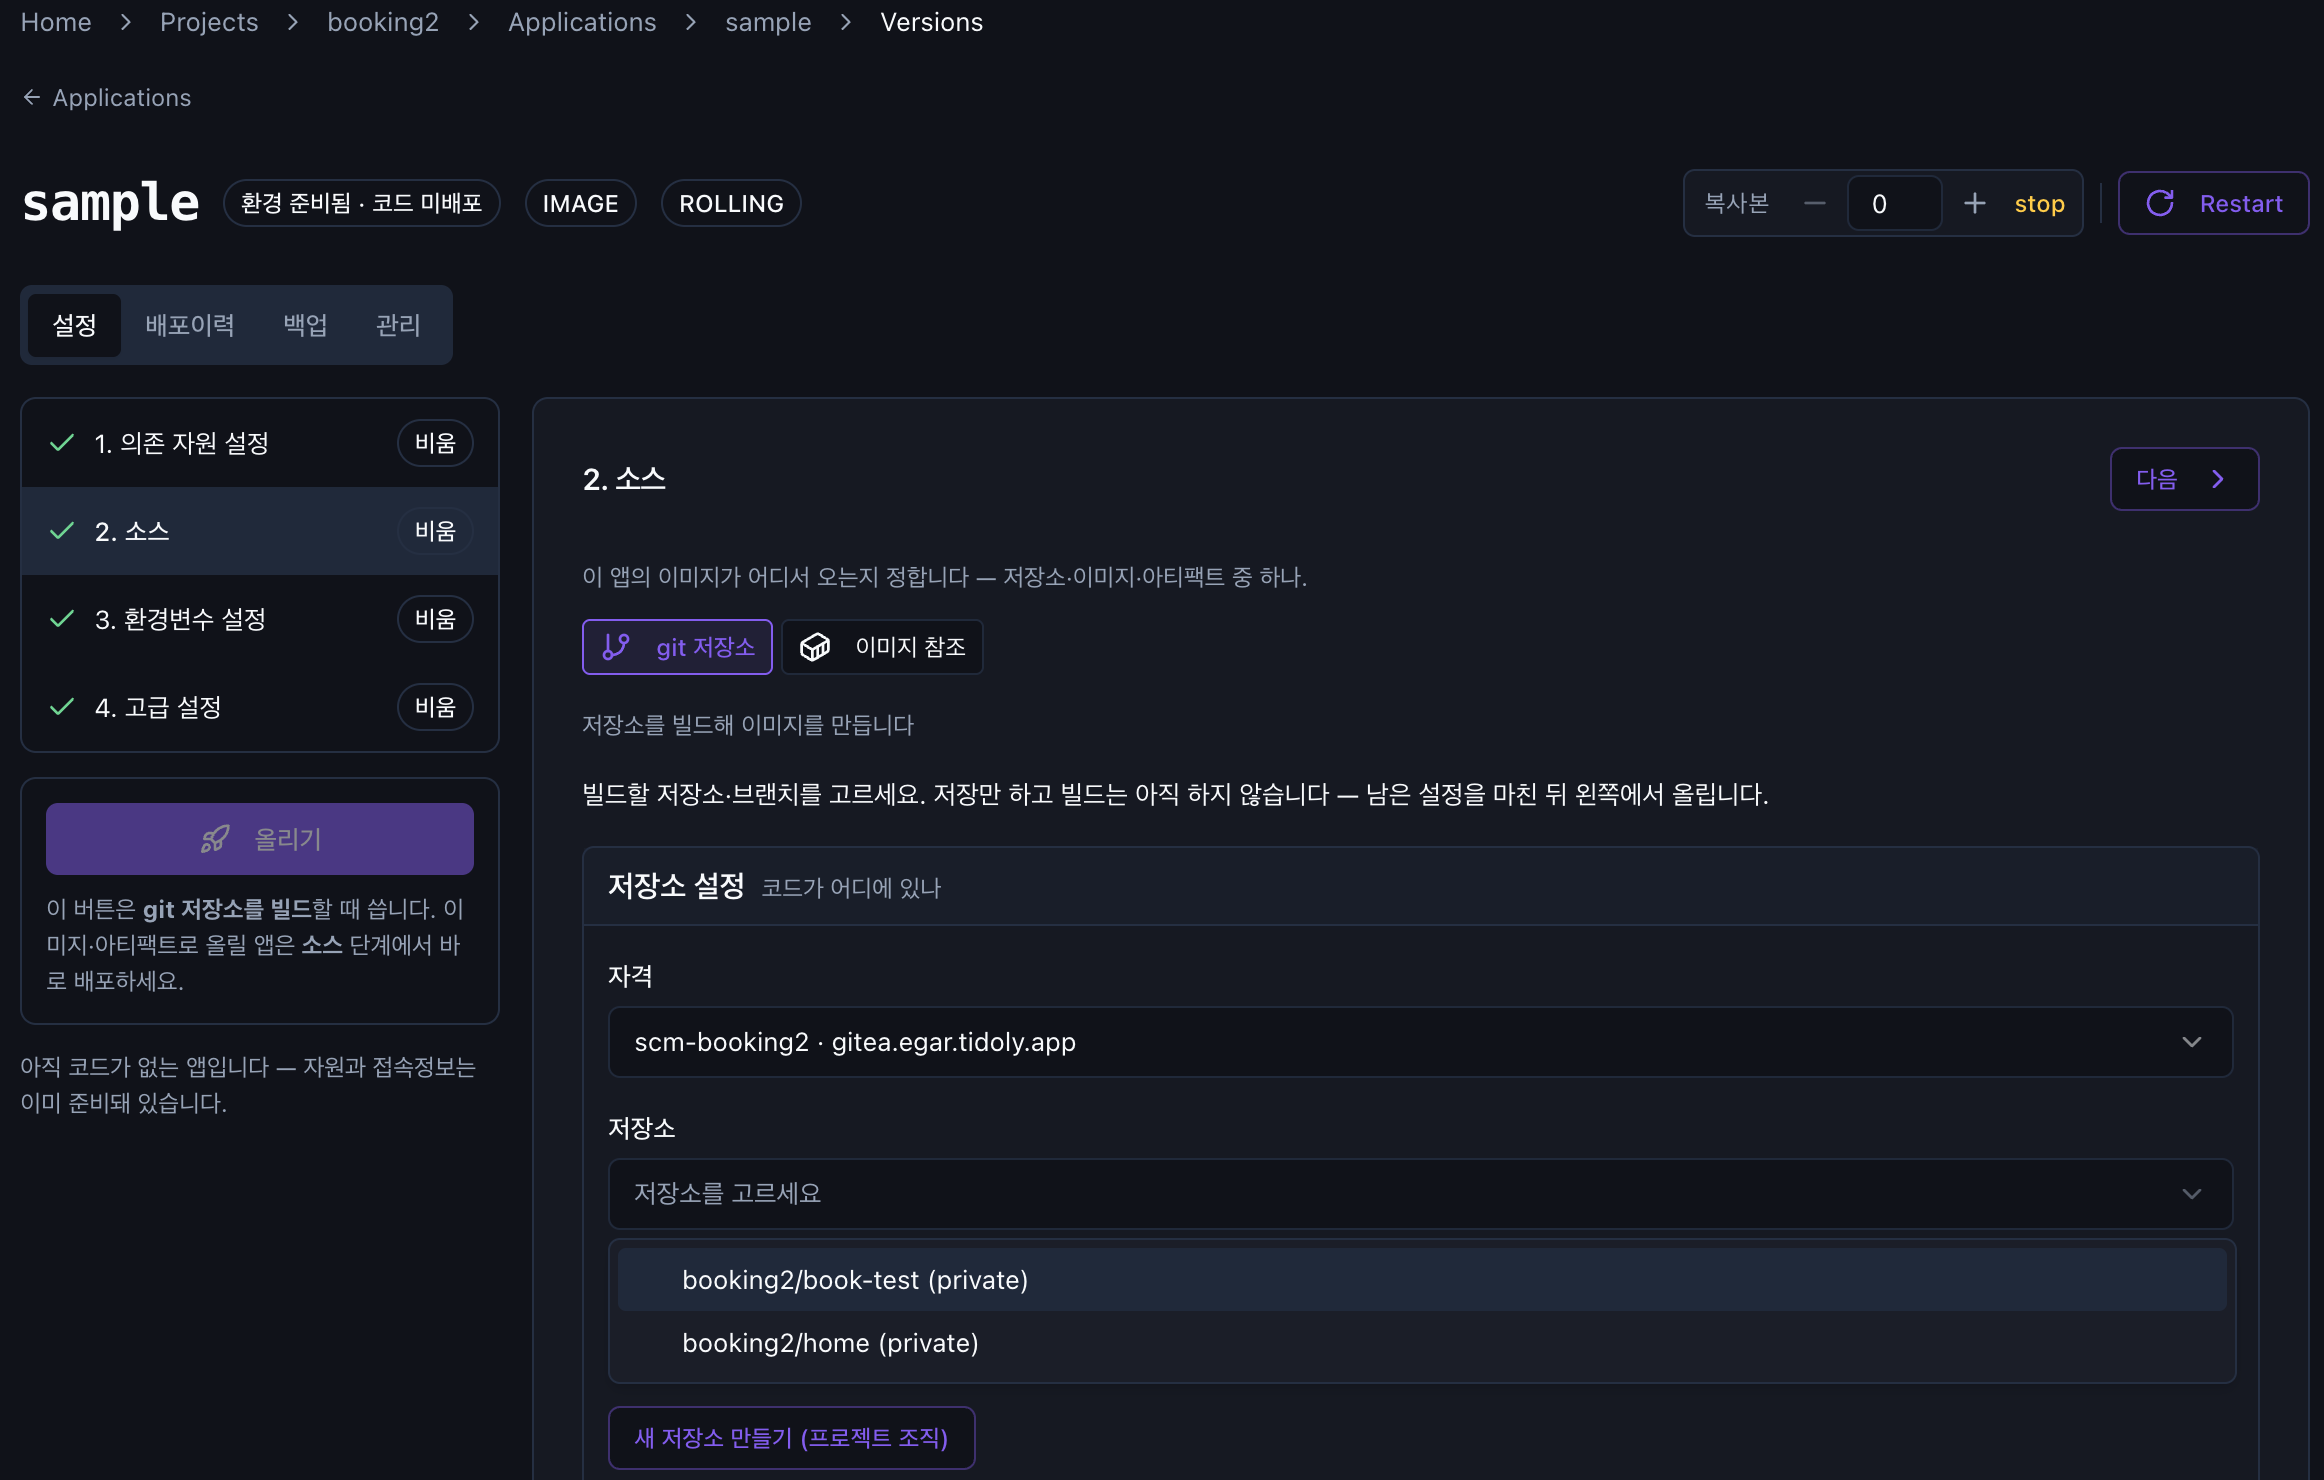
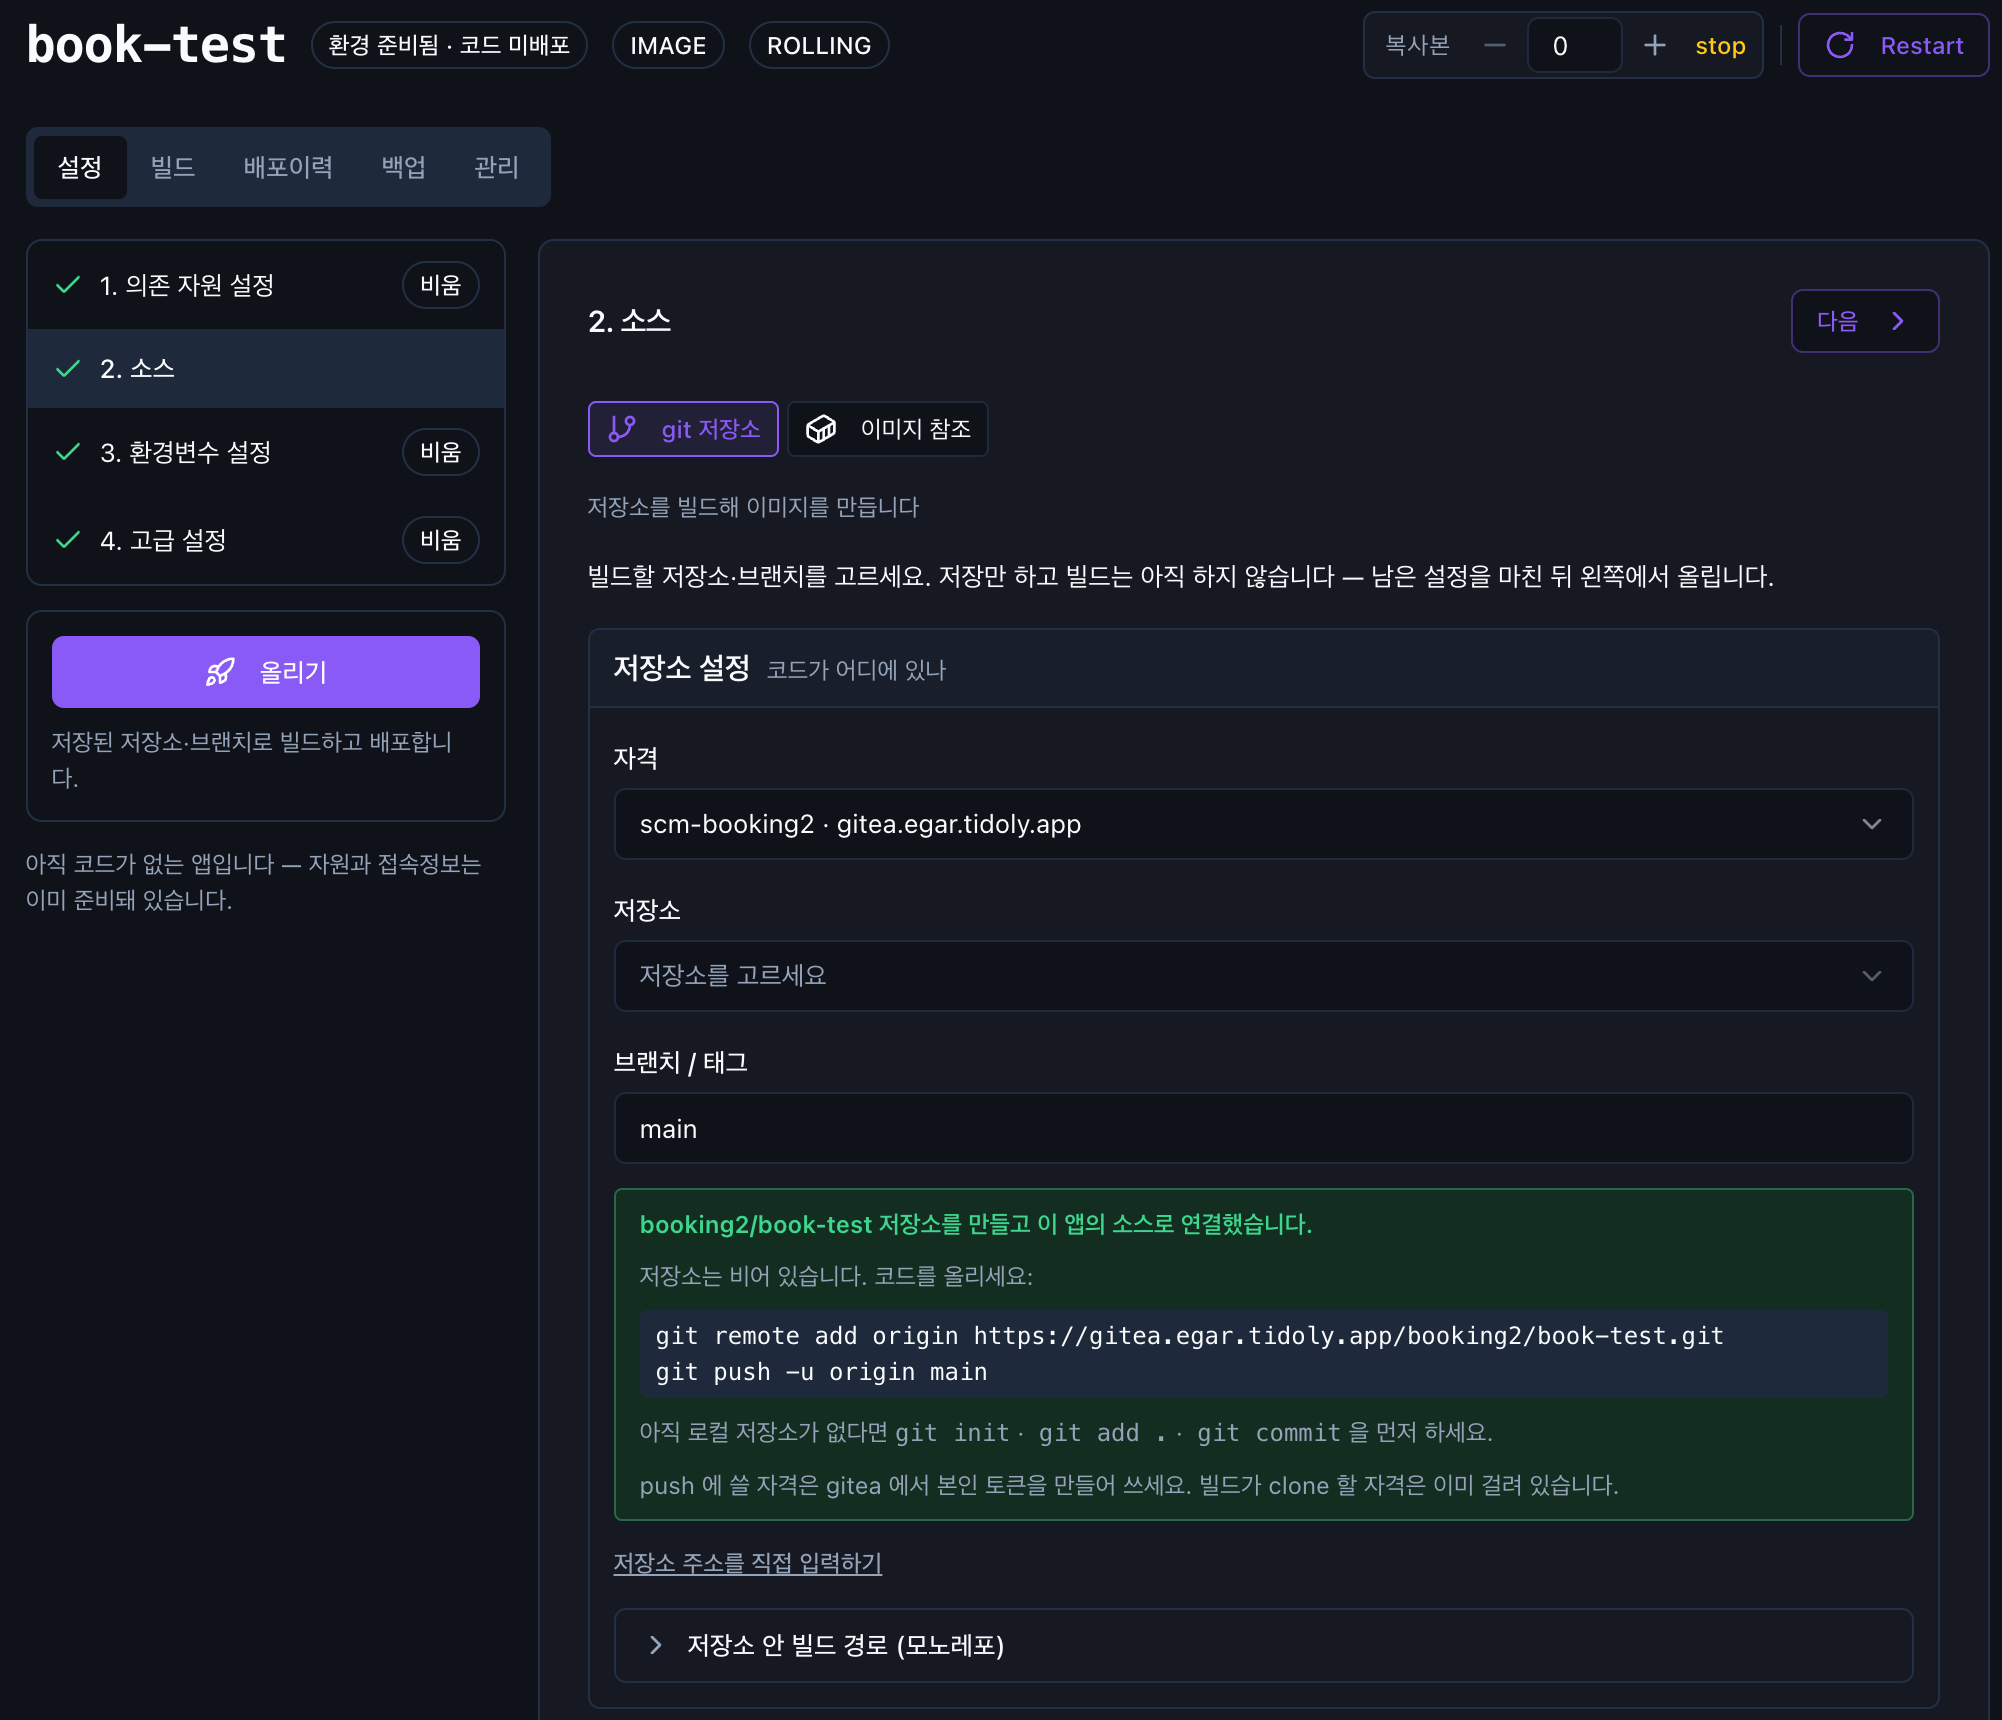
3. Connect the source
Select the repository and credential to use.
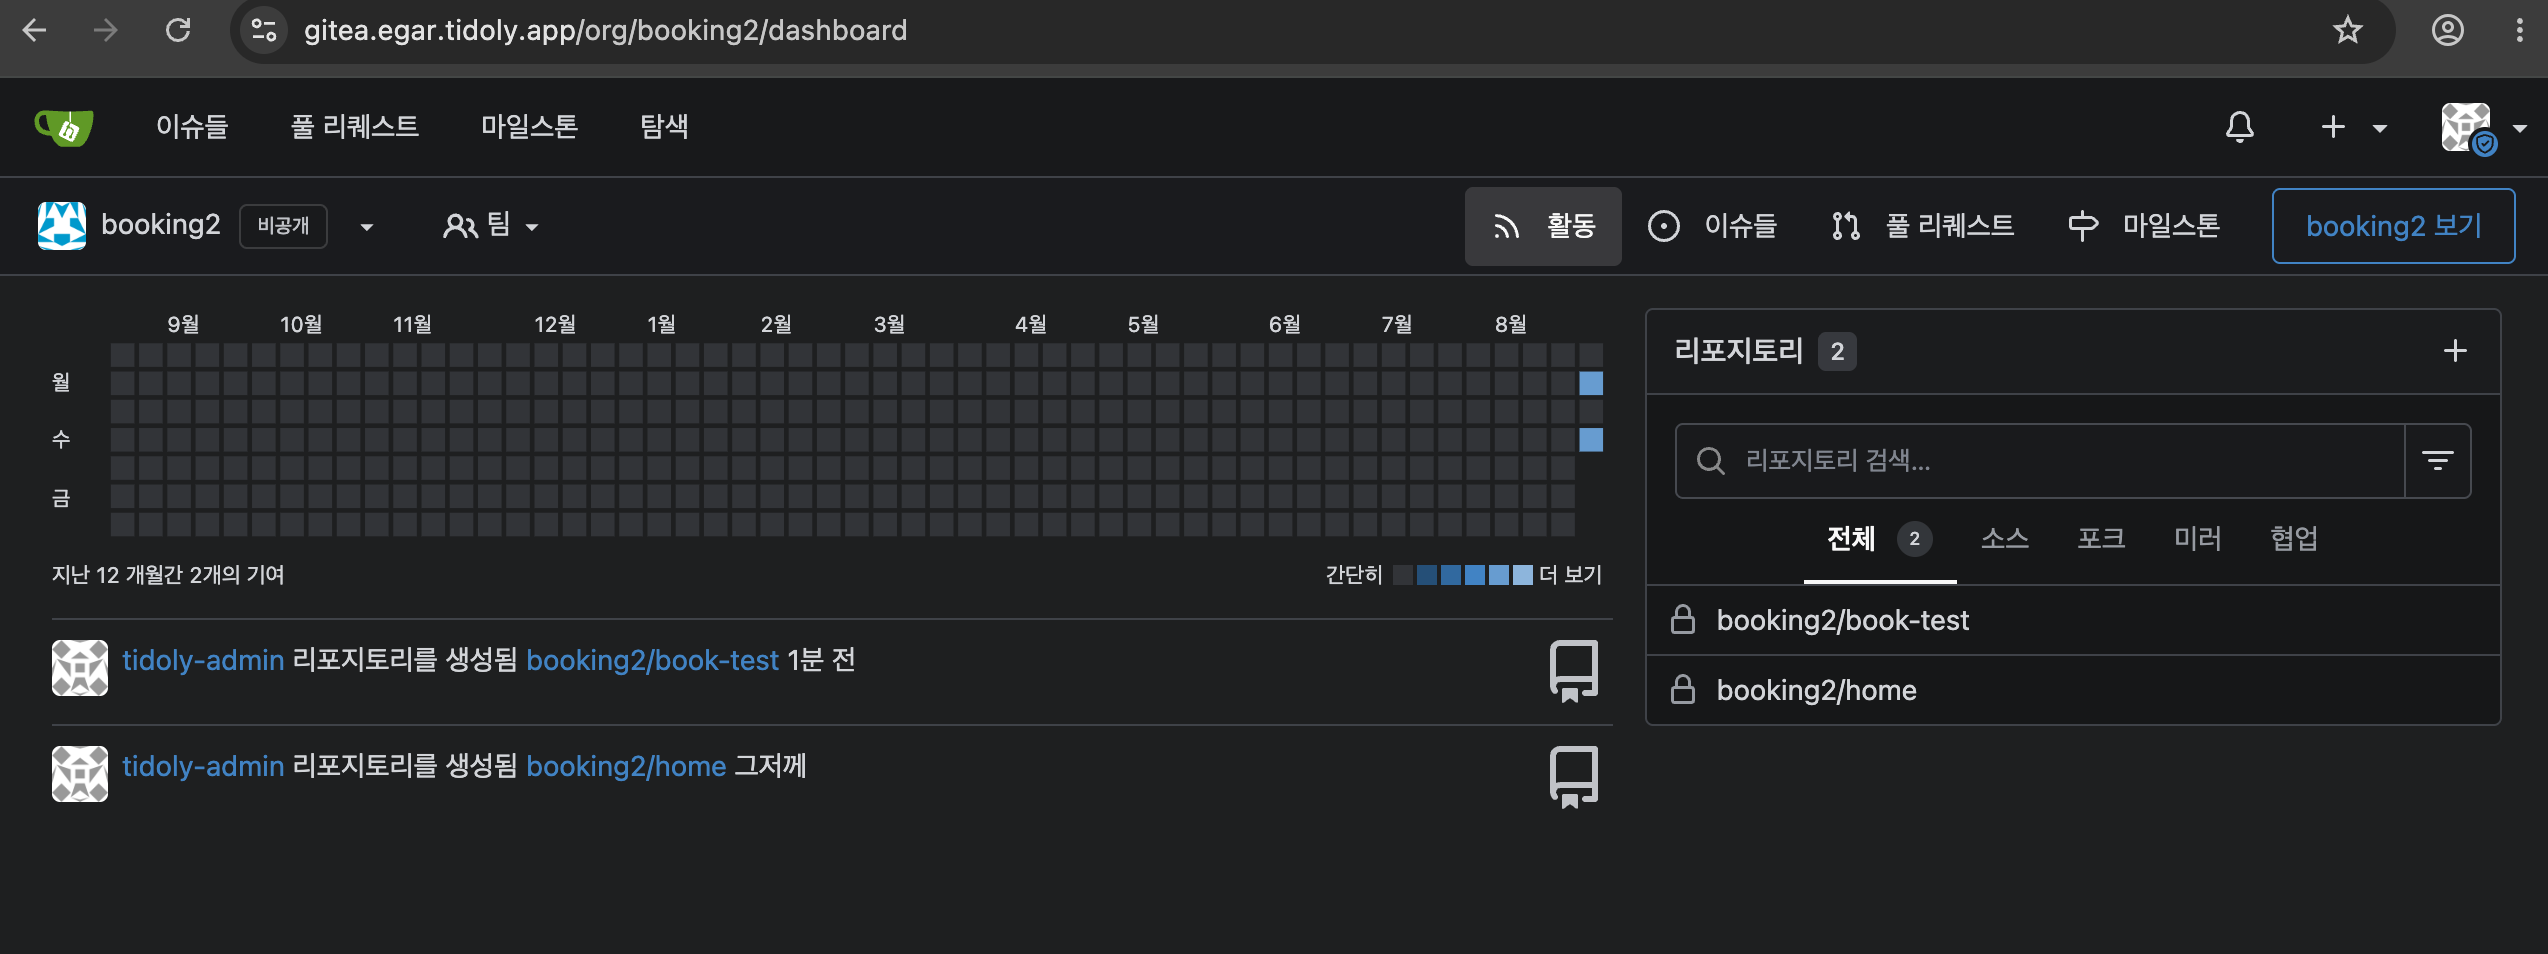
If you do not have a repository yet, click 새 저장소 만들기 (프로젝트 조직) (Create new repository (project organization)) to create one right away.
4. Push your code
Run the two commands shown on screen exactly as they are.
git remote add → git push
There is no need for any complicated Git setup.
5. Build and deploy
Click 올리기 (Deploy) to build the code and deploy the result.
Once deployment is complete, you can access it right away at
<app-name>.<domain>
with an HTTPS certificate applied as well.
There is nothing to prepare separately
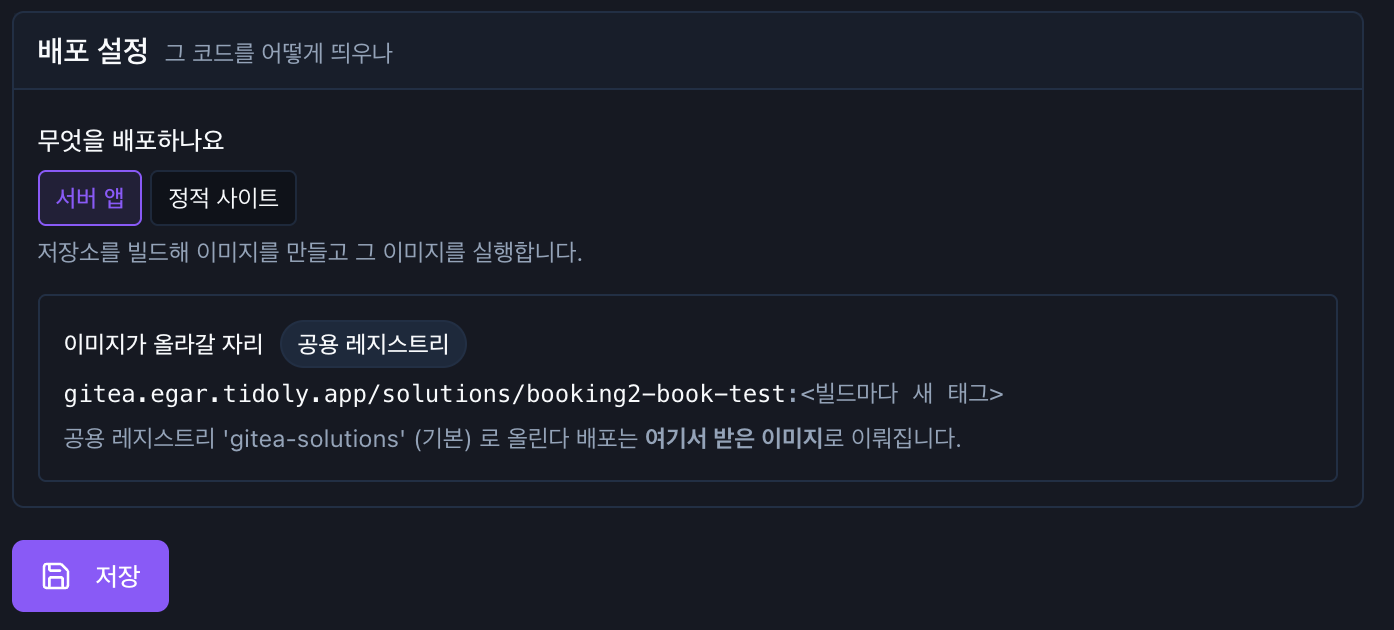
If you have a Dockerfile, it is used as is.
If you do not have a Dockerfile, tidoly checks the source language and project structure and builds it in a suitable way.
When a project is created, the repository organization and the credentials needed for builds are prepared as well.
So you do not have to enter a repository address or token by hand.
When you first create an app, you are asked only for settings that are hard to change later:
Name · environment · resources to connect
The remaining settings can be changed when needed after the app is created.
You can deploy without Git too
Even without a Git repository, you can deploy an app in other ways.
| Method | Use it when |
|---|---|
| 파일 업로드 (File upload) | You upload artifacts you have already built (JAR · Python · Node · static site) |
| 이미 있는 이미지 (Existing image) | You use a container image built elsewhere as is |
| 먼저 자리만 만들기 (Create a placeholder first) | You need connection info or a runtime environment ready before the code |
Required resources just need to be connected
If your app uses a database or storage, you only need to specify the environment variable names the app needs.
At deployment, tidoly finds and connects the required resources and injects the connection info and credentials into the app.
There is no need to copy addresses or passwords by hand.
Which resources can be connected and how → Chapter 8 · Connect resources
If a resource is already installed, it is reused.
The same resource is not installed again.
You can change connections later
Even after creating the app, you can change the connected resources.
App → 설정 (Settings) → 의존 자원 설정 (Dependency settings) → 자원 추가 (Add resource)
Here you can connect new resources or disconnect existing ones.
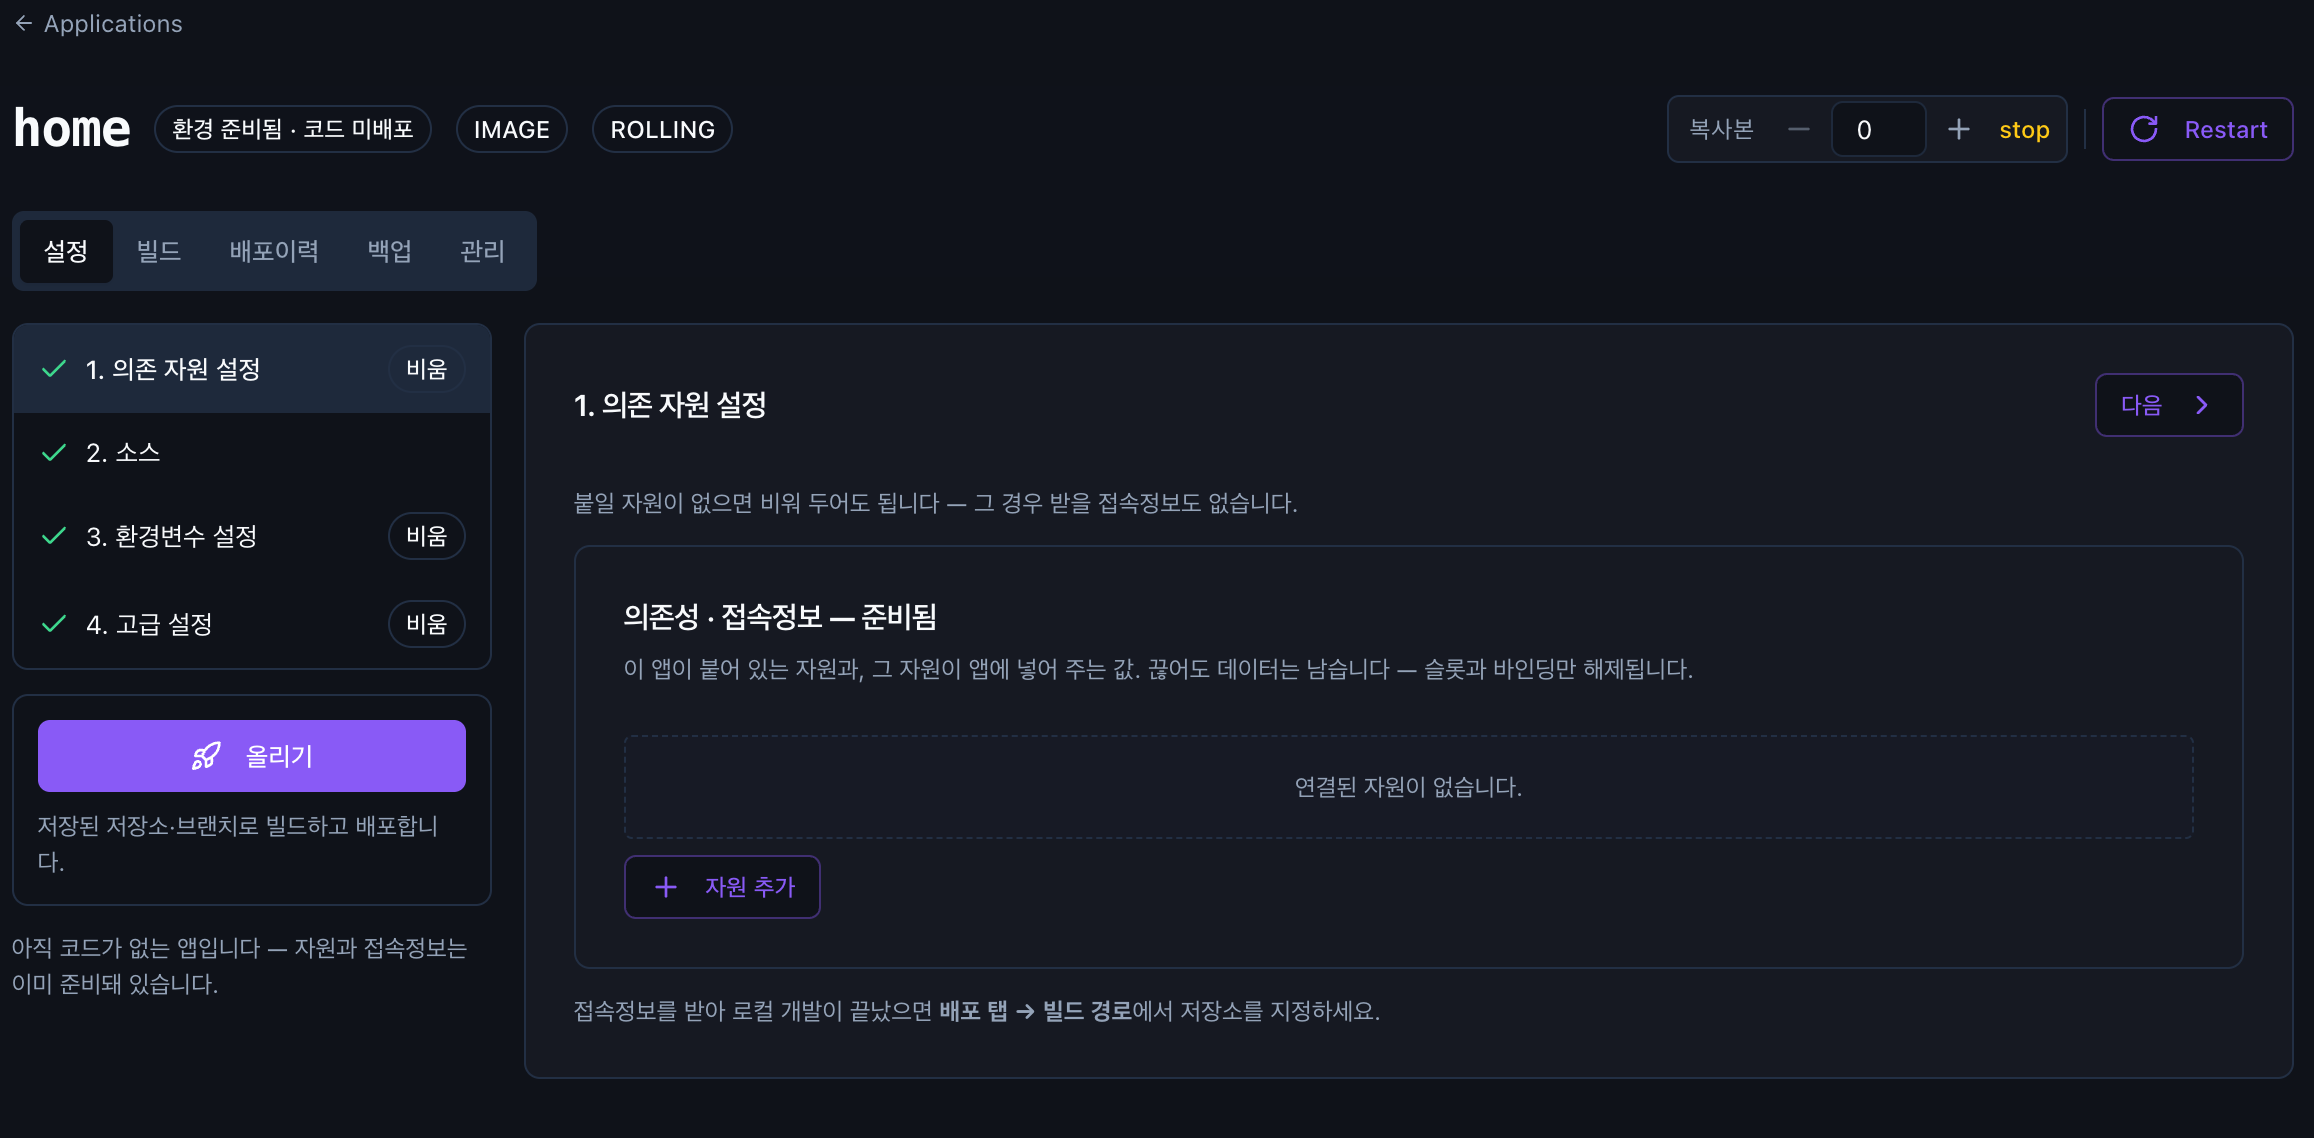
Disconnecting does not delete the data.
Only the connection between the app and the resource is removed. Leftover data can be cleaned up as needed in Chapter 3 · Data left behind after deletion.
You can also use this feature when you need connection info before the code.
By connecting only the resources, you can prepare connection info without running the app.
You can take this info and start developing on your local computer first.
Run it on your computer first
Before deploying, you can also run the same app on your own computer.
Download .env.local from the app screen; it contains exactly the environment variables currently injected into the app.
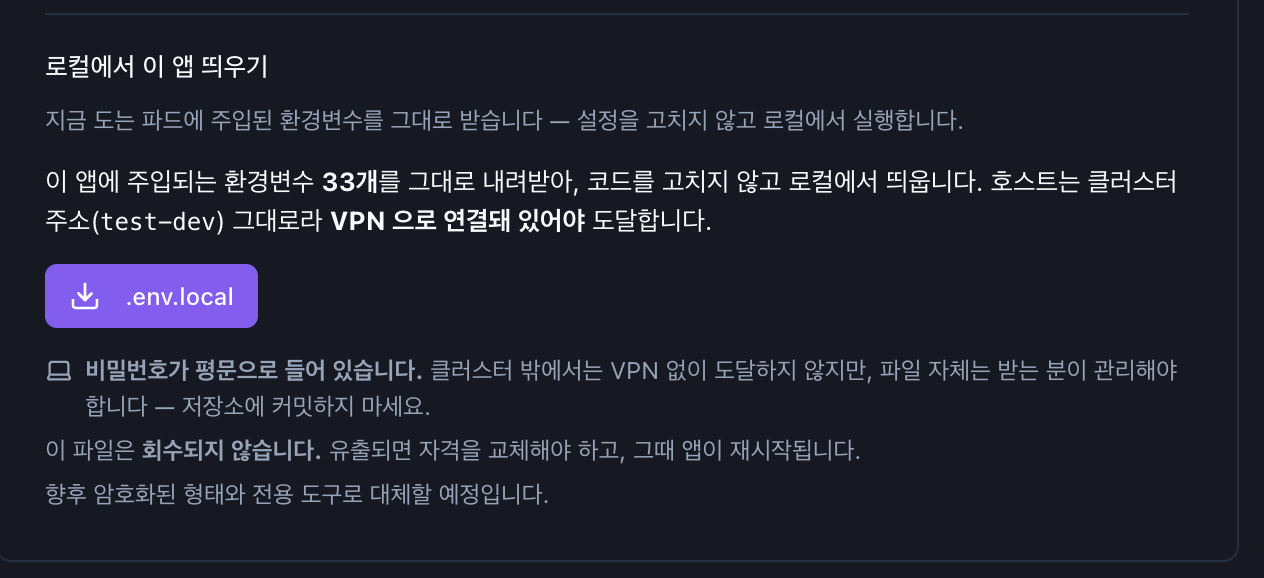
No code changes are needed
Locally, too, the cluster addresses are used as is.
So to reach the cluster from your local computer, a VPN connection is required.
.env.local may contain passwords
Do not commit the downloaded file to a Git repository.
This file may contain real connection info and passwords.
If the file is leaked, rotate the affected credentials; when credentials change, apps that use them may restart.
For security, .env.local cannot be downloaded in the prod environment.
If you need local development, use a development environment.
Rebuild and redeploy
An app you have deployed once can be rebuilt with the same settings, or built from a different branch or tag just this once.
| Feature | What it does |
|---|---|
| 다시 빌드 (Rebuild) | Uses the saved repository · branch · build path as is. |
| 이번만 다른 브랜치 (Different branch this time) | Keeps the saved settings and uses a different branch or tag only for this build. |
| 취소 · 로그 (Cancel · Logs) | Stops a running build or shows its progress. |
The 빌드 (Build) tab holds the currently saved settings and past build history.
Click 빌드 & 배포 (Build & Deploy) to rebuild and redeploy with the saved settings.
Builds can also run automatically when you push code
If you set up a webhook on the repository, it can build and deploy automatically every time code is pushed.
Register the webhook URL and secret shown on the build screen in the repository's webhook settings.
The build button also checks whether a build is currently possible before running.
If it cannot run, it tells you why first, instead of starting a build that then fails.
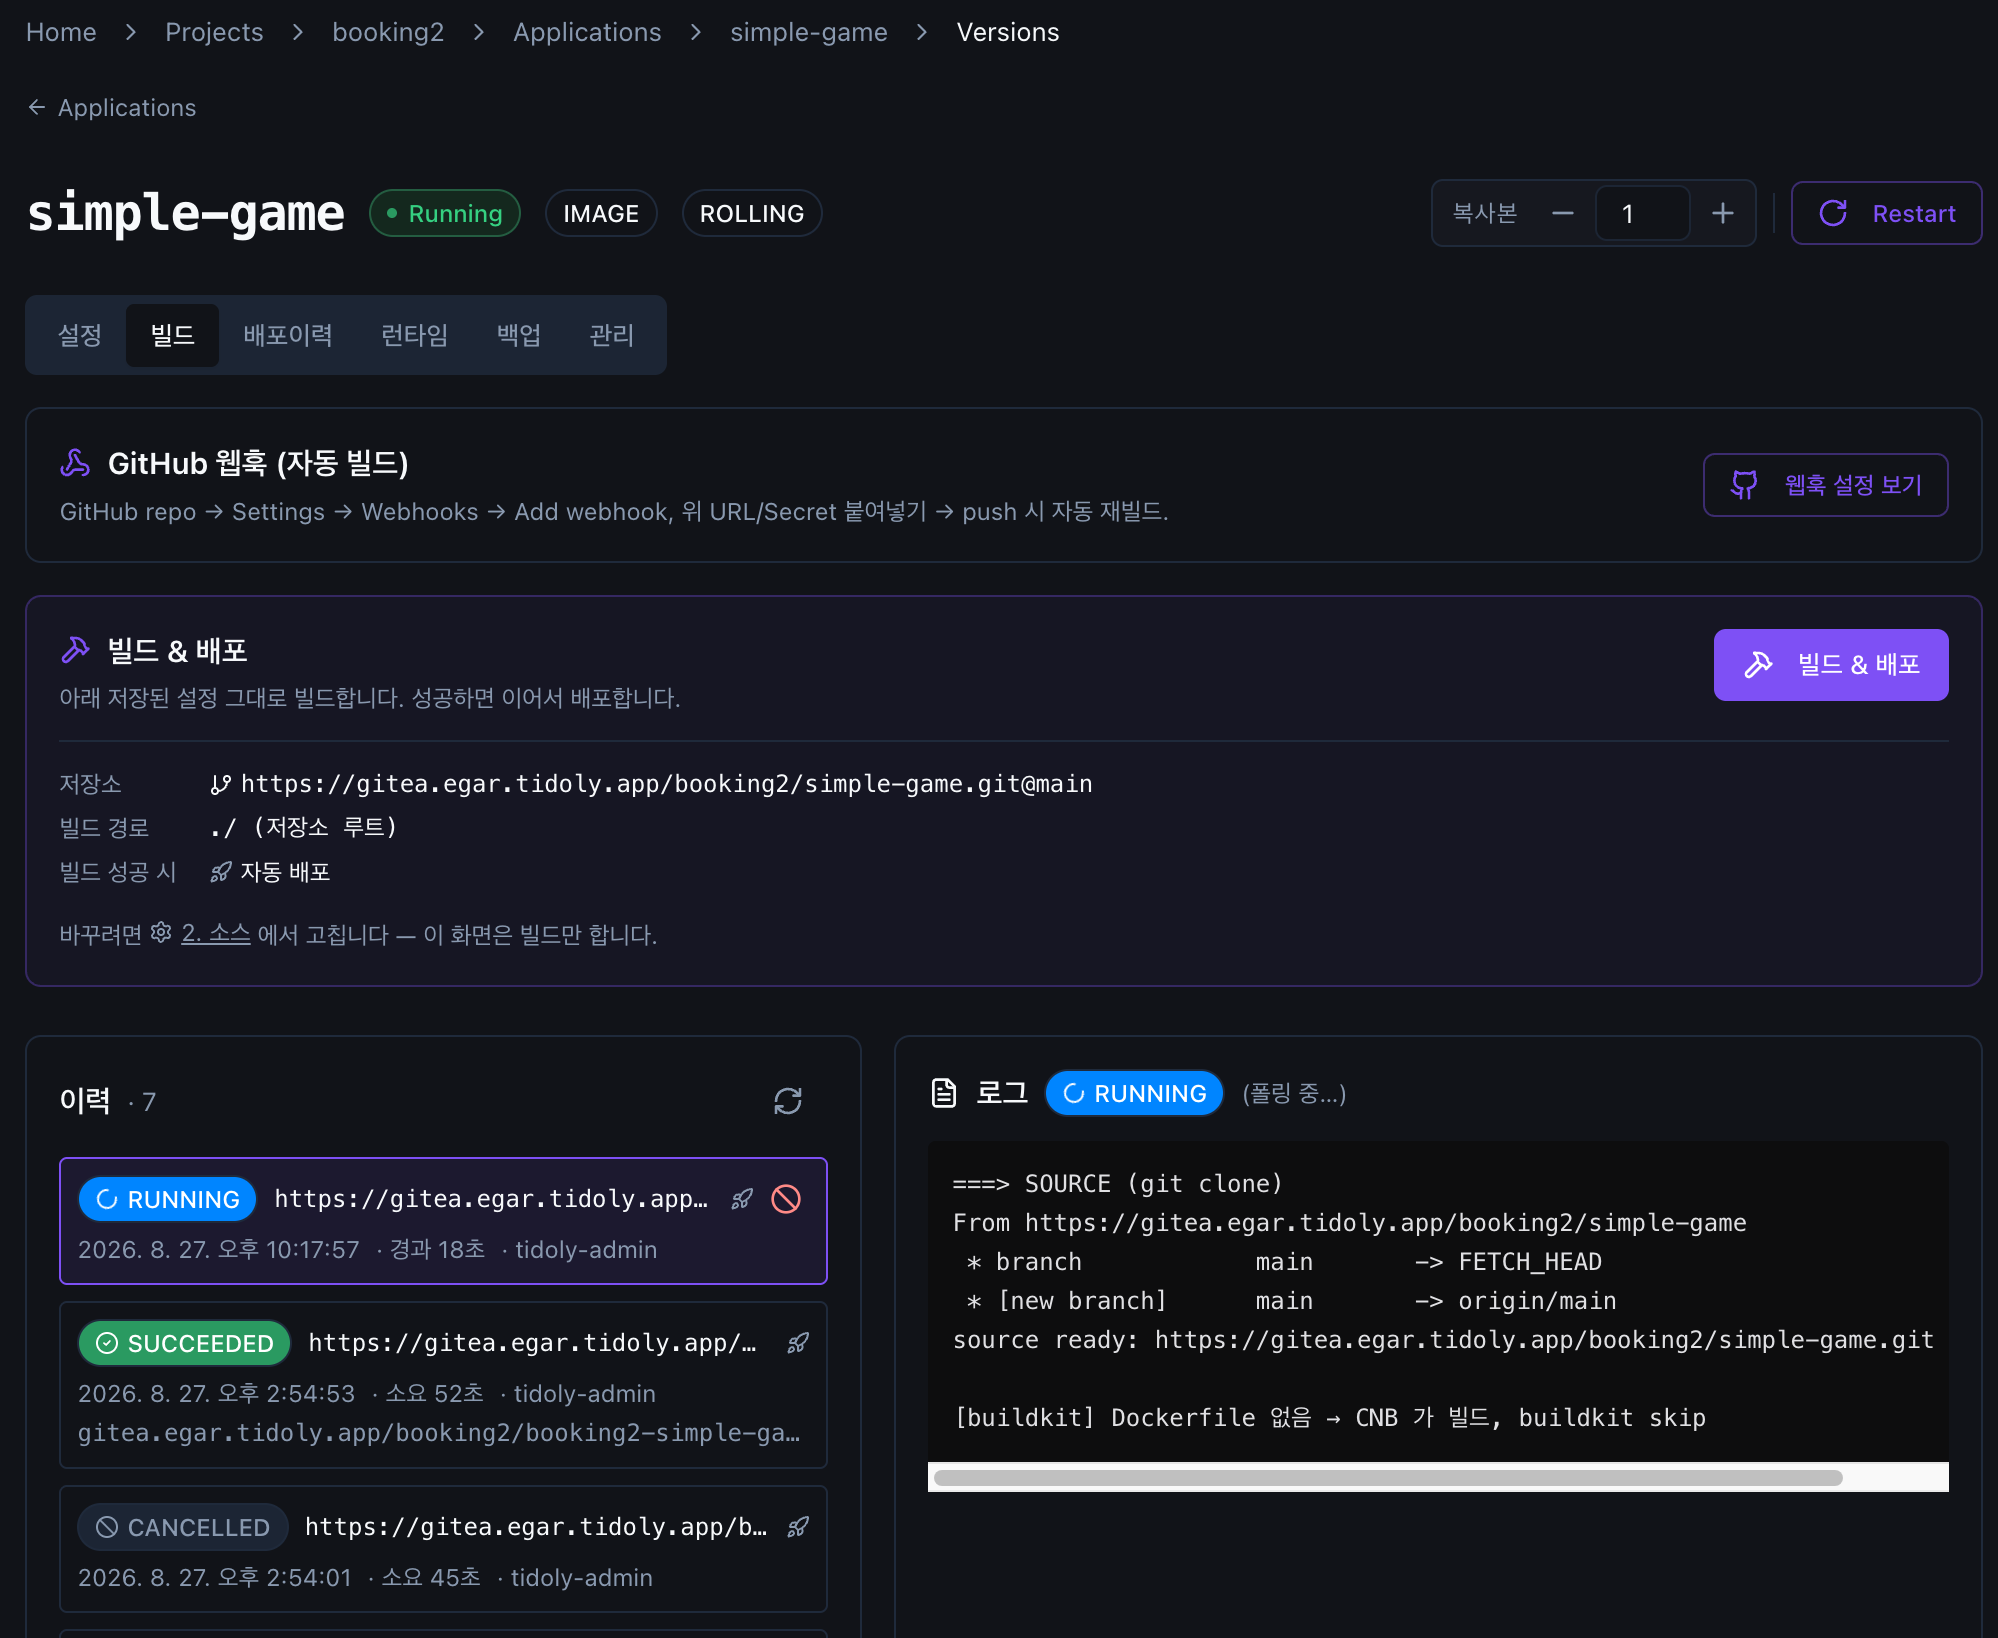
You can also see how it was built
The actual build method is shown at the top of the log.
For example,
Dockerfile 없음 → CNB가 빌드 (No Dockerfile → built by CNB)
shows which build method was chosen.
If there is a Dockerfile, a Dockerfile-based build is used.
The build history records the status, such as SUCCEEDED · RUNNING · CANCELLED, along with the start time, duration, and who ran it.
Manage the deployed app
Even after deployment, you can manage everything needed for operation from a single app screen.
| Feature | What it does |
|---|---|
| 로그 · 지표 (Logs · Metrics) | See what is happening in the app right now. |
| 개수 조절 · 재시작 (Scale · Restart) | Adjust the number of running instances to match traffic, or restart the app. |
| 환경변수 · 설정 파일 (Environment variables · Config files) | Change runtime environment values and view the change history. |
| 버전 이력 (Version history) | View previous deployed versions and roll back. |
| 환경 승격 (Environment promotion) | Promote a version verified in dev to prod. |
| 배포 토큰 (Deploy token) | Used when an external tool requests a deployment. |
Change only environment variable values
When you change only the value of an existing environment variable, there is no need to rebuild or redeploy.
Change the value in 관리 → 환경변수 (Manage → Environment variables).
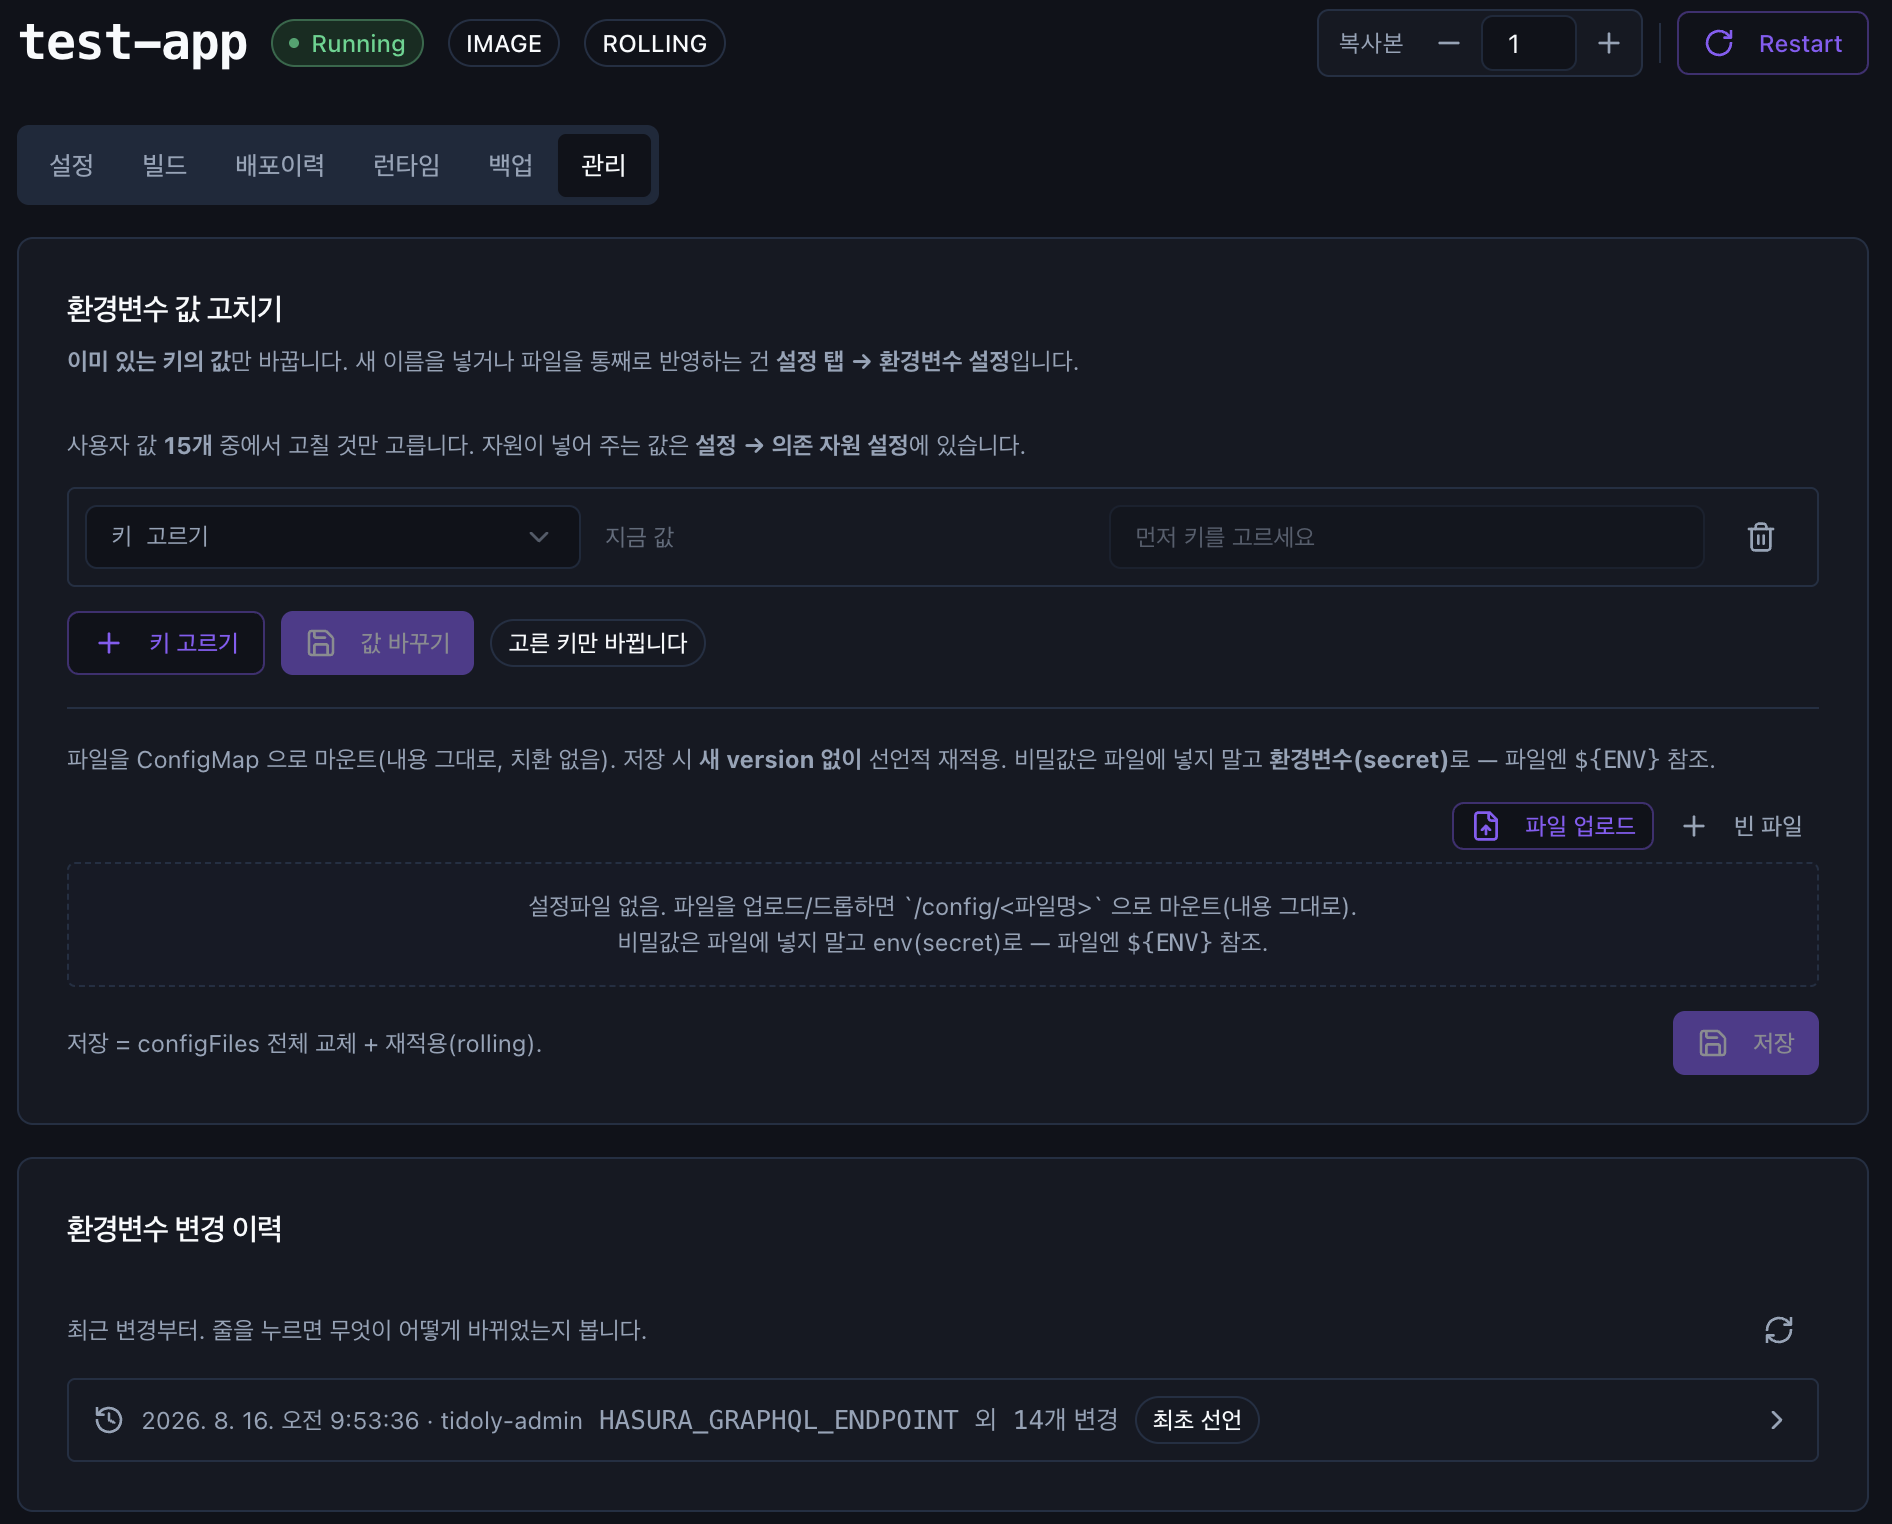
Because change history is kept, you can click each change to see what changed and how.
Where you manage environment variables depends on their type
To add a new environment variable name or apply an entire environment variable file, use
설정 → 환경변수 설정 (Settings → Environment variable settings)
Values injected automatically by connected resources are not edited here directly.
When a connected resource changes, the required values follow automatically.
→ Chapter 8 · Connect resources
Keep secrets such as passwords and API keys out of code and config files, and manage them as environment variables.
Roll back to a previous version
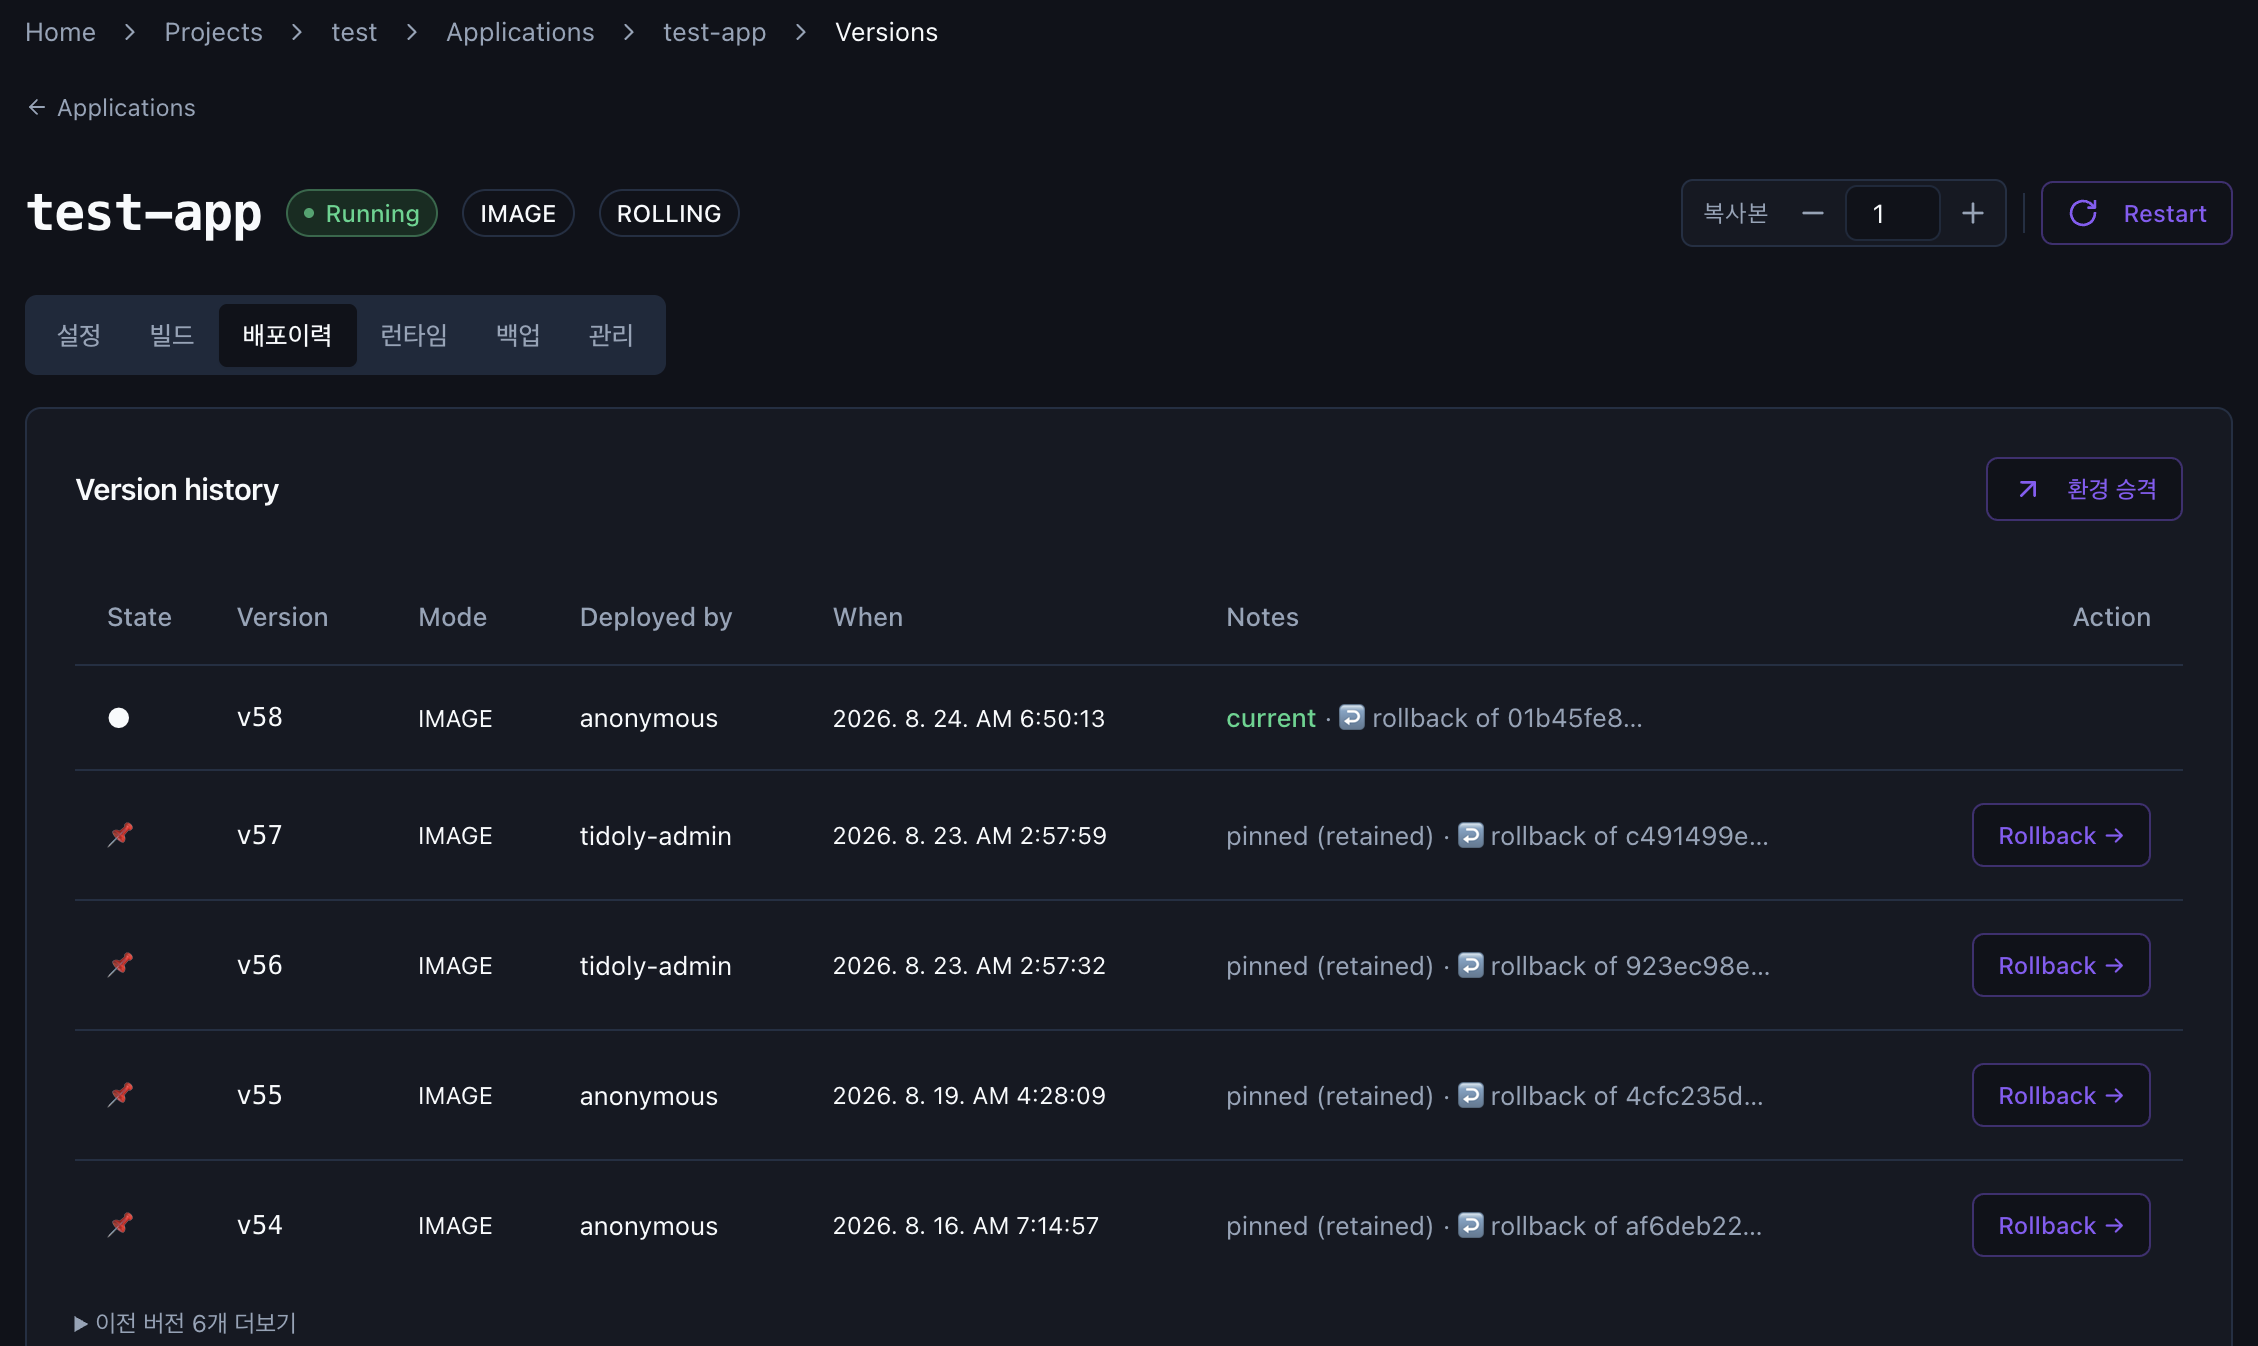
In the deployment history, select the version you want and roll back with Rollback →.
A rolled-back deployment keeps a rollback of … record, so you can later see which version it was rolled back from.
Versions marked pinned (retained) are excluded from automatic cleanup.
Troubleshooting
Private repositories require a credential
tidoly does not save a private repository it cannot access without a credential.
It tells you which credential the repository needs, so register that credential first and then connect again.
Deleting an app does not delete its data right away
Even after you delete an app, the storage data that was connected to it may remain.
This behavior prevents you from losing data by mistake.
When the remaining data is no longer needed, you can clean it up yourself in Storage.
Next → 7. Connect external systems