

7. Connect external systems
If you register the cloud DBs · S3 · AWS resources you already use with tidoly, you can connect them to apps the same way as resources installed in tidoly.
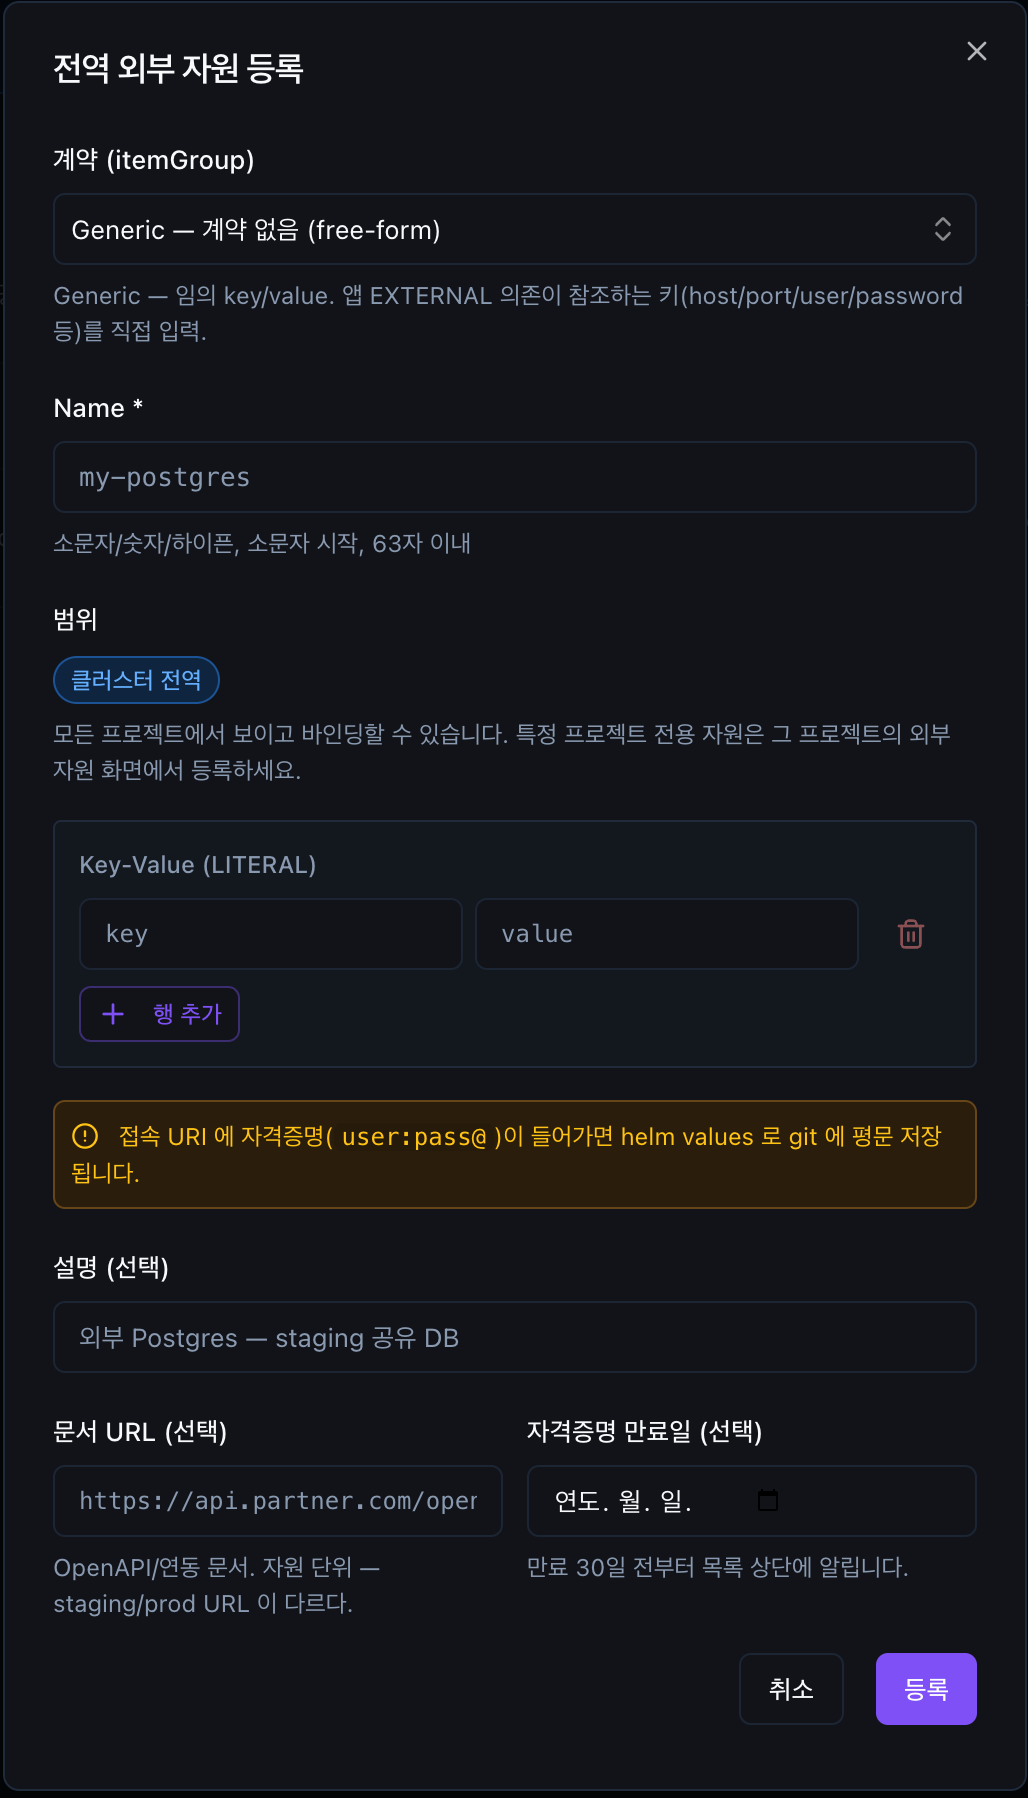
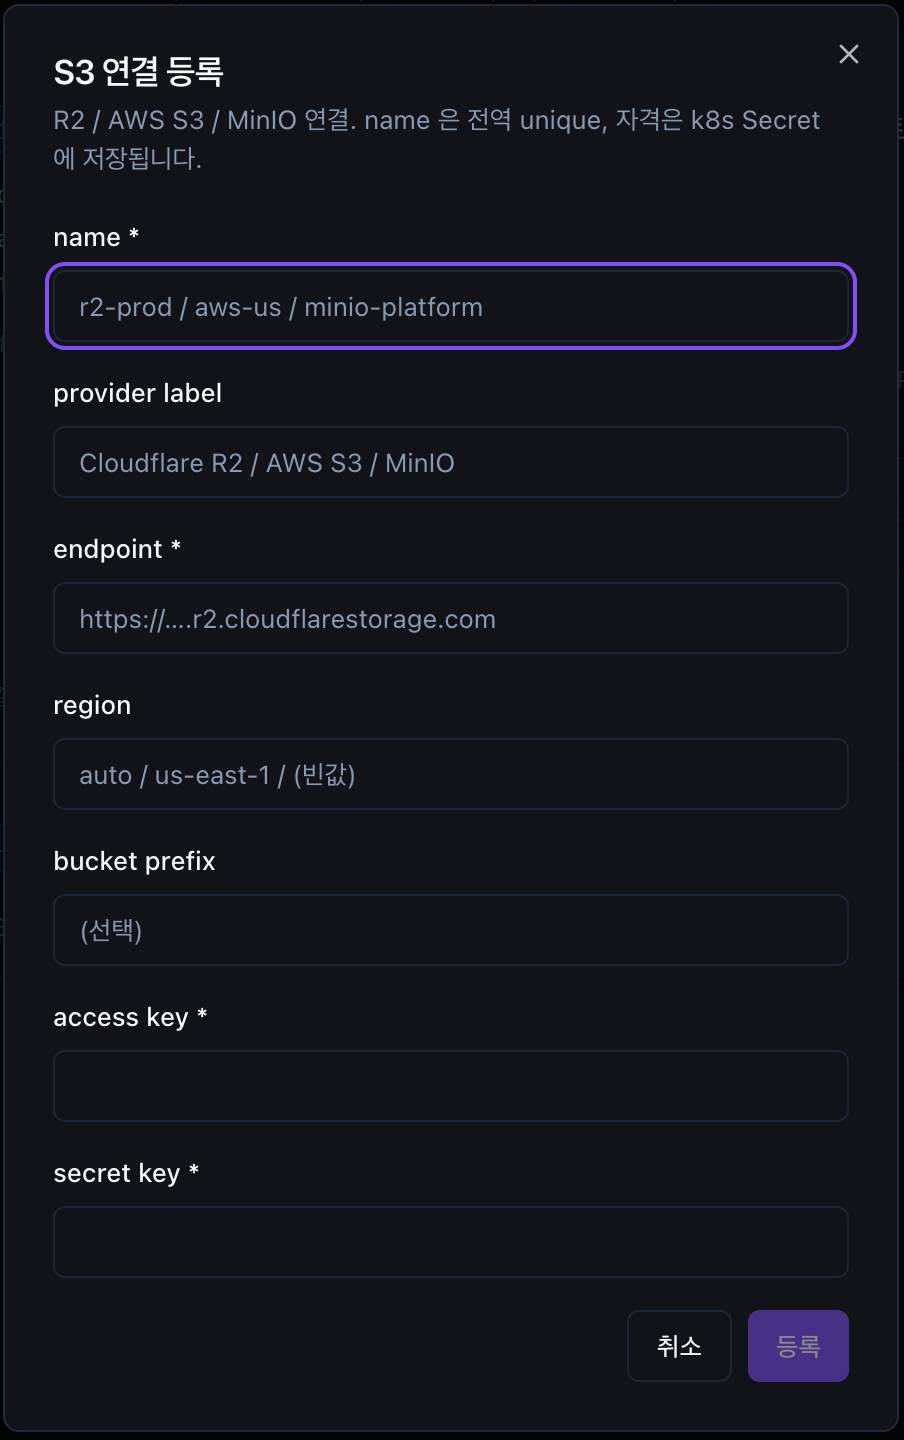
Registering an external resource
Project → External Resources → 등록 (Register)
Registration is simple.
Select the type.
The input fields for the selected type appear automatically.Enter the connection details.
Required fields and sensitive fields are shown separately.Run the connection test.
This checks whether the address you entered can be reached.
Sensitive information is handled securely
Instead of entering a value directly, you can also point to a Secret that already exists in the cluster.
Sensitive values are not shown on screen again after they are saved.
If you register a key expiry date, a warning is shown starting 30 days before it expires. If needed, you can also register a link to a document that explains how to issue or renew the key.
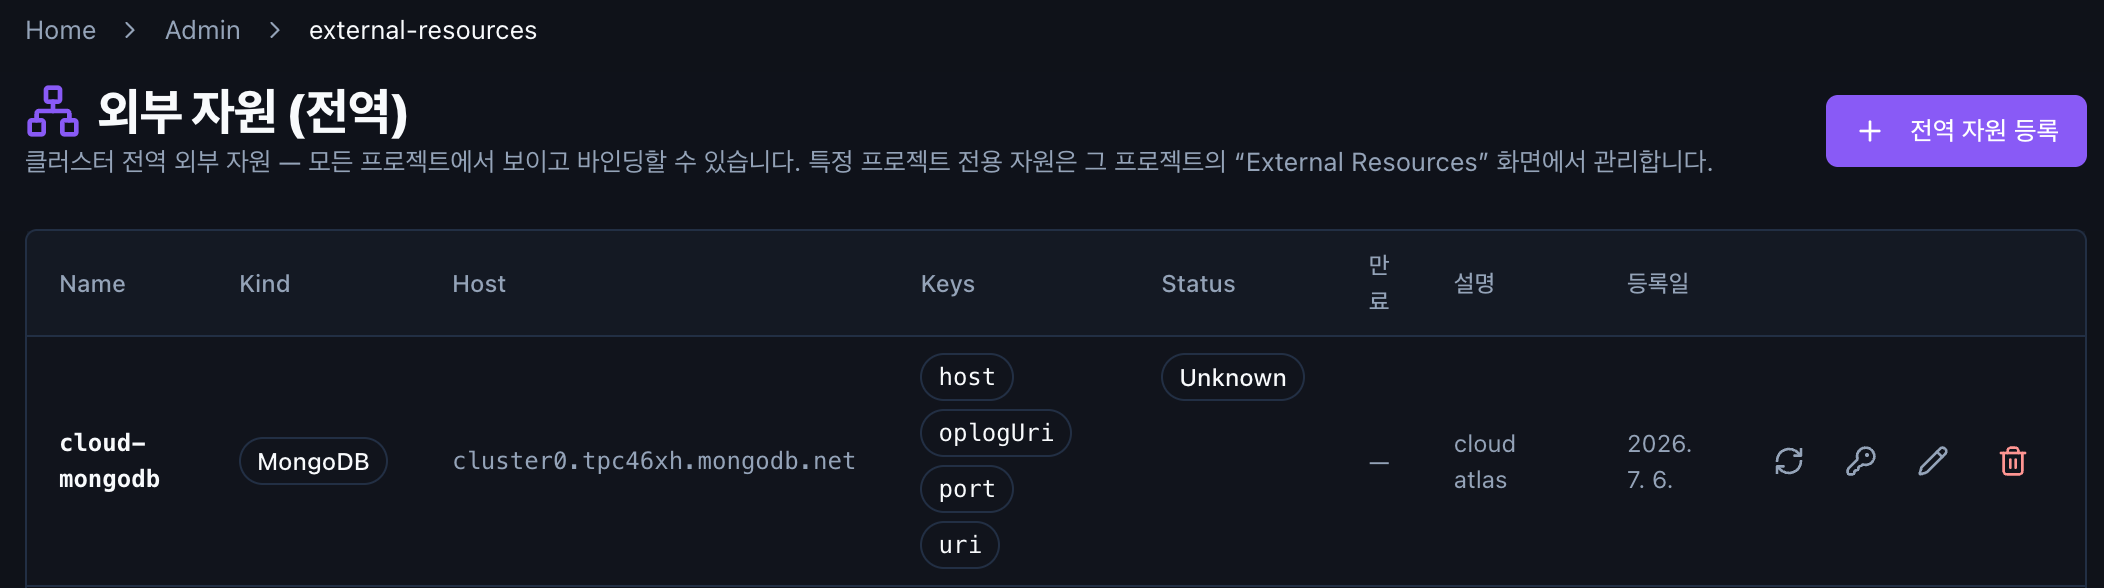
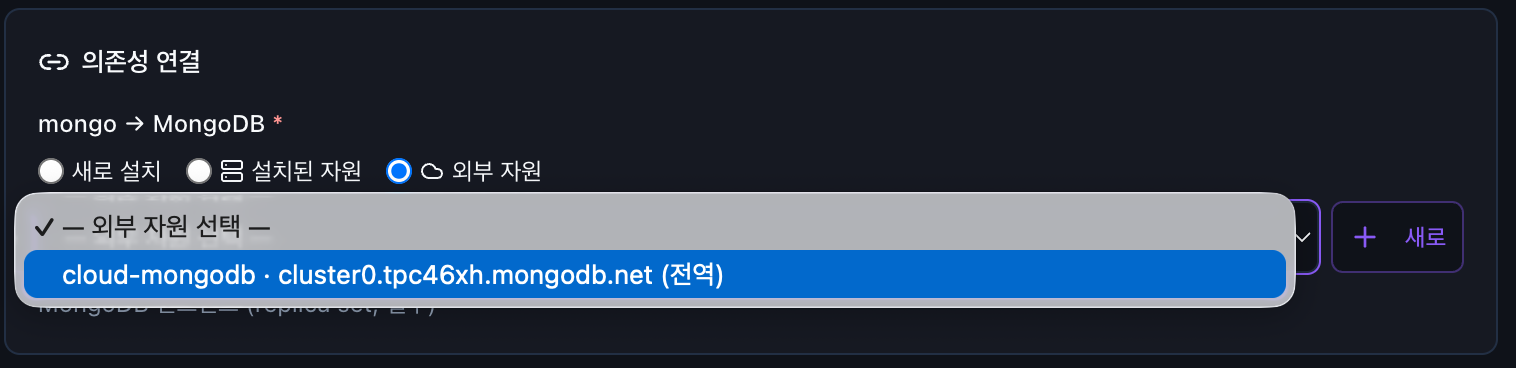
External resources registered globally also appear in this list. Global resources are marked 전역 (Global).
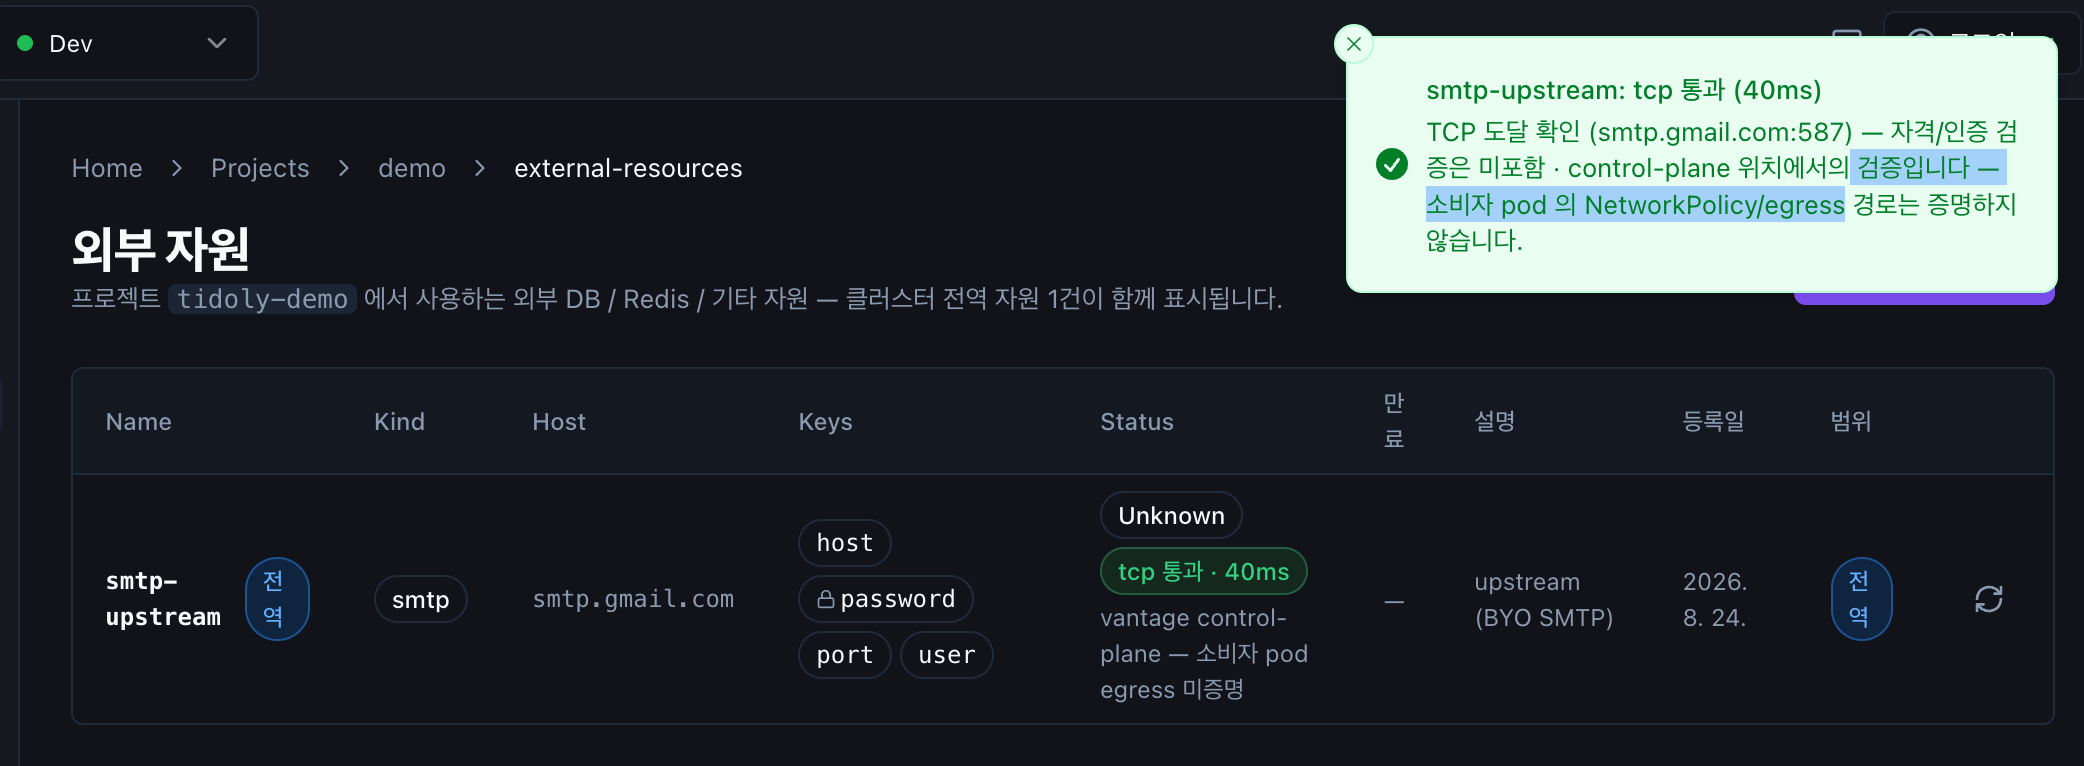
The connection test only checks whether a connection is possible
What the connection test checks is whether a TCP connection from the PaaS to that address is possible.
It does not check whether the username or password is correct.
Also, the test request runs from the PaaS, so it does not verify the network path from the Pod where the actual app runs.
The screen also says "소비자 pod egress 미증명" (consumer pod egress not proven).
Where do I register it?
Where you register an external resource depends on who uses it.
| Target | Where to register |
|---|---|
| A cloud DB used only in this project (RDS · DocumentDB · ElastiCache, etc.) | Project → External Resources |
| An external resource used by all projects | Admin → External Resources |
| S3 · Cloudflare R2 | Admin → Integrations → Object Storage |
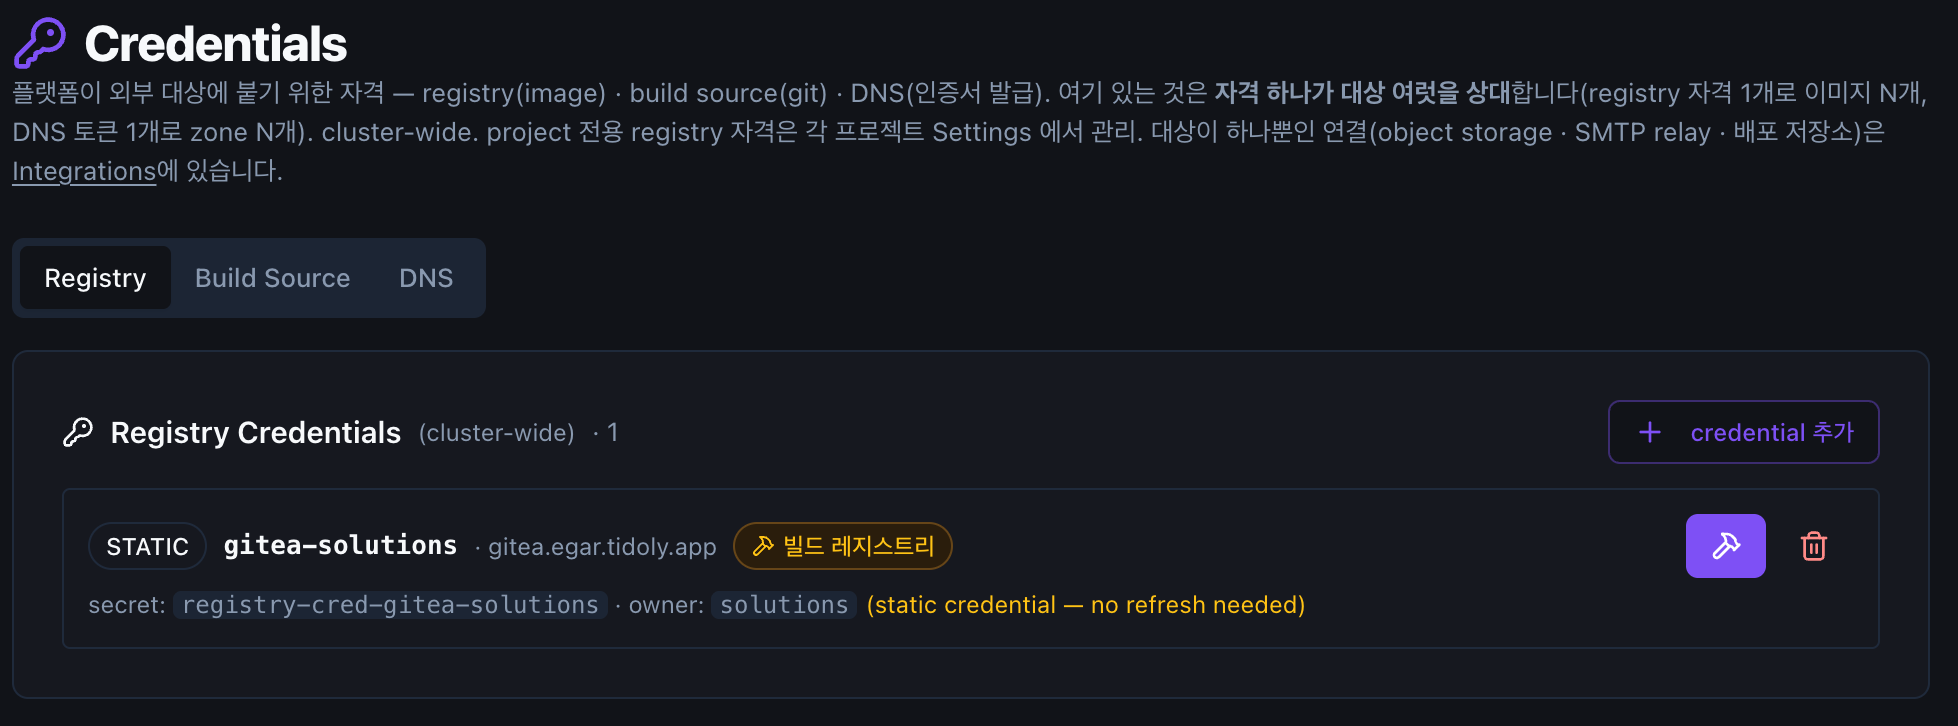
| Accounts · API keys reused in several places | Admin → Credentials |
Global resources registered in Admin are shared across the whole site.
Object storage in particular, once registered, can be selected wherever storage is needed, such as backups or file storage.
Do not put passwords in the connection address
If you put the username and password in the URI, as in user:pass@host, the credentials may be stored in plain text in configuration files.
Do not put passwords in the URI — register them separately as a Secret or credential.
Using the same credential in several places — Credentials
Credentials is the right choice when one credential needs to be used for several targets.
For example, when one registry credential gives access to several images, you do not have to register the same credential again for each target.
How do I use a registered external resource?
Once an external resource is registered, it appears as a connection candidate when you install a service or app.
Connecting a resource installed in tidoly and connecting an external resource work the same way.
→ Chapter 8 · Connect resources
The connection test passed, but the app cannot connect?
This can happen because the two tests run from different places.
The connection test runs from the PaaS, but the actual app runs in a Pod. Because projects may restrict outbound traffic by default, you also need to check the path from the app out to the external resource.
Sending mail
Notifications, user invitations, and mail sent by apps all go through a single mail relay server.
You do not configure a separate mail server for each service.
The mail server is not configured during installation
So that mail server settings never block a service installation, the mail relay is configured once, at the platform level.
Once it is set up, every service that sends mail uses the same relay.
A webmail screen is also provided, so you can check sent mail right in the browser.
This lets you confirm "whether the notification or invitation mail was created" without checking a real mailbox.
First, install the mail relay
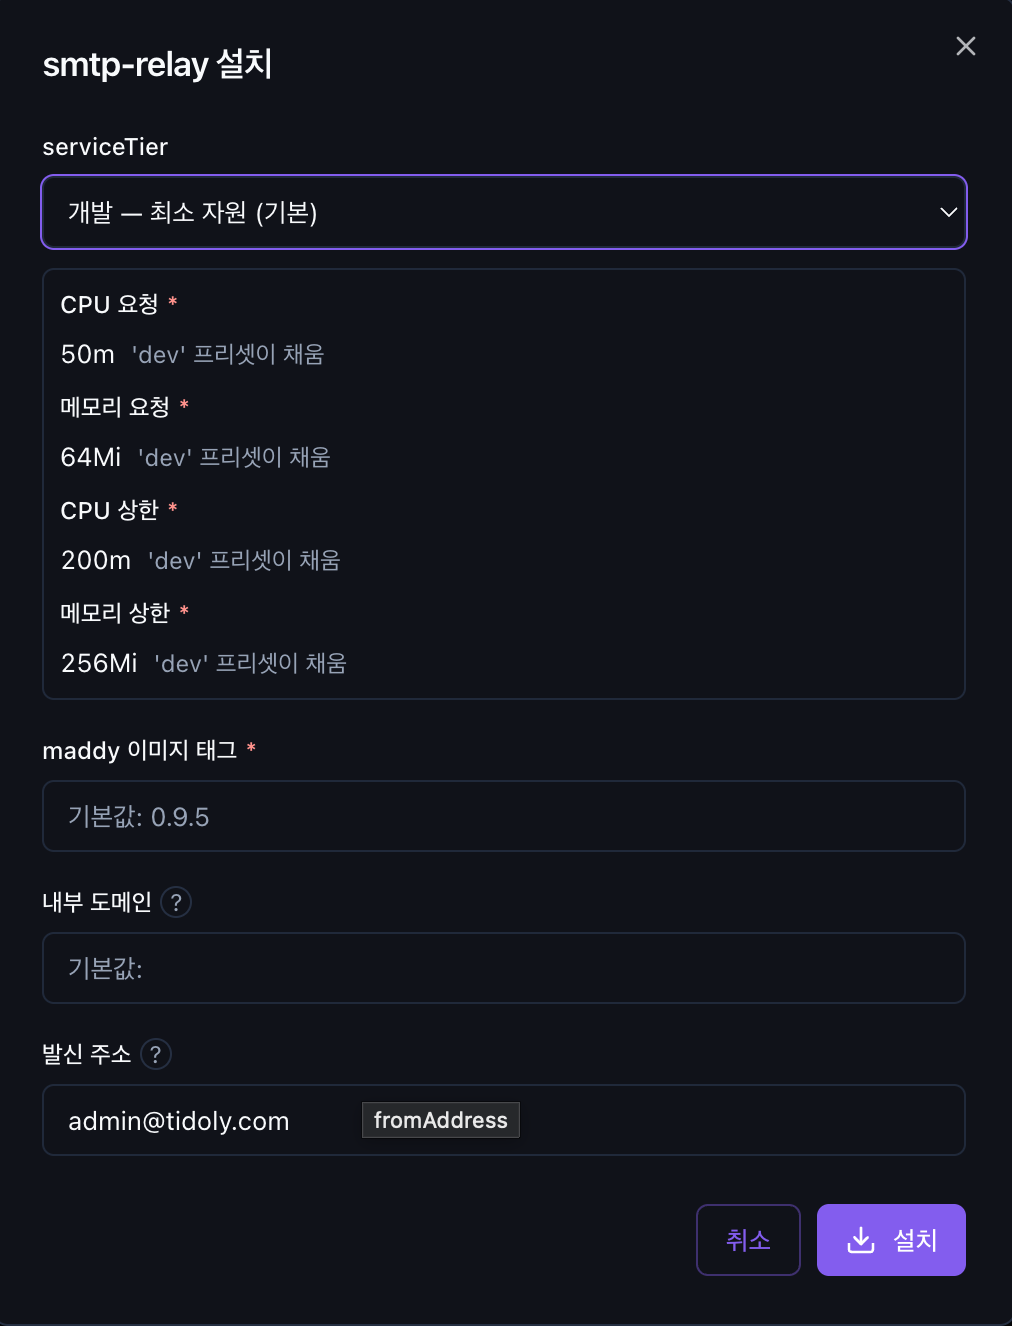
Admin → Operator Install → tidoly Platform
Install the smtp item there.

What you decide at installation is the size and the sender address.
Two modes
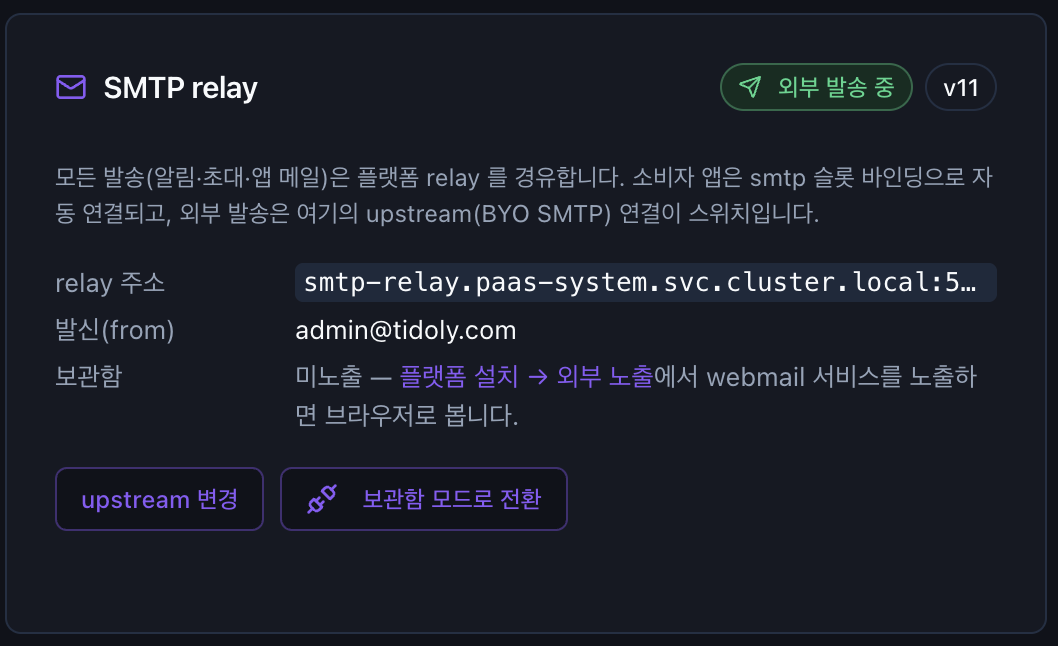
| Mode | Behavior |
|---|---|
| 보관함 모드 (mailbox mode) | Does not send mail outside; keeps it only in the webmail screen. |
| 외부 발송 (external delivery) | Delivers to real recipients through the mail server you already use. Sent mail can also be viewed in webmail. |
In mailbox mode, invited people cannot receive mail
In mailbox mode, invitation mail is not sent outside.
Because the relay server accepts the mail normally and stores it in the webmail mailbox, the sending process itself is treated as successful and no error occurs.
If you need to invite team members, set up external delivery first.
If you use it alone or only inside your company, you can leave it as is
Mailbox mode lets you confirm that notification and invitation mail is generated correctly even without an external mail server.
It is also useful for development or internal environments that do not need to send mail outside.
However, password reset links and invitation links may remain as-is in the mailbox.
If the webmail is exposed publicly, these links could be seen by others, so be careful.
Sending mail outside
In the mail card under Admin → Integrations, enter the details of the mail server to use.
| Field | Description |
|---|---|
| Server address · port | e.g. smtp.example.com · 587 |
| User · password | If the server does not require authentication, you can leave the user empty. |
| Sender address | The sender address shown to recipients. |
If you enter only a user and no password, authentication may fail.
For a server that is already registered, leaving the password empty keeps the existing password.
To turn external delivery off again
Clicking 보관함 모드로 전환 stops only external delivery, and mail continues to be stored in the webmail mailbox.
You can also keep specific domains from going through the external server
Addresses that do not need to be sent outside, such as your company mail domain, will not go through the external mail server if you add them to the exclusion list.