

3. Projects and status
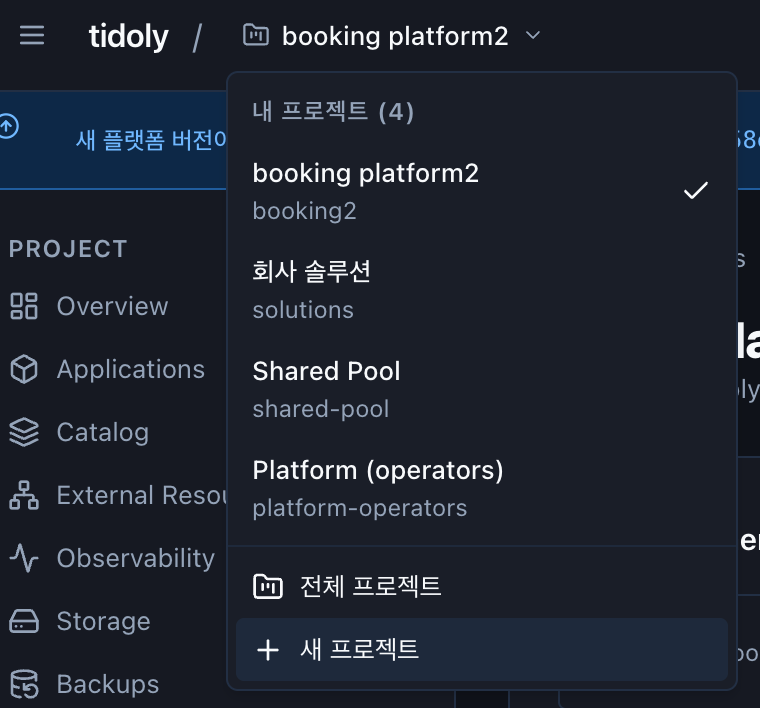
A project is a workspace for a team or a service. Your apps and assets live inside it.
Create
- Go to
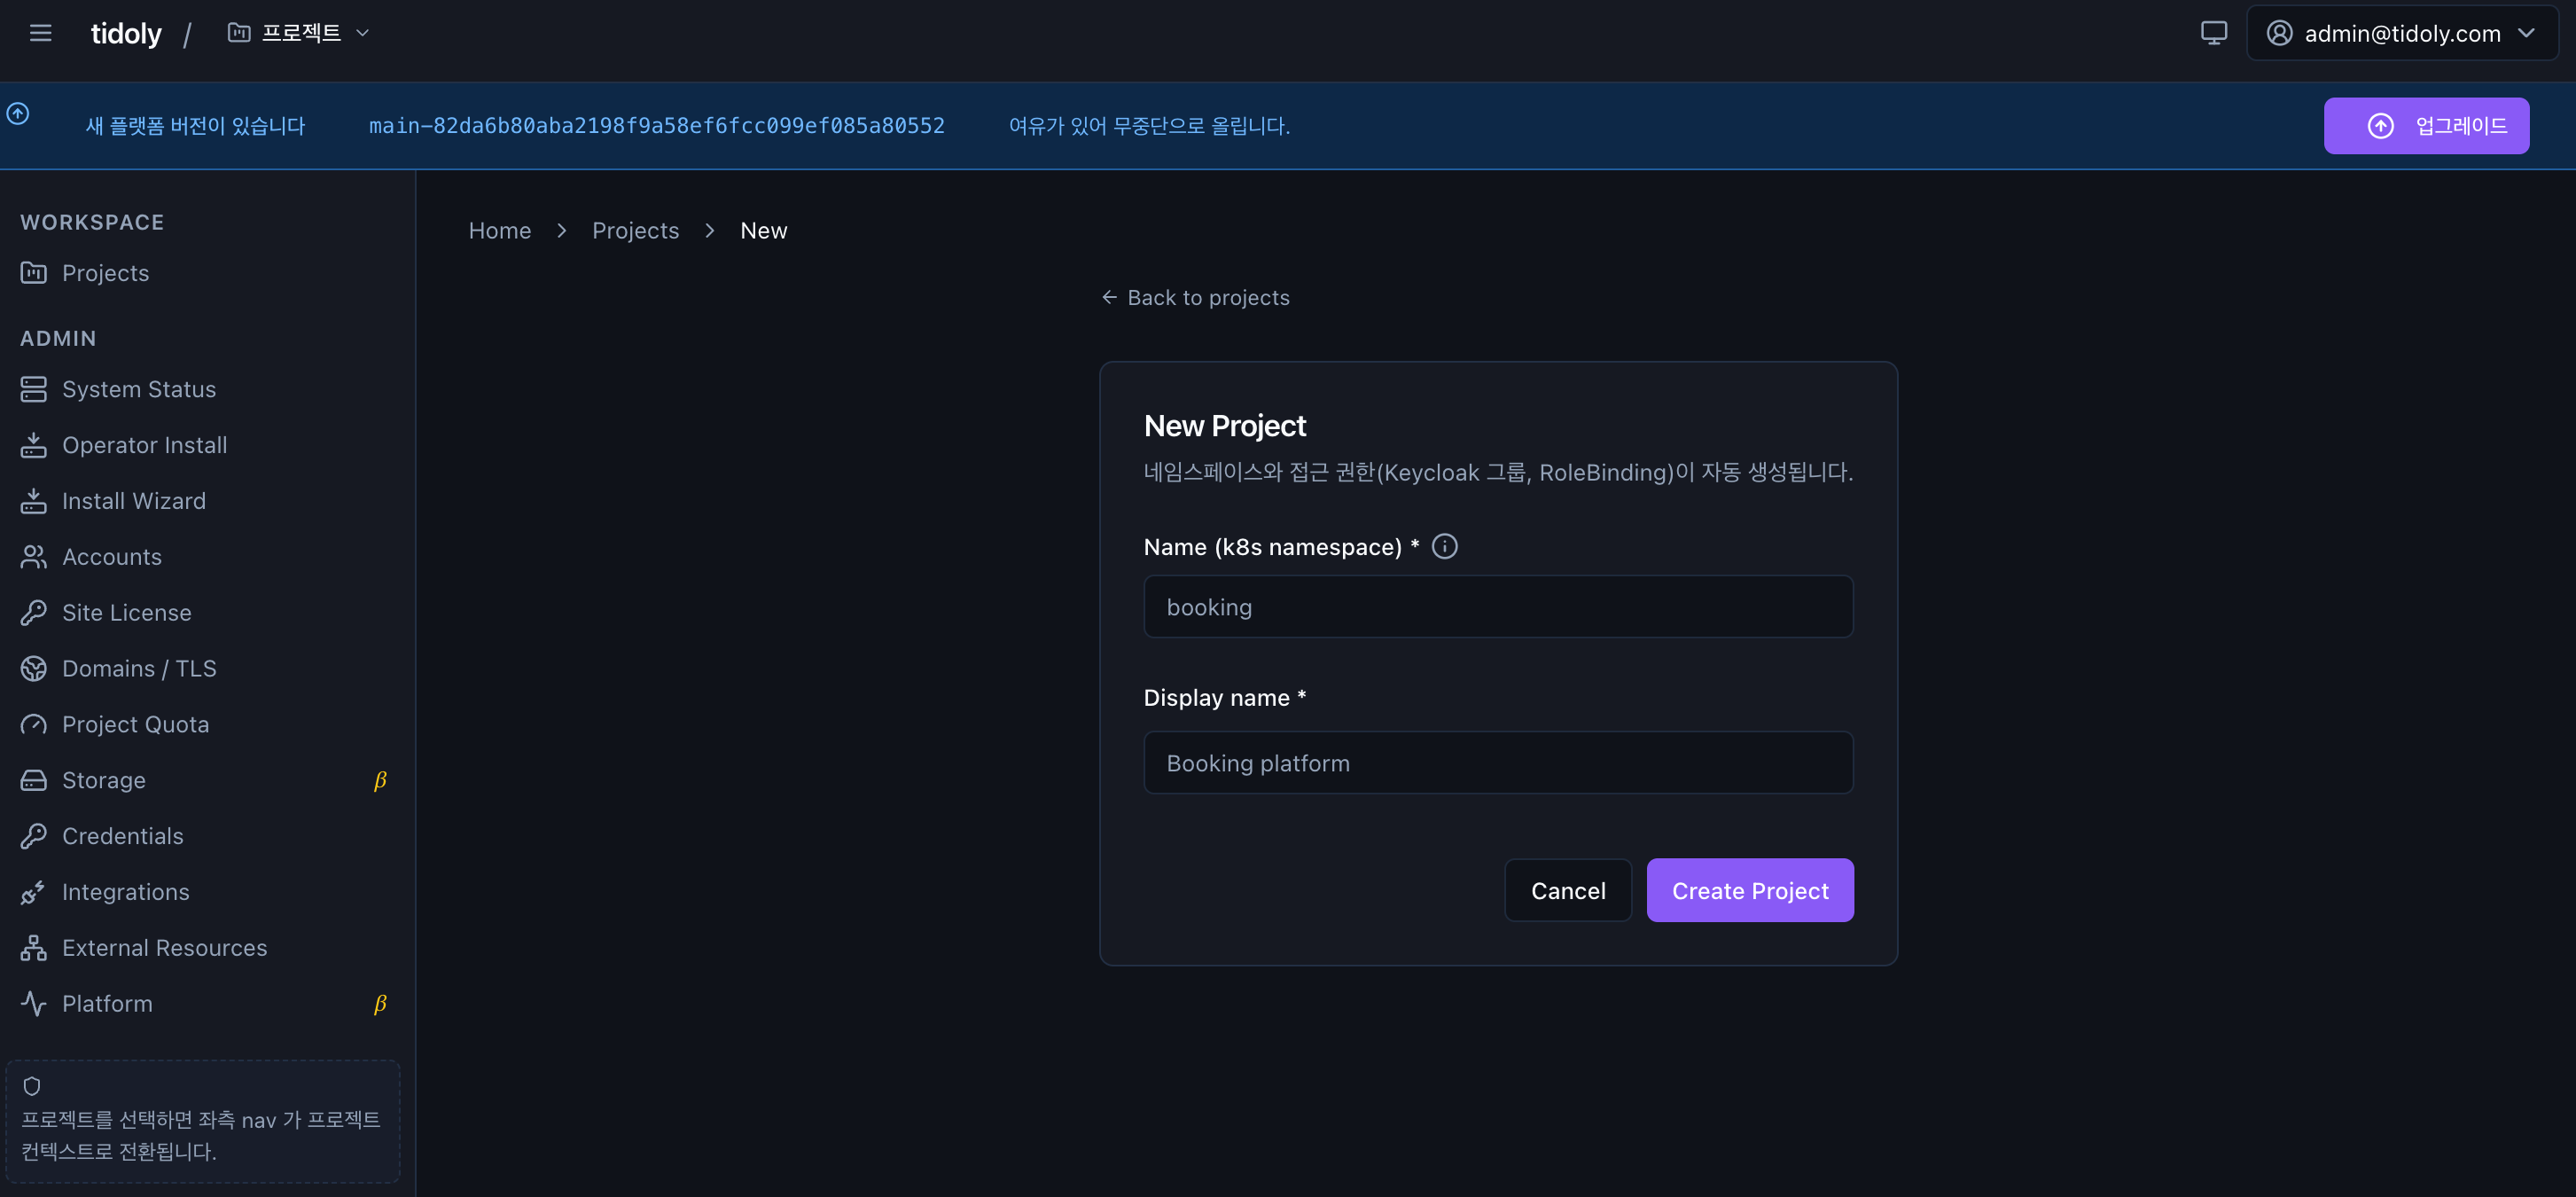
app.<domain>→ SSO login — sign in with the account shown on the installation complete screen. - Projects → New Project — choose a name and you are done.
Name is up to 31 lowercase letters, digits and hyphens (e.g. booking). Display name is the name shown on screen, and the owner is set automatically to the account you are logged in with.
Creating a project automatically sets up a dedicated space and access permissions. It starts with a single Prod environment — if you want a separate place for testing, → Advanced · Splitting environments
Screen layout
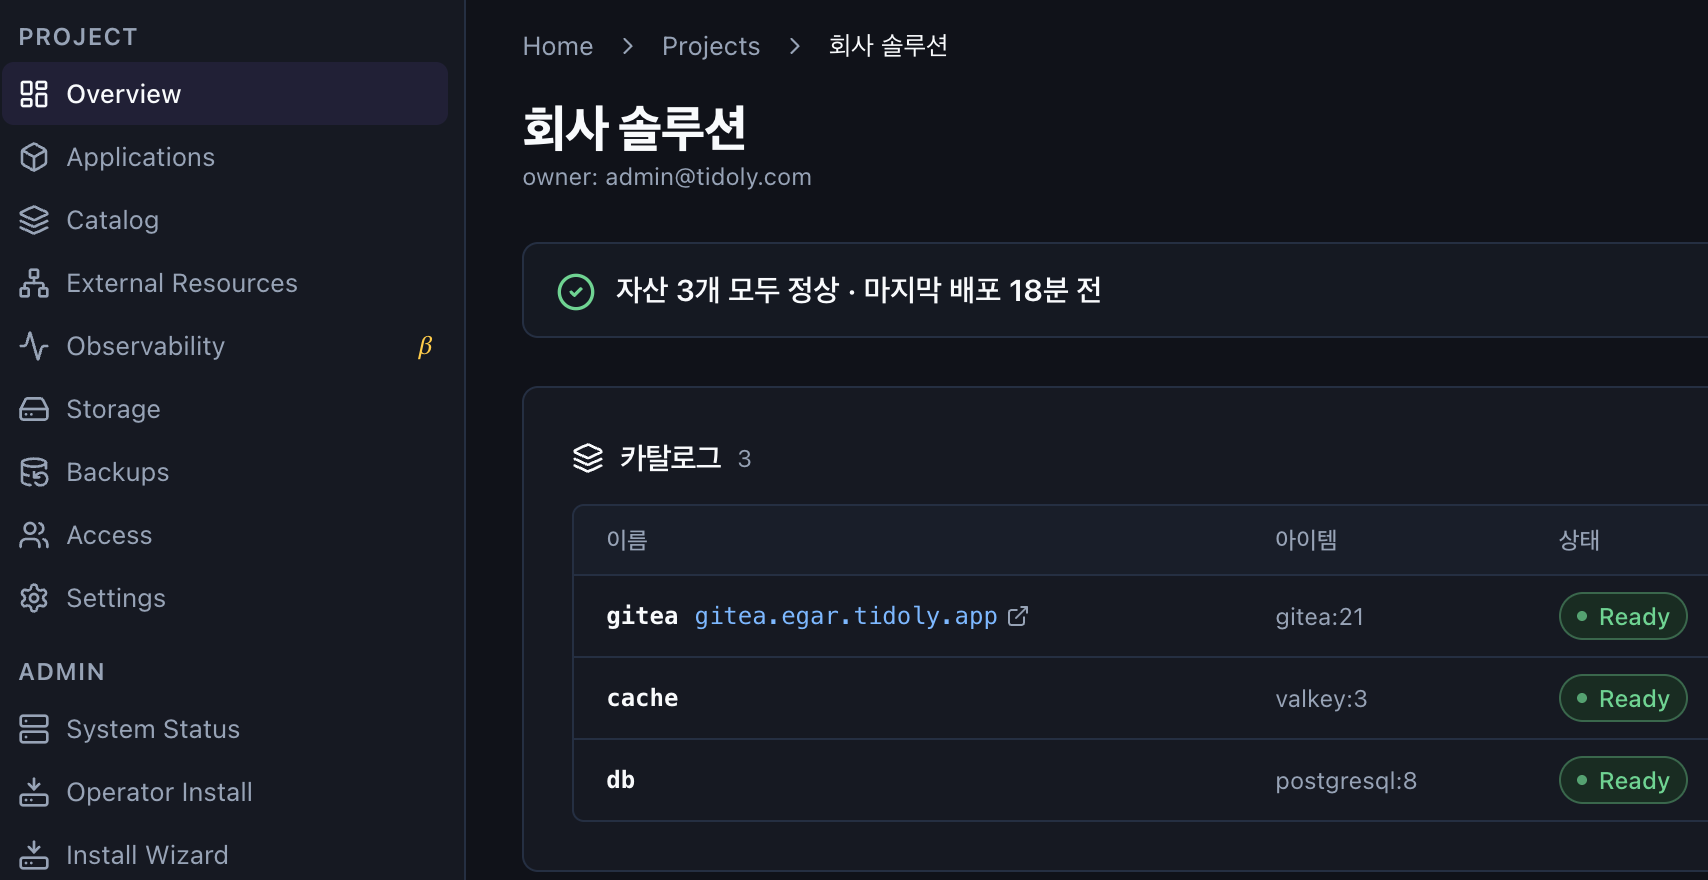
| Menu | What you see |
|---|---|
| Overview | "Are my assets OK right now?" on one screen — verdict · asset list · requested resources |
| Applications | Apps you built and deployed yourself → Chapter 6 |
| Catalog | Assets you can install → Chapter 5 |
| External Resources | Register AWS, a separately installed DB, or other integrations → Chapter 7 |
| Observability | Entry point for logs · metrics — below |
| Storage | Add / delete data volumes — below |
| Backups | Asset backup · restore — below |
| Access | Invite team members and assign roles — below |
| Settings | Project settings · environments · delete |
An asset is something you took from the Catalog and installed (database · monitoring · chat …); an app is something you built and deployed yourself. The screens show these two separately.
Invite team members
Project → Access → 멤버 초대 (Invite member). Just set the email and role.
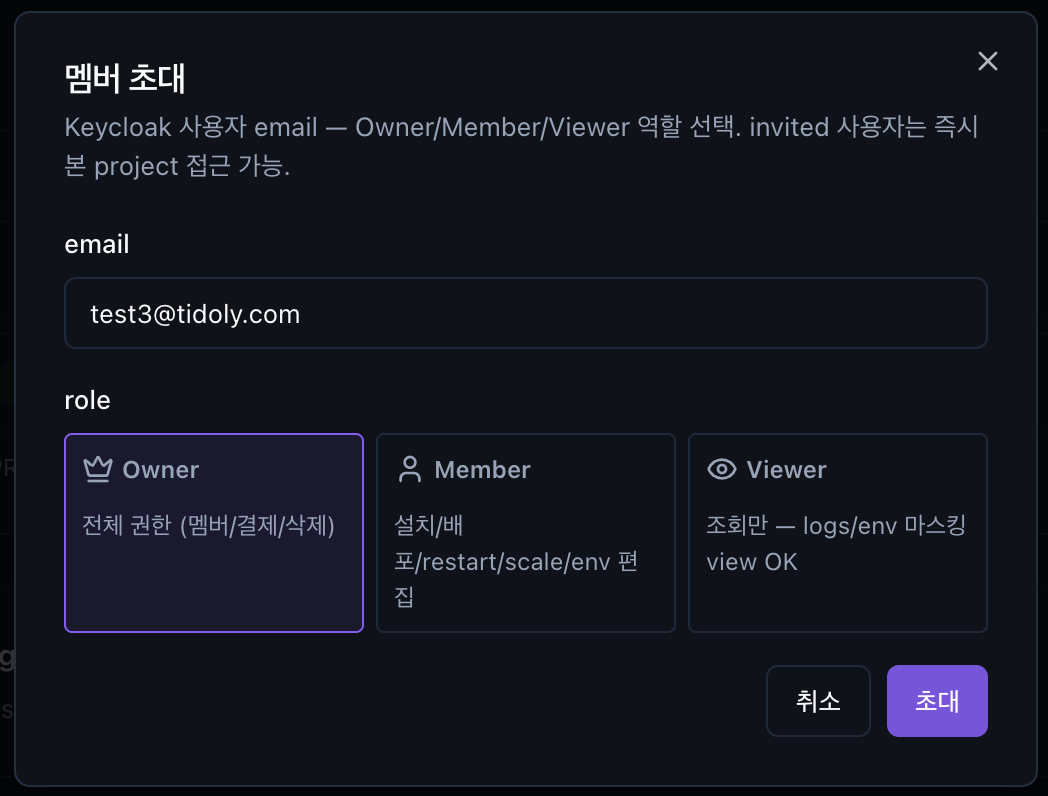
| Role | What they can do |
|---|---|
| Owner | Full permissions — members · billing · delete |
| Member | Install · deploy · restart · scale · edit environment variables |
| Viewer | Read only — logs and environment variables are shown masked |
Inviting someone creates their access permissions and login account together. There is nothing separate to request or approve.
The tools you install open with the same account. When team members join or leave, you only need to change one place.
Invitation emails may not be going out
If the mail relay is in mailbox mode, invitation emails do not reach the recipient, and that person cannot log in. No error appears anywhere. Check this before inviting team members. → Chapter 7 · Sending mail
The recipient gets an email asking them to activate their account. The link in it expires after 12 hours, so if they open it late, simply invite them again.
Connecting to project resources from your own computer also works right away for members — when someone is removed, that access goes away too. → Advanced · Connect from your laptop
View metrics
Observability is not included in the installation. Until you install it, Observability is empty.
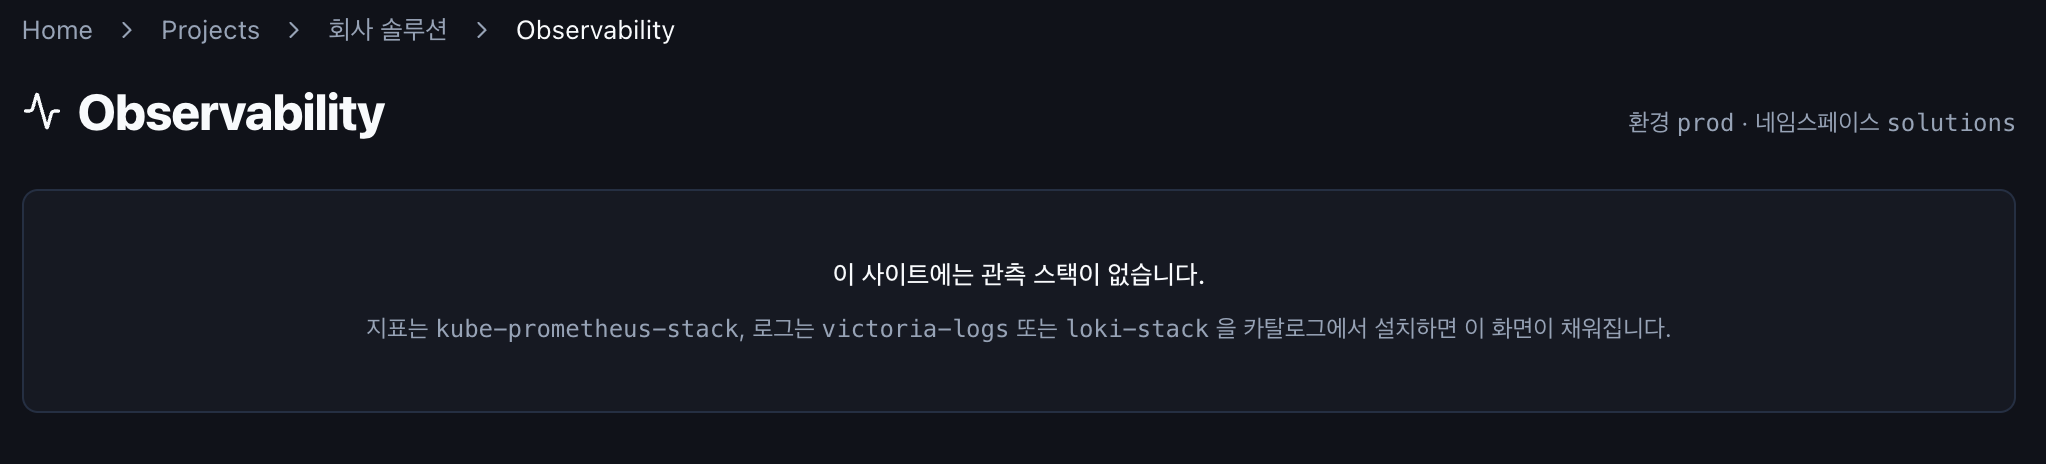
Pick something for each of the three slots — metrics · logs · dashboards — and it fills in. When you install Grafana, SSO authentication is connected automatically. → Chapter 5 · Things you install only once
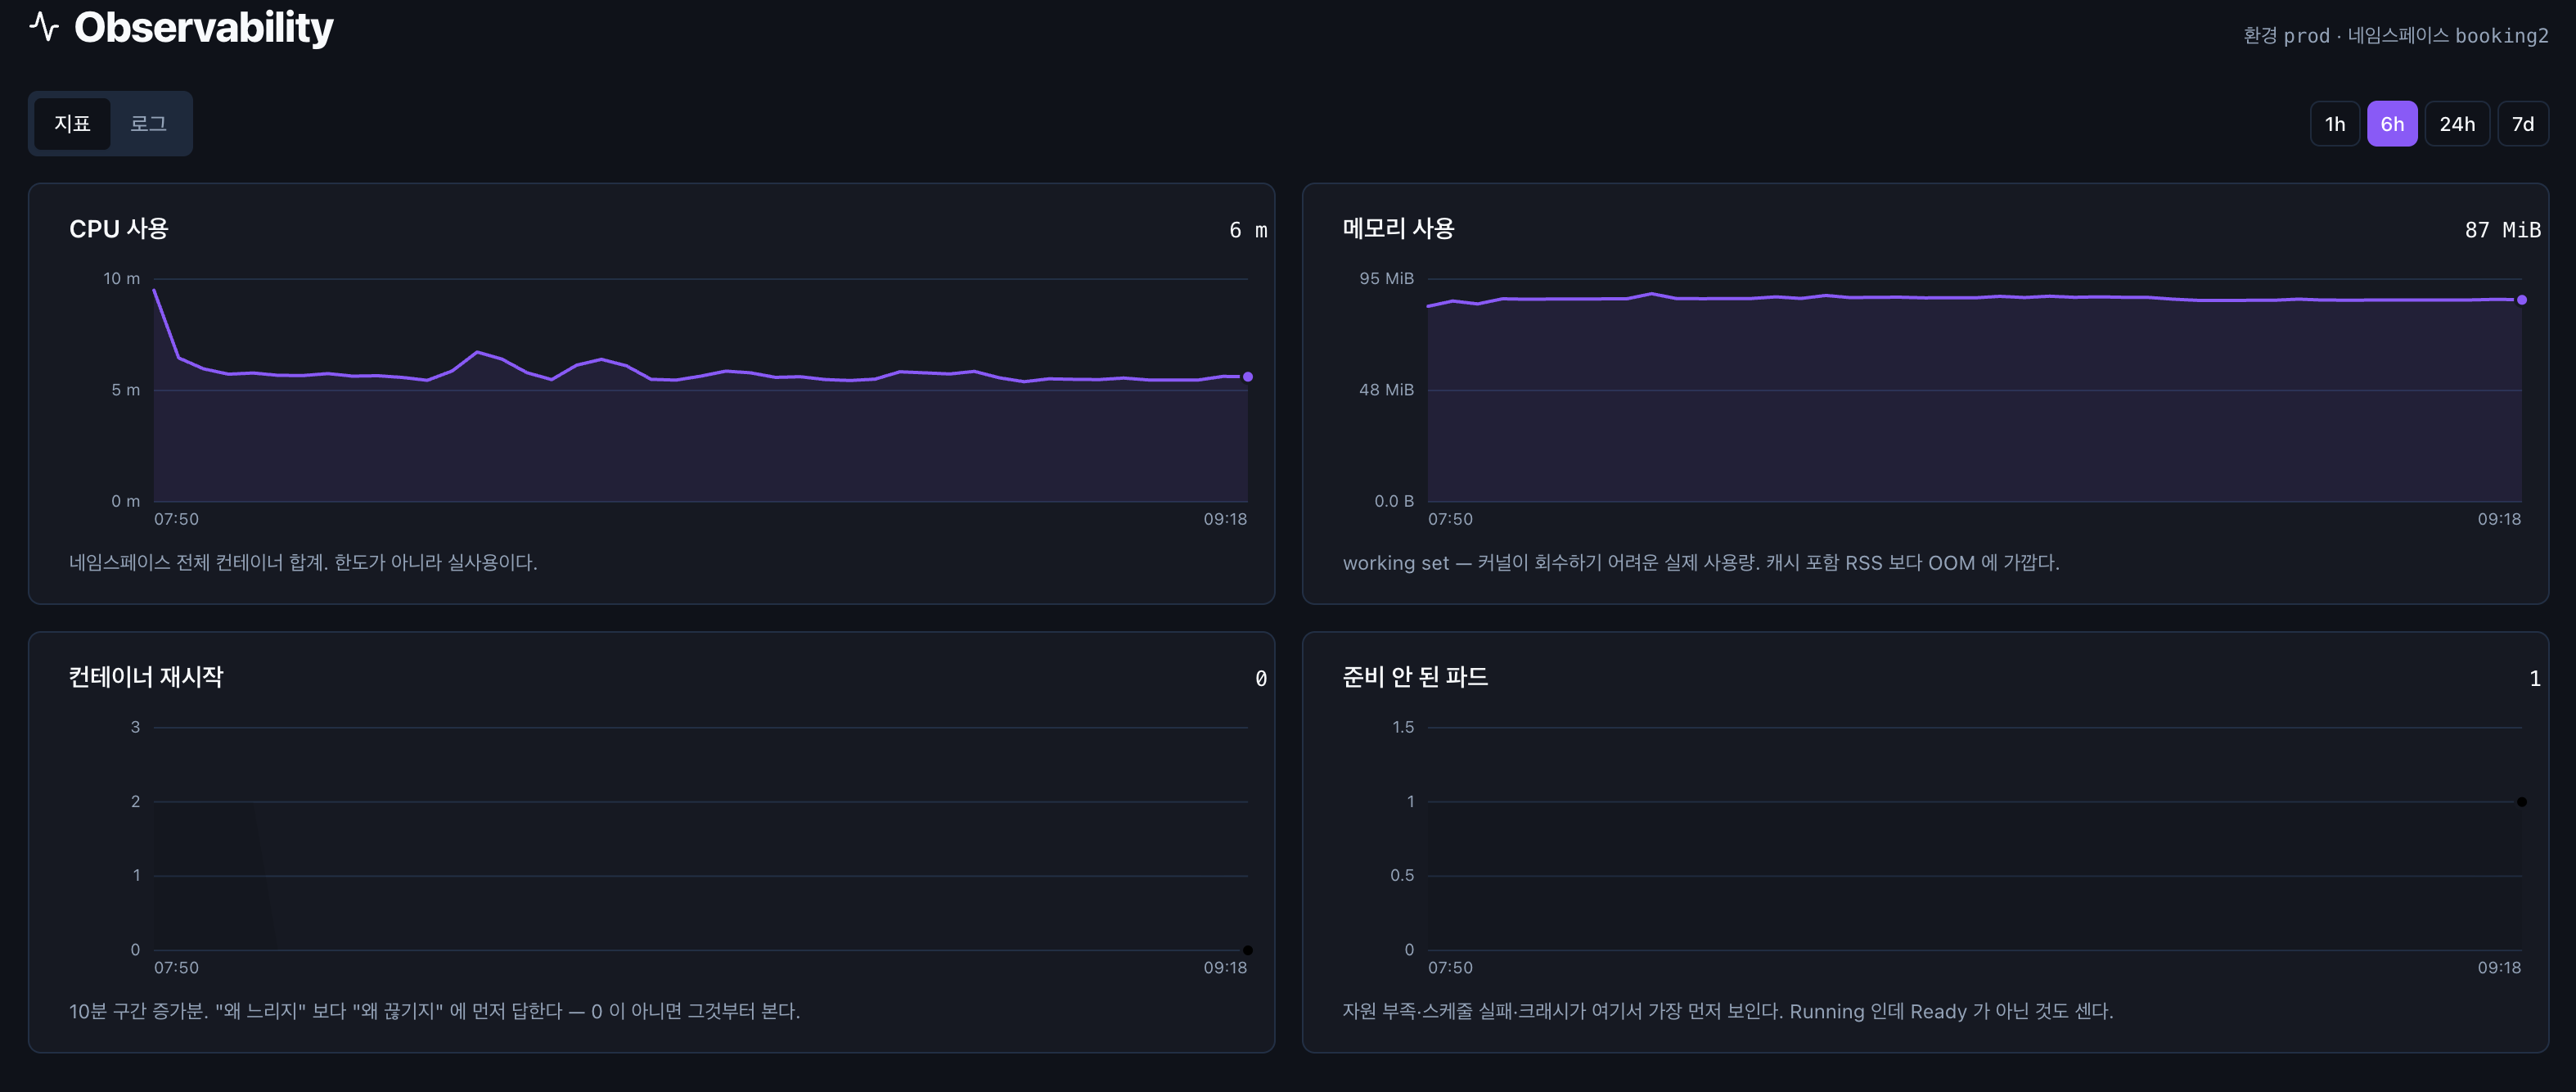
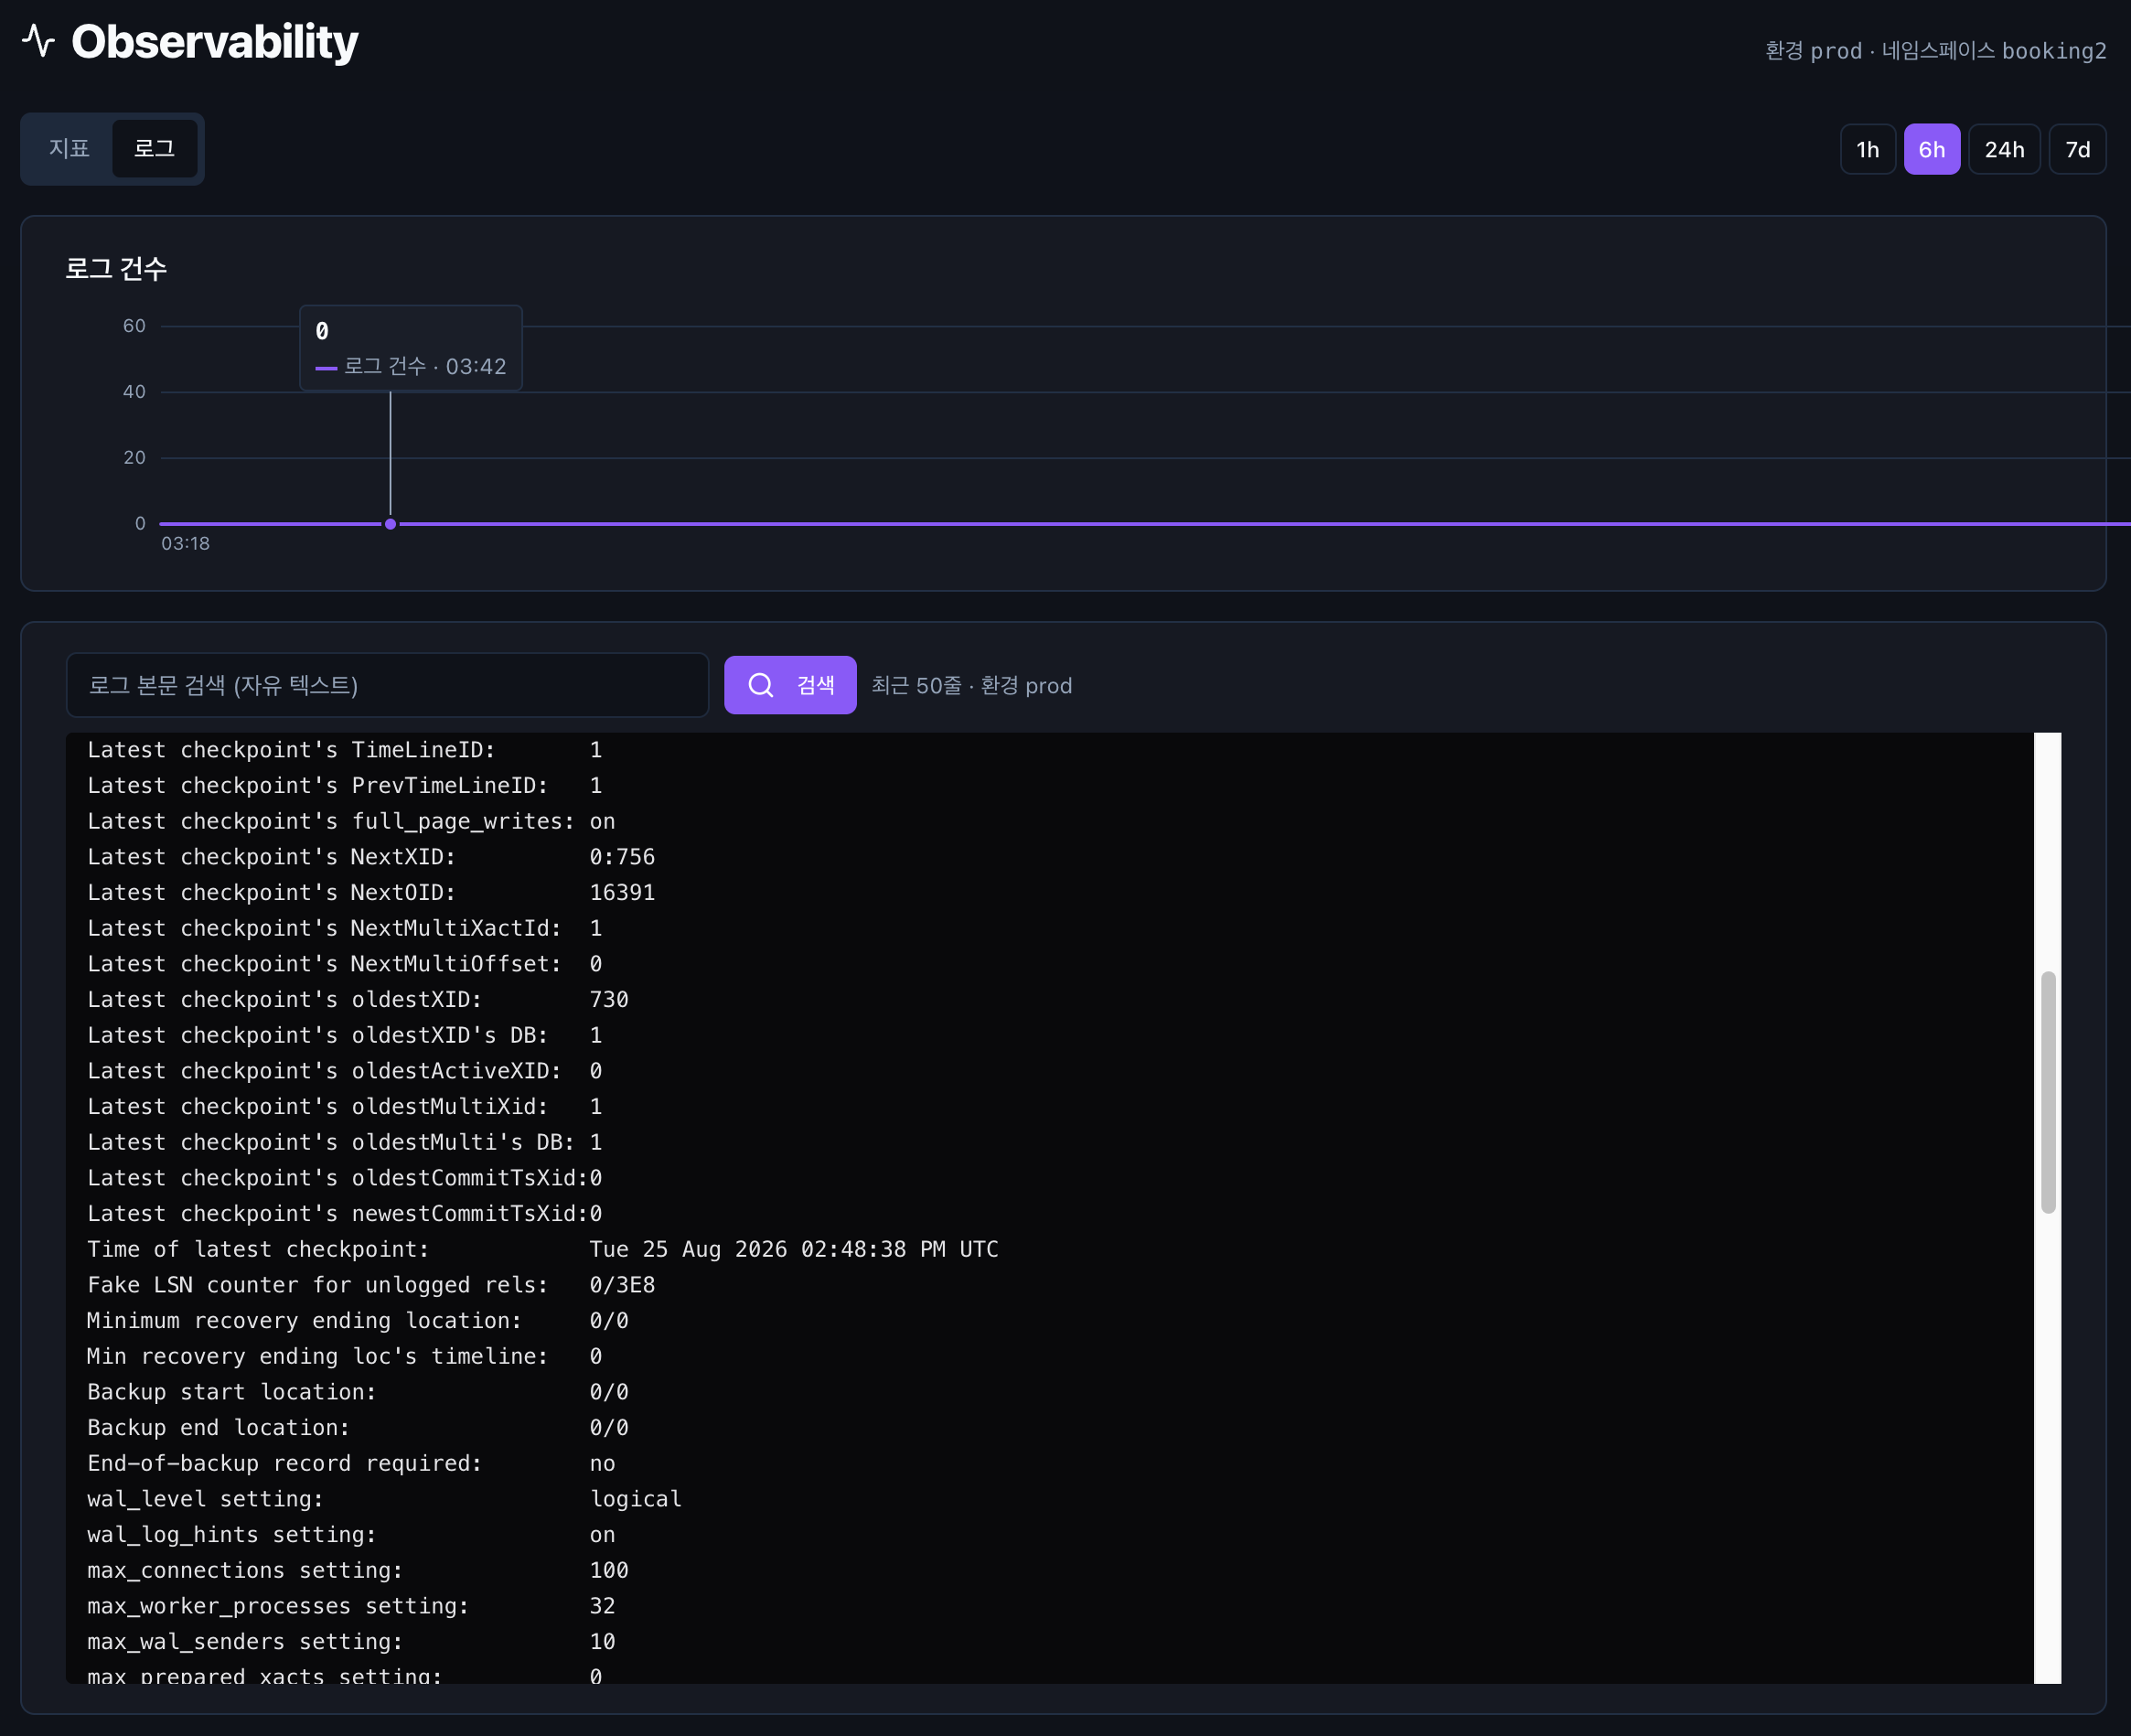
After installation you can view the metrics and logs screens. Time ranges are 1h · 6h · 24h · 7d.
| Where to look | |
|---|---|
| Observability | The whole project |
| Metrics · Logs tabs | Asset / app detail — just that one |
| Grafana | When you build dashboards, set alerts, or overlay several assets |
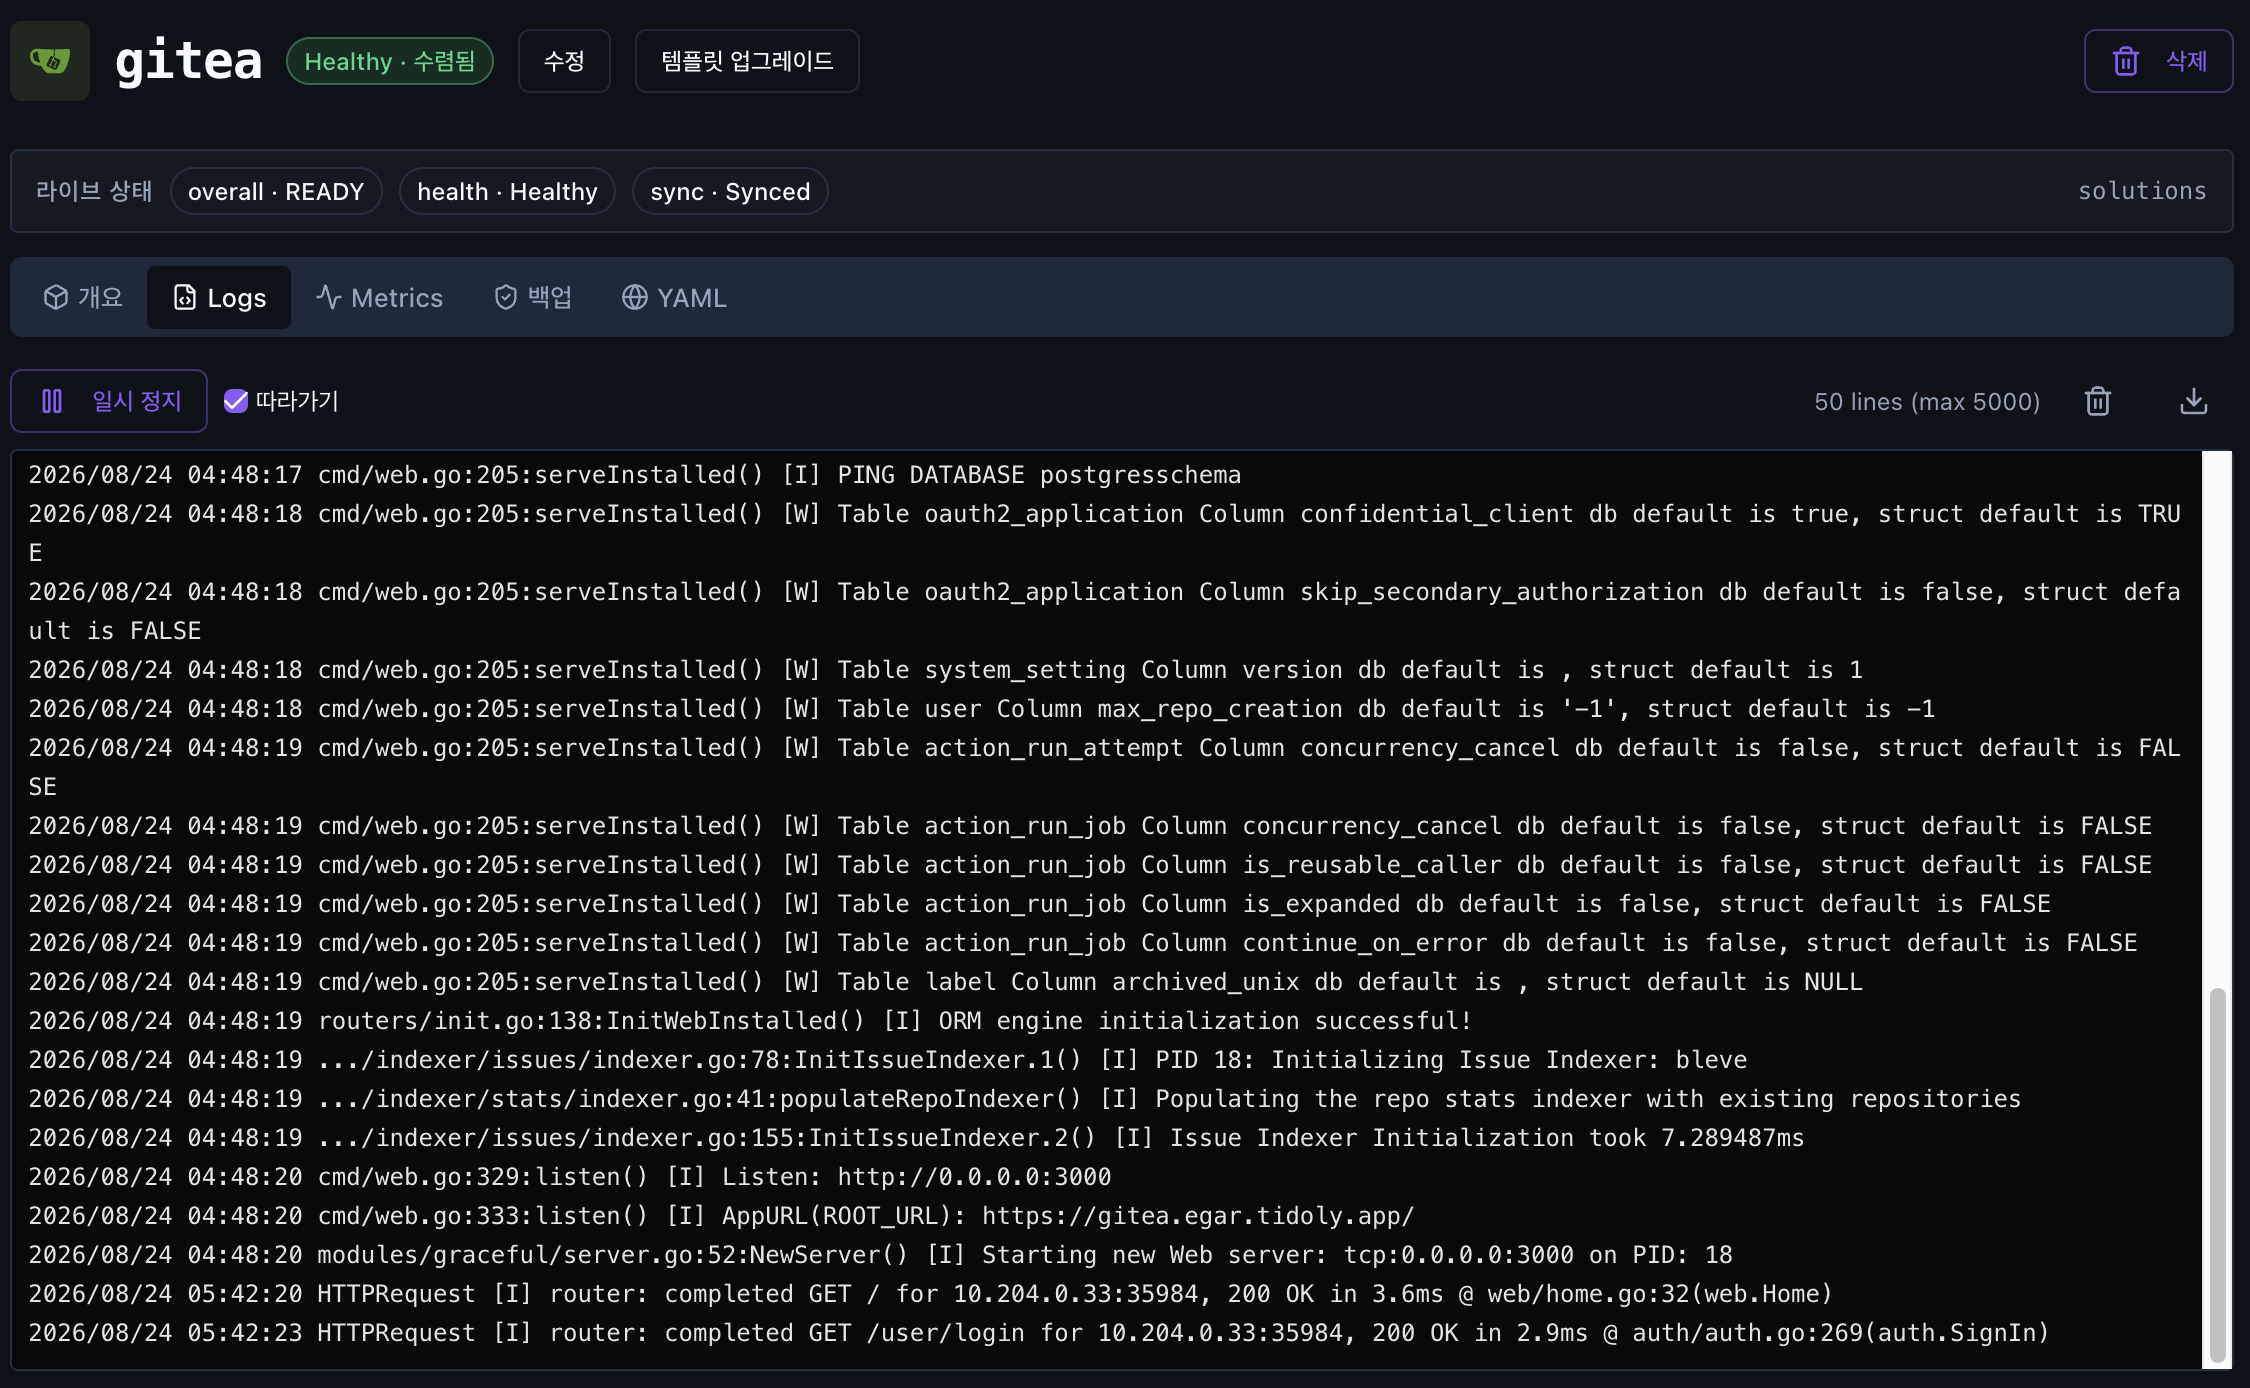
When you are looking at a single asset, the Logs tab on its detail screen is quickest. Lines stream in as they are written.
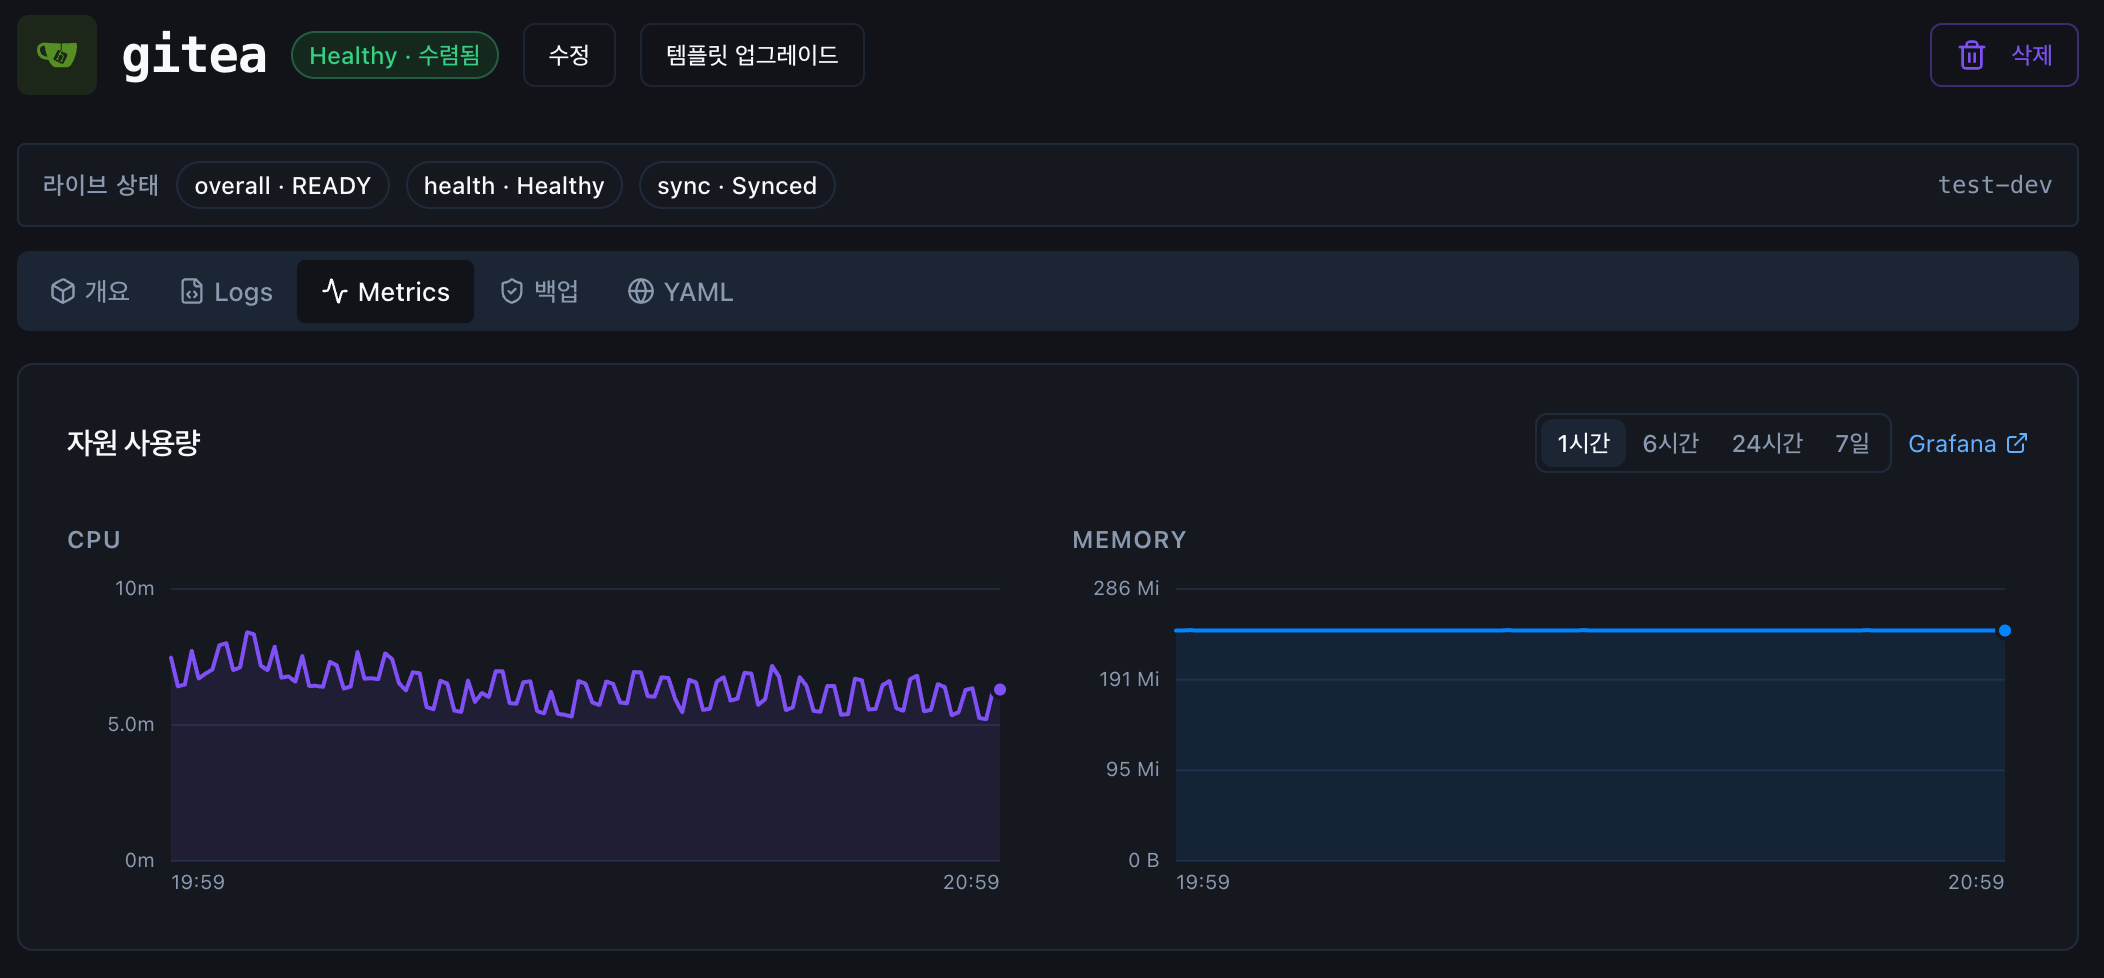
The Metrics tab shows only that one asset's CPU and memory. To dig deeper, move to Grafana from the same screen.
Where to do what
Installing and connecting is the PaaS's job; actually using a tool happens in the tool itself. SSO integration is already done, so just open it and use it.
| Task | Where |
|---|---|
| Projects · asset installation · connections · backups | PaaS management screen |
| Dashboards · alert rules | Grafana |
| Release status · manual sync | ArgoCD |
| Users · groups | Keycloak |
Change settings in the PaaS screen
Settings you change directly in the original tool may be overwritten at the next sync. Change size, options and connections in the PaaS screen. Things the PaaS does not manage, such as dashboards and alert rules, stay as they are.
Turn on backups
Backups are off at first. There is not yet a place to keep backups outside the server.
Register S3 · Cloudflare R2 in Admin → Integrations and backups turn on. → Chapter 7 · Where to register
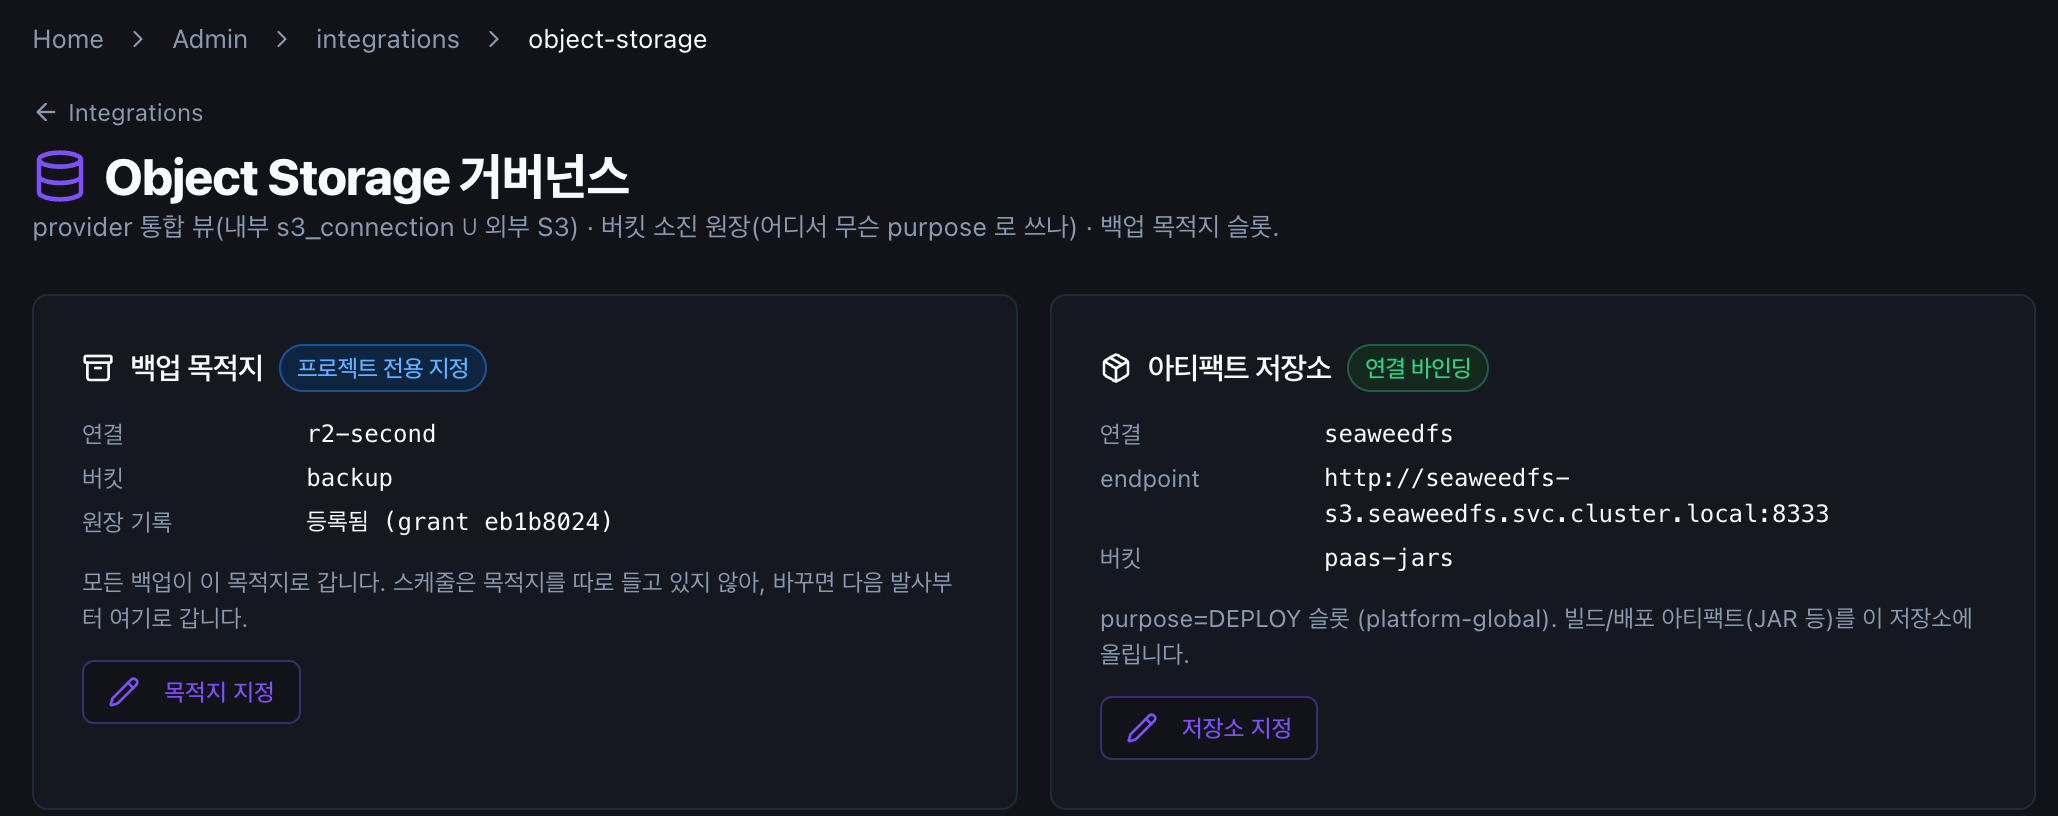
All backups go to this one destination. You do not set it per asset. If you change the destination, backups go there from the next run; backups already taken are not moved.
Backups must not stay on the same server
If the whole server dies, the backups die with it. A backup is only a backup if you can restore from it. That is why backups turn on only once external storage is connected.
Set a schedule for each asset
Once ready, a 백업 (Backup) tab appears on the asset detail screen.
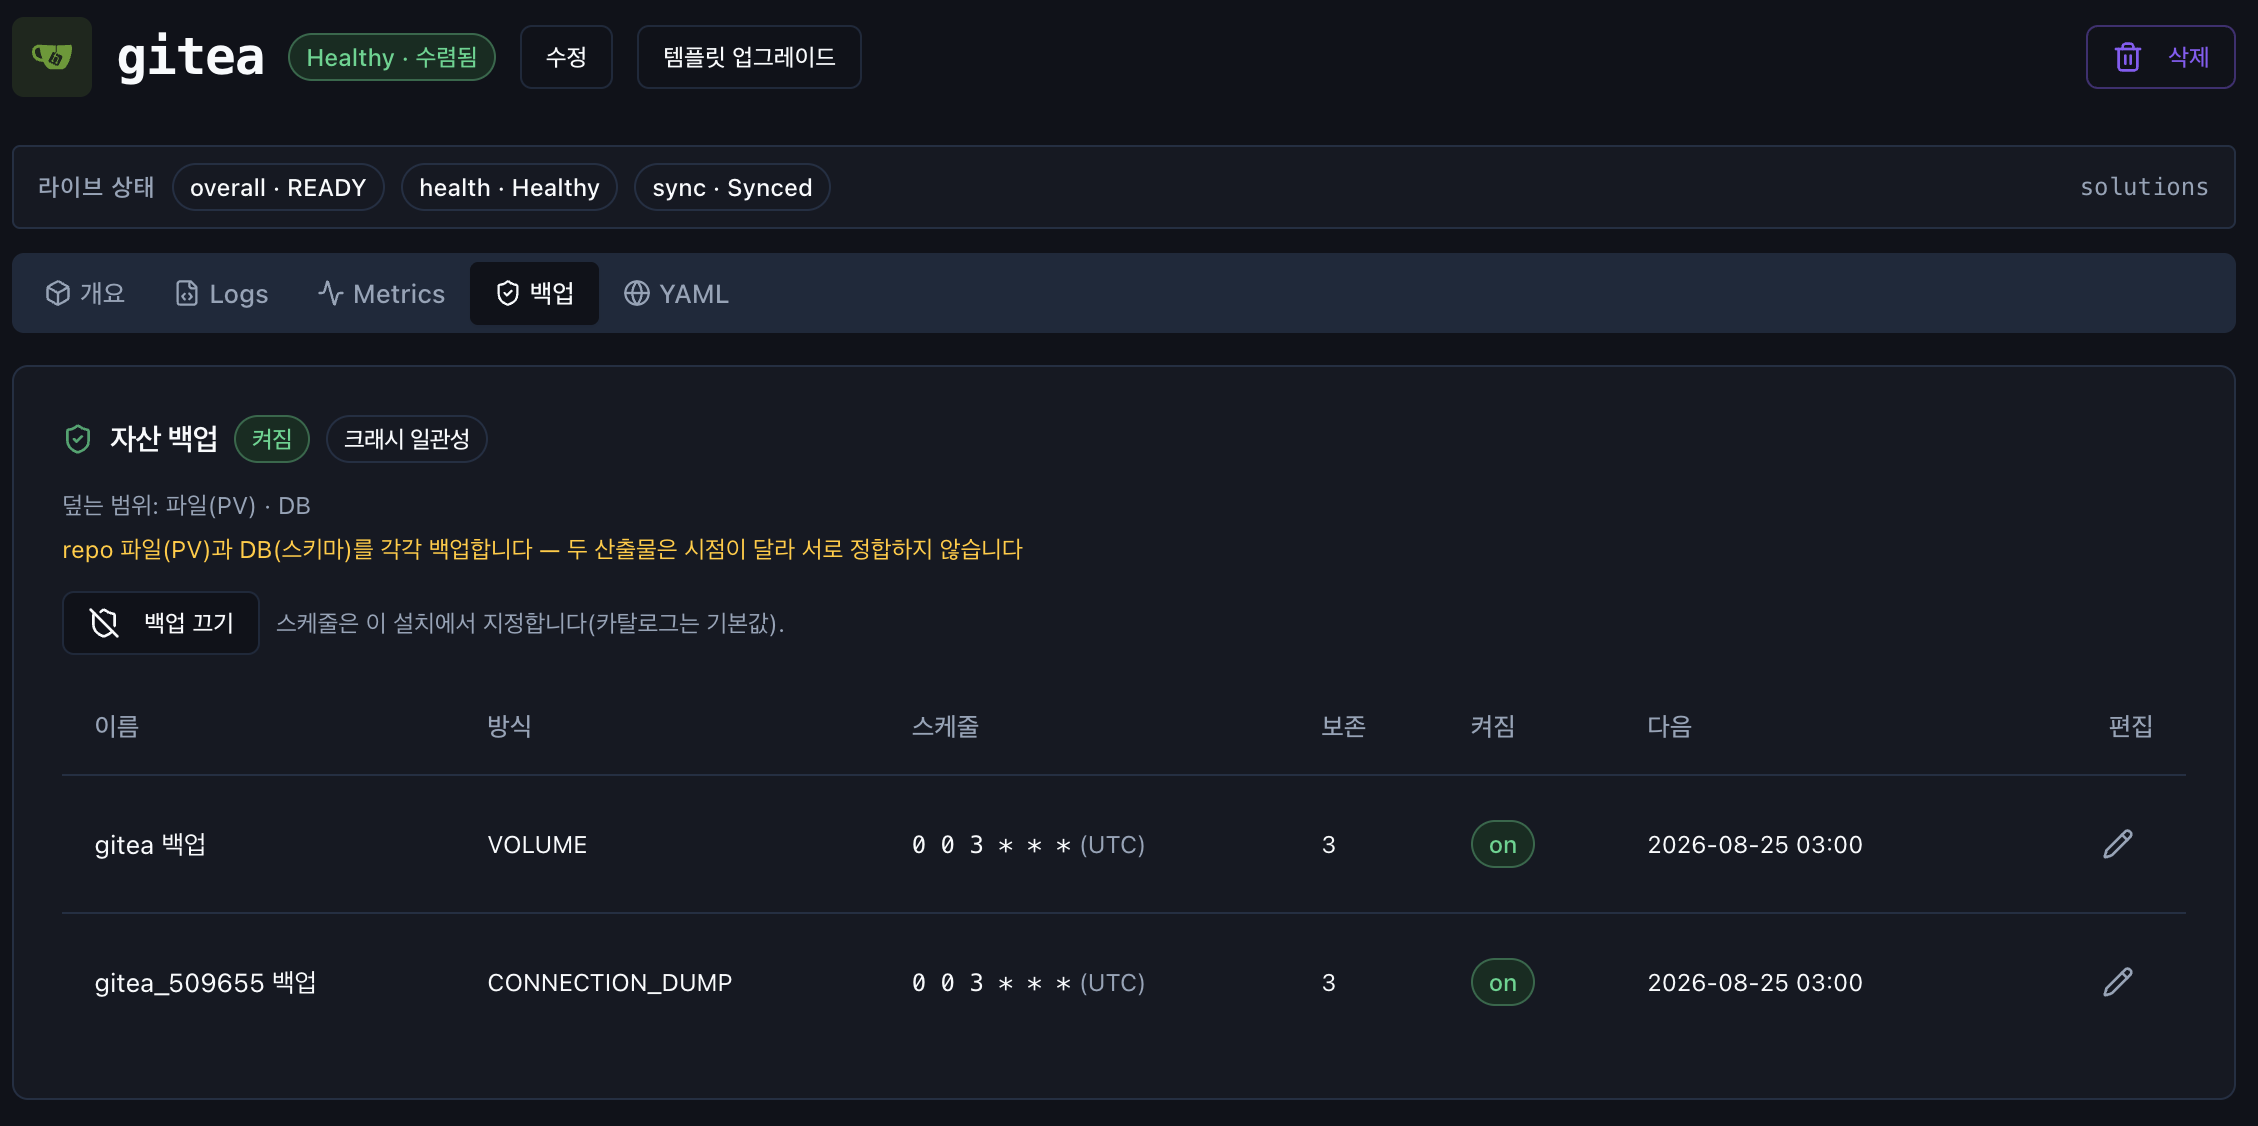
Files and the database are backed up separately. The schedule and retention count are pre-filled with defaults, and you can change them.
Files and database are from different points in time
Because the two are backed up separately, they do not capture the same moment. This means that when you restore, they may not line up exactly — the screen also shows 크래시 일관성 (Crash-consistent).
Data left behind after deletion
Even if you delete an app, its data volumes remain. This lets you recover if you deleted something by mistake. You can see the remaining volumes in Storage.
Volumes of live apps are not listed here but on the app screen — so that what is safe to delete and what is not are not mixed in one table.
Remaining volumes still take up disk
If you do not clean them up, they keep piling up. Delete them only when you are sure they are no longer needed — this cannot be undone.
Next → 4. Install a bundle at once