

0. Prepare a server (Ubuntu)
tidoly PaaS is installed on Ubuntu 24.04 LTS.
If you already have a Linux server you can use, skip this chapter and go to 1. License and domain.
Server specs
If you run not only tidoly PaaS itself but also builds and deployments on the same server, it's best to leave headroom.
| Minimum | With build and deploy automation | |
|---|---|---|
| CPU | 8 cores | 8 cores |
| Memory | 8GB | 10GB or more |
| Disk | 100GB | 100GB |
If you allocate too little here, increasing it later is a hassle. If you plan to use builds and deployments too, allocate 10GB or more of memory.
How to install Linux
Choose one of the following methods depending on the hardware you have.
| Hardware | Method |
|---|---|
| Physical server · Mini PC · Spare desktop | Install from USB |
| Mac | UTM virtual machine |
| Windows | Virtual machine — WSL is not supported |
Install from USB (physical server)
1. Download the Ubuntu Server ISO
Download Ubuntu Server 24.04 LTS.
Use the Server edition, not the Desktop edition.
2. Create a USB drive
Write the ISO file to a USB drive.
- Mac · Windows: balenaEtcher
- Windows: Rufus
3. Install Ubuntu
Boot from the USB drive and follow the Ubuntu installer.
Check the following two things.
Install OpenSSH Server
Be sure to select Install OpenSSH server. It is off by default — turn it on with the space bar and continue.
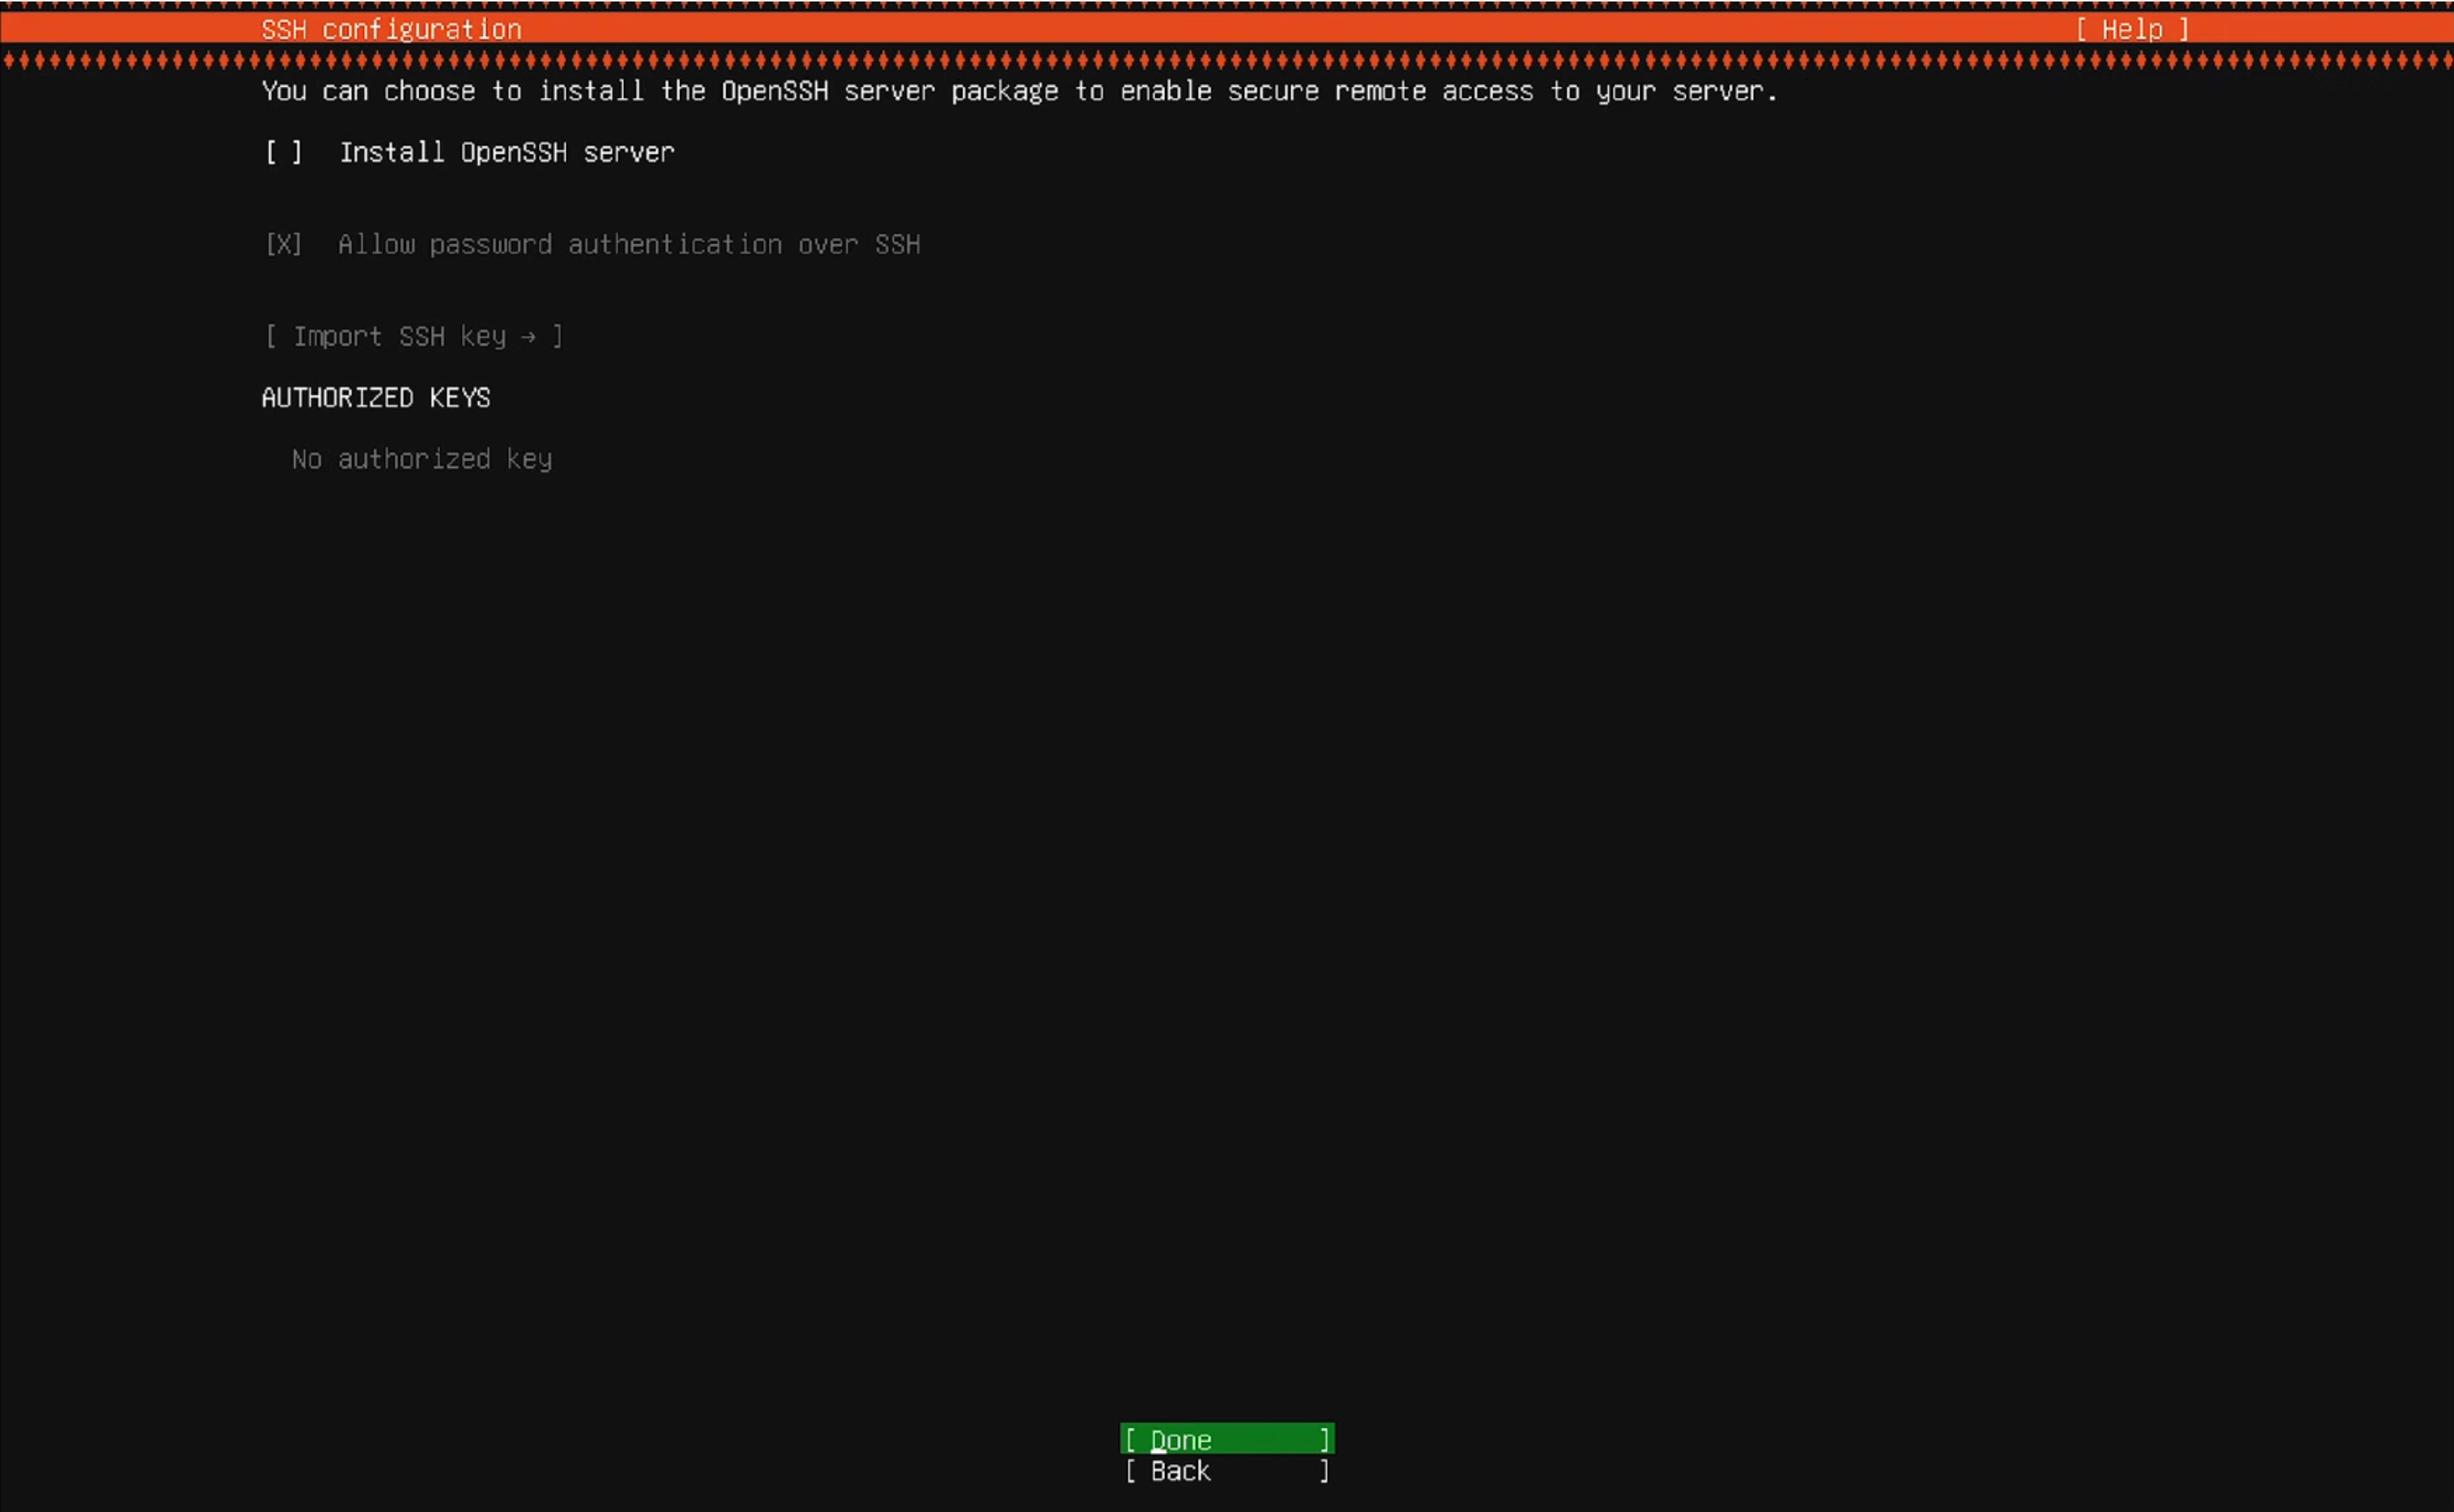
Miss this and it surfaces much later
Nothing happens at the time; it only shows up in Chapter 2, when the installer can't connect to the server. The message shown then is "별칭/주소와 키를 확인하세요" (Check the alias/address and key), so it doesn't tell you whether the cause is the SSH key or the server.
To fix it, you have to go back to the server and run sudo apt install openssh-server.
Disk
Unless you have a specific reason, use the entire disk.
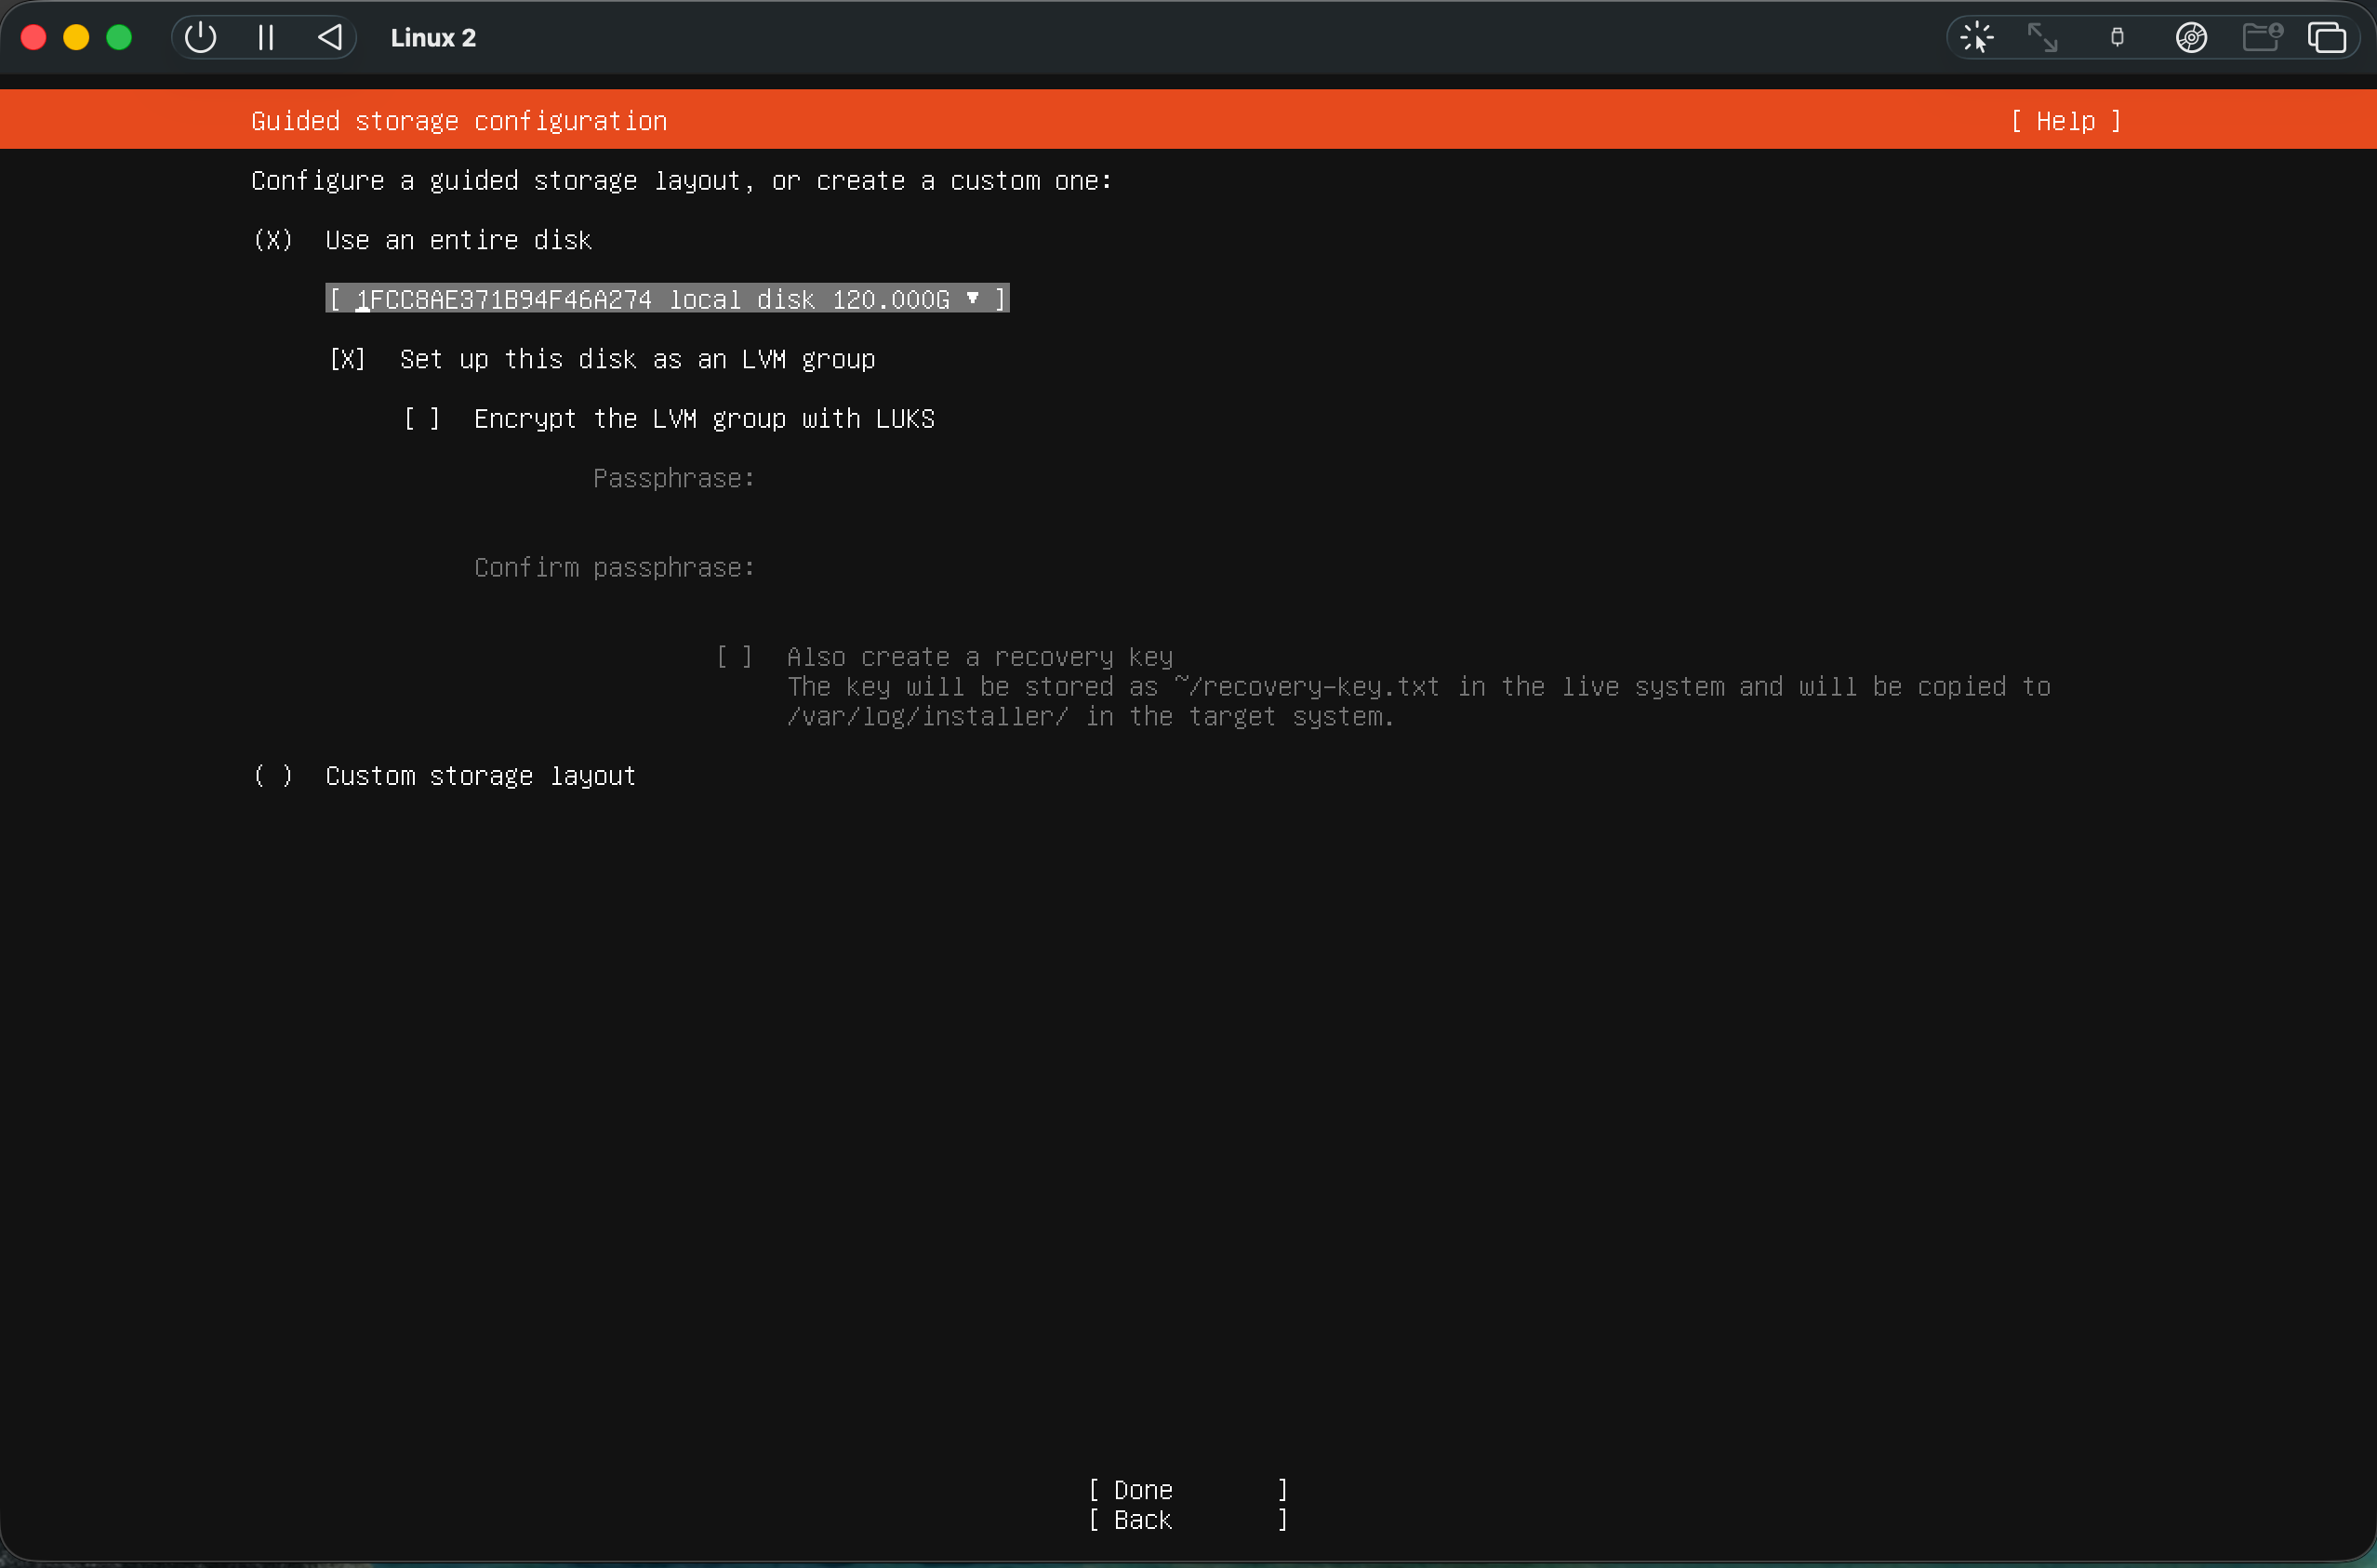
Set the LVM size to the maximum
When you choose LVM, the entire disk is not allocated to the logical volume. If you just move on, sometimes only half is allocated.
After installation, check the actual usable size.
df -h /If you configured a 100GB disk and / shows a smaller size → Advanced · Extending an LVM disk
4. Network
You can install with the network left at the default (DHCP). A static IP is not an installation requirement.
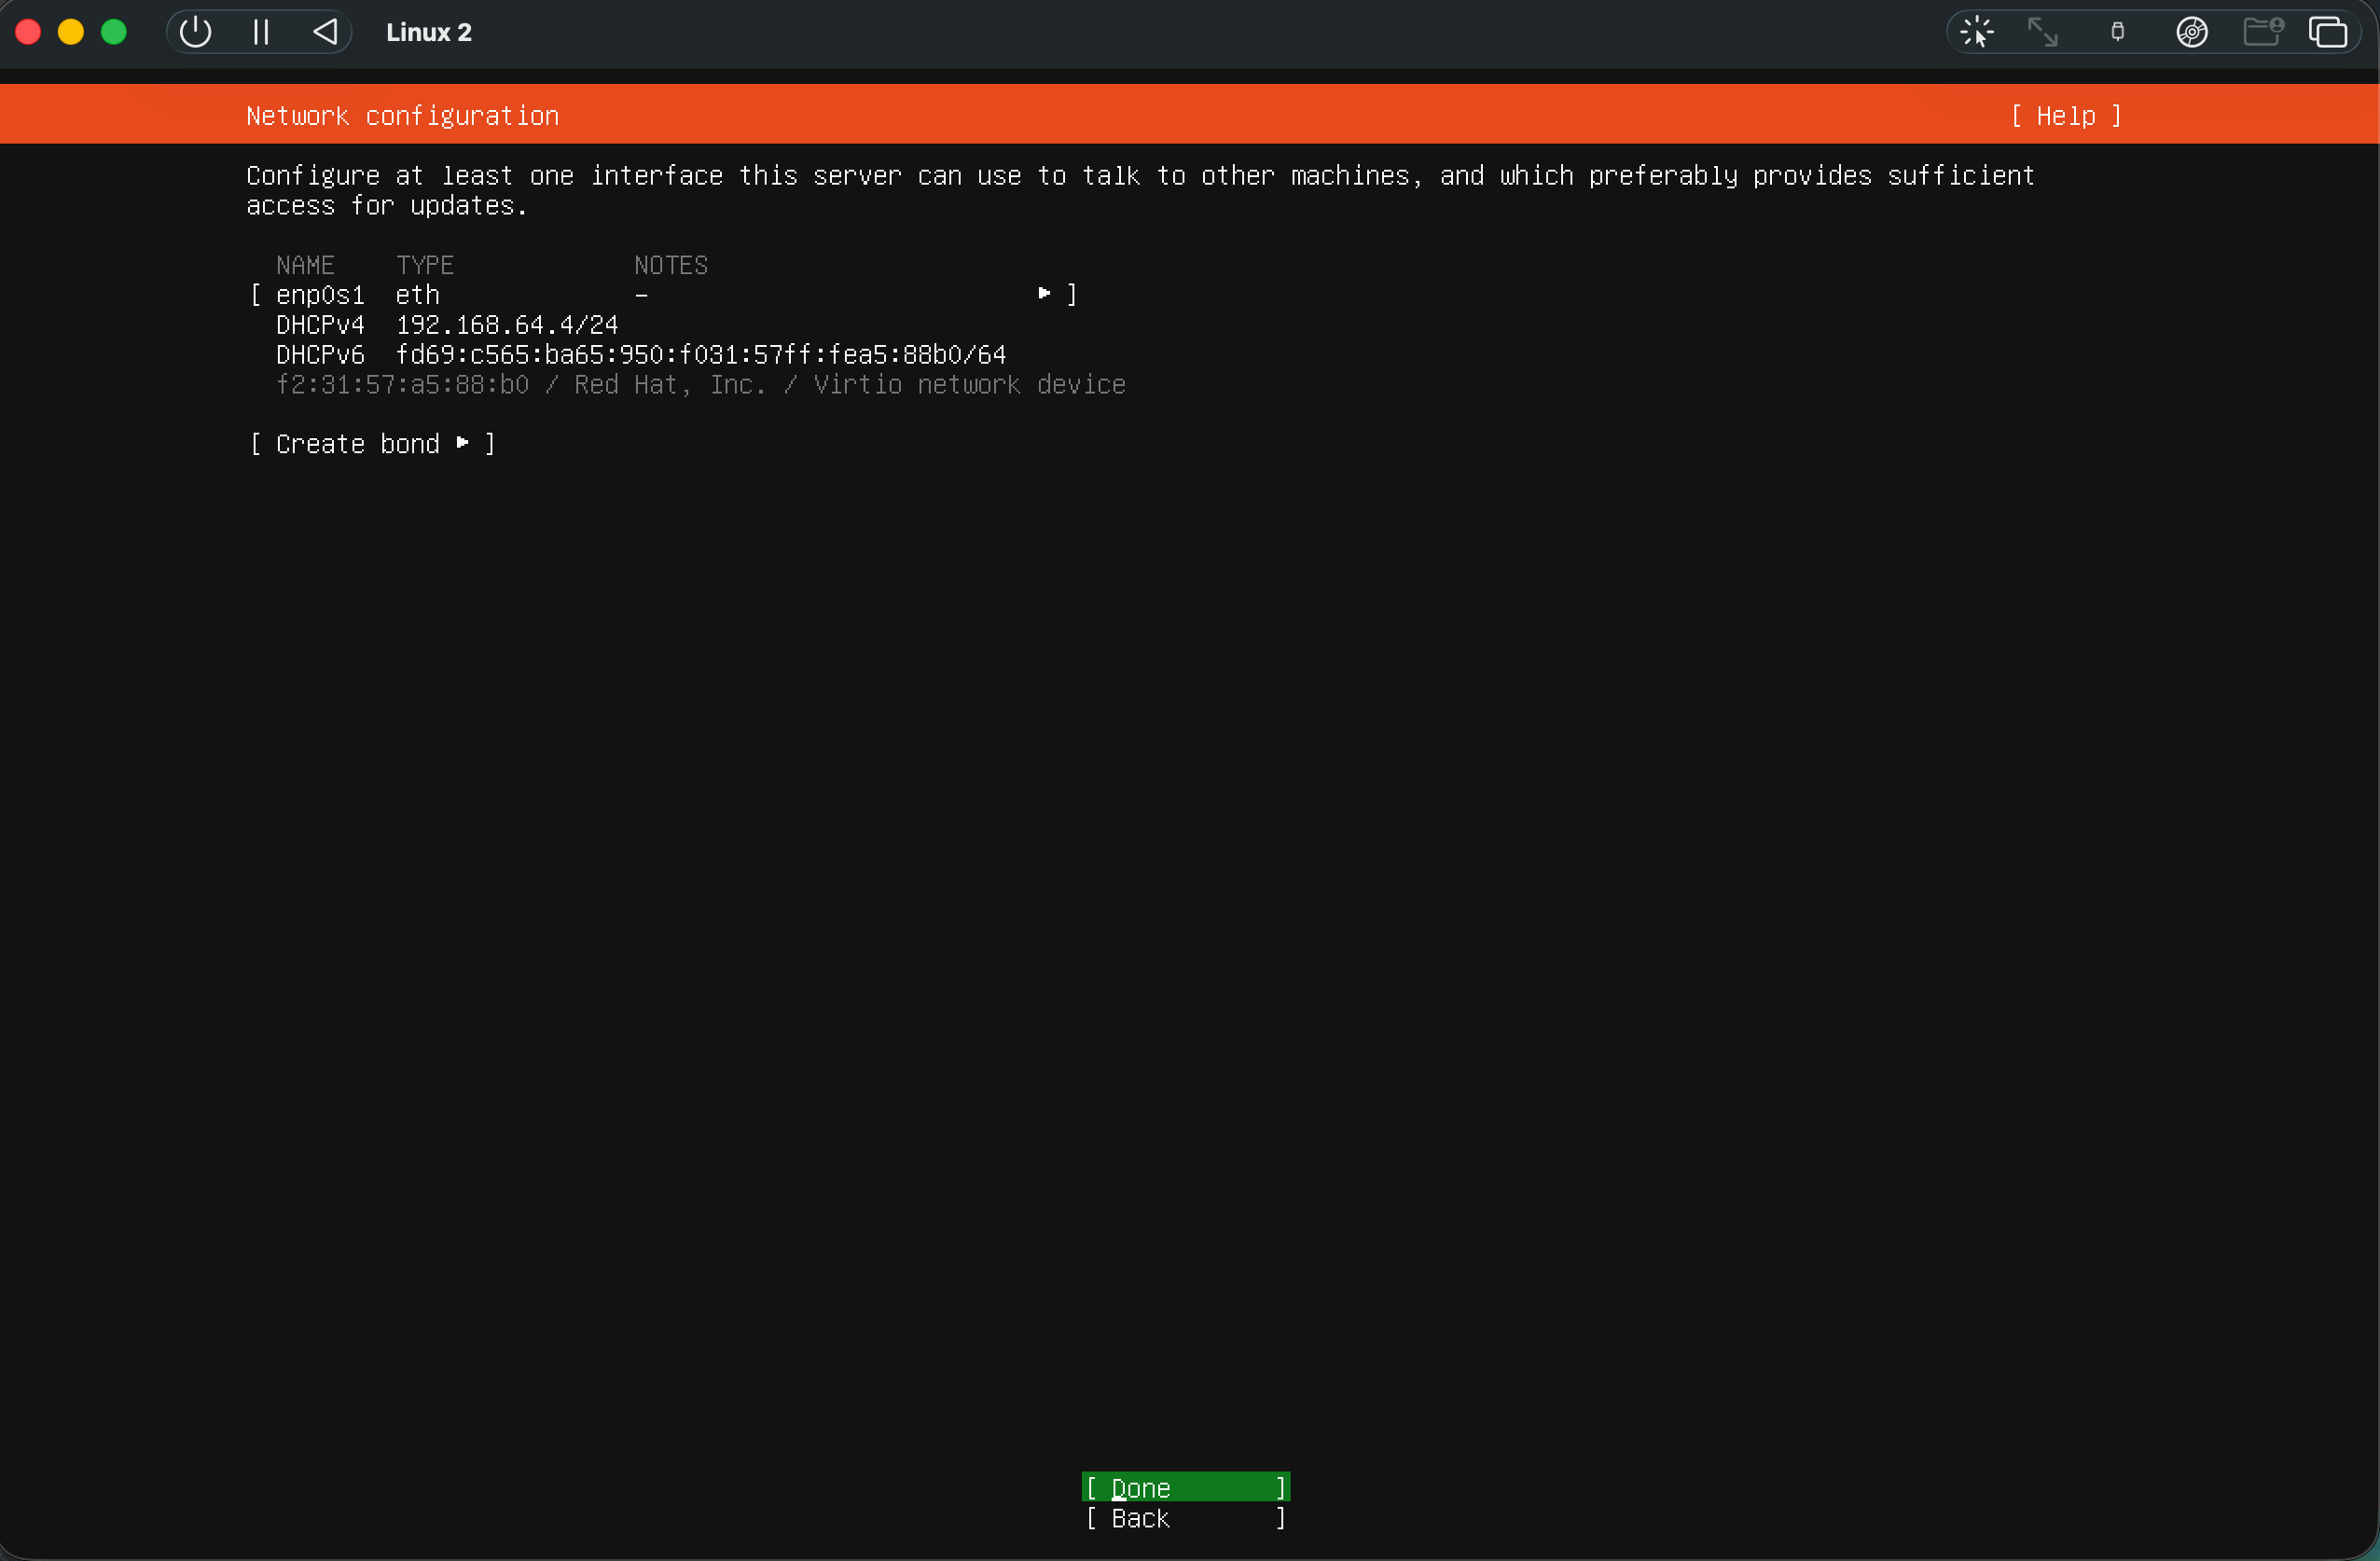
If a changing server IP address is inconvenient, or you want to serve directly on a public IP, see Advanced · Router settings.
Mac — UTM virtual machine
On a Mac, you can create an Ubuntu Server virtual machine with UTM.
Ubuntu image
On Apple Silicon Macs, use the Ubuntu Server ARM64 ISO.
Virtual machine specs
Allocate CPU, memory, and disk according to the server specs above.
Network
Just use UTM's default, Shared Network, as is.
With the tunnel, you don't need separate port forwarding or a public IP.
If you'll serve directly on a public IP, see Virtual machine network.
Windows — virtual machine
On Windows, you can create an Ubuntu 24.04 LTS virtual machine with whichever of the following is convenient.
- Hyper-V — Windows Pro or higher
- VirtualBox
- Multipass
Set the virtual machine's CPU, memory, and disk according to the server specs.
Unless you have a specific reason, use the network at its default.
WSL is not supported
Kubernetes can run on WSL, but it is not a supported environment for tidoly PaaS.
WSL sits behind NAT, so its IP changes on every reboot, and to expose ports 80 and 443 externally you have to set up port forwarding again each time. Because addresses and certificates sit on top of that, once something drifts it's hard to tell where it broke.
tidoly PaaS is validated against physical servers or virtual machines running Ubuntu directly. Therefore, WSL environments are not supported.
How do I set up the virtual machine network?
In most cases, just use the default network settings.
| Usage | Network |
|---|---|
| Serve externally via the tidoly tunnel | Default |
| Test only on my computer | Default (Shared · NAT) |
| Serve directly on a public IP | Bridged + static IP recommended |
When using the tunnel
With the tidoly tunnel, the server connects outward, so you don't need to worry much about whether the virtual machine's network is NAT or Shared.
You also don't need to open ports on your router or obtain a public IP for the server.
When serving directly on a public IP
The virtual machine needs to get its IP directly from the router, so use a bridged network.
Also, if the IP obtained via DHCP changes, it may no longer match your port forwarding settings, so we recommend giving the server a static IP.
If you use UTM
If you use UTM's default network (Shared) and also try to serve directly, certificate issuance will fail.
If you plan to serve directly on a public IP, configure a bridged network.
Check that preparation is complete
Once Ubuntu is installed, check whether you can connect via SSH from your computer.
ssh user@server-address 'sudo -n true'If everything is fine, the command exits without asking anything and without errors.
If at this step you're asked for an SSH key or get a sudo-related error, first see SSH key preparation in Chapter 2.
Once preparation is done, move on to the next step.
Next → 1. License and domain