

1. License and domain
Before installing the product, you obtain a license key. The access address (domain) is also finalized at this step.
1. Get a license
Before you start — when you enter the license key into the installer, the address and connection method you chose are synced automatically. So on the installation screen, you proceed with values already filled in, without extra setup.
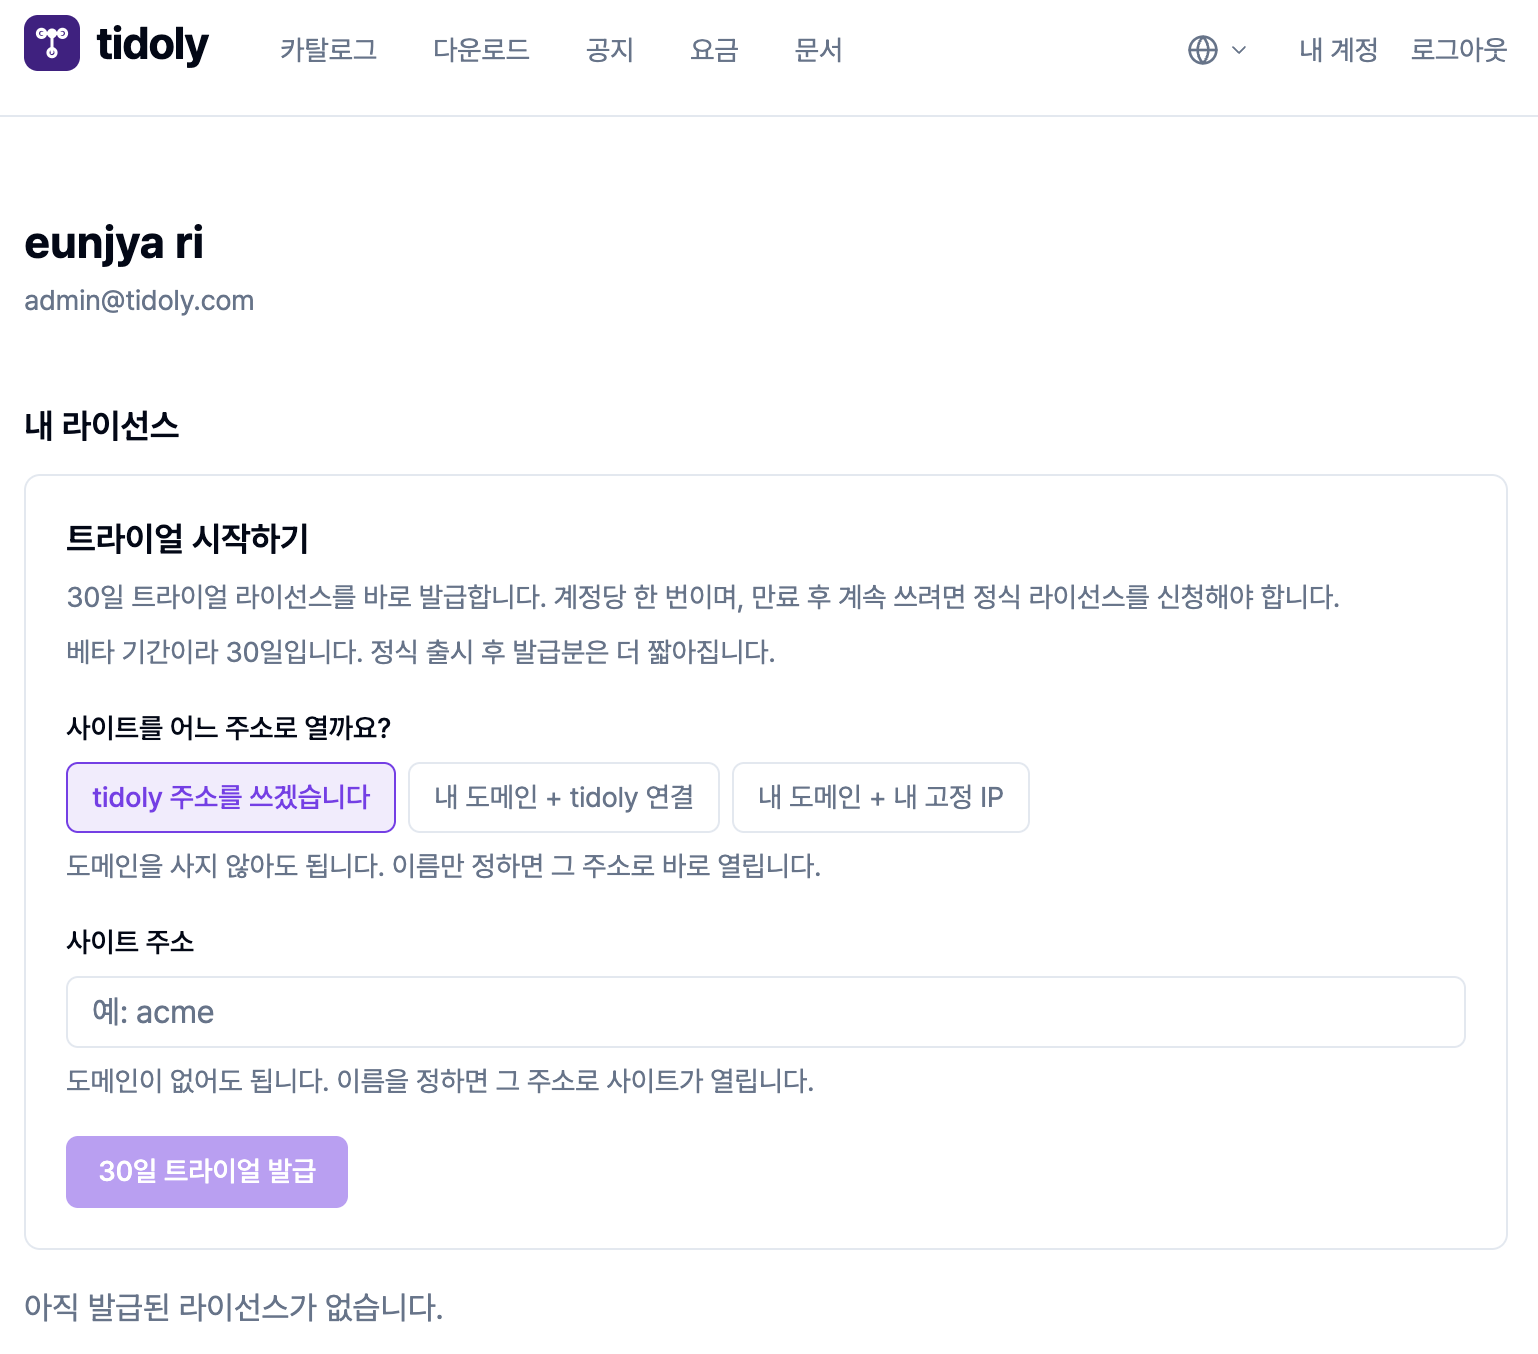
- Log in to the portal: After logging in to your account, go to the [내 계정] (My account) page.
- Start a trial: Choose the address method you want, then click the
30일 트라이얼 발급(Issue 30-day trial) button. - Copy the key: Copy the issued license key. (Used on the first installation screen)
Issuance policy
| Item | Details |
|---|---|
| Validity period | 30 days (limited to the beta period; the validity period is planned to be shortened after the official release) |
| Number of issuances | Once per account (to keep using it after expiry, you need to apply for a full license) |
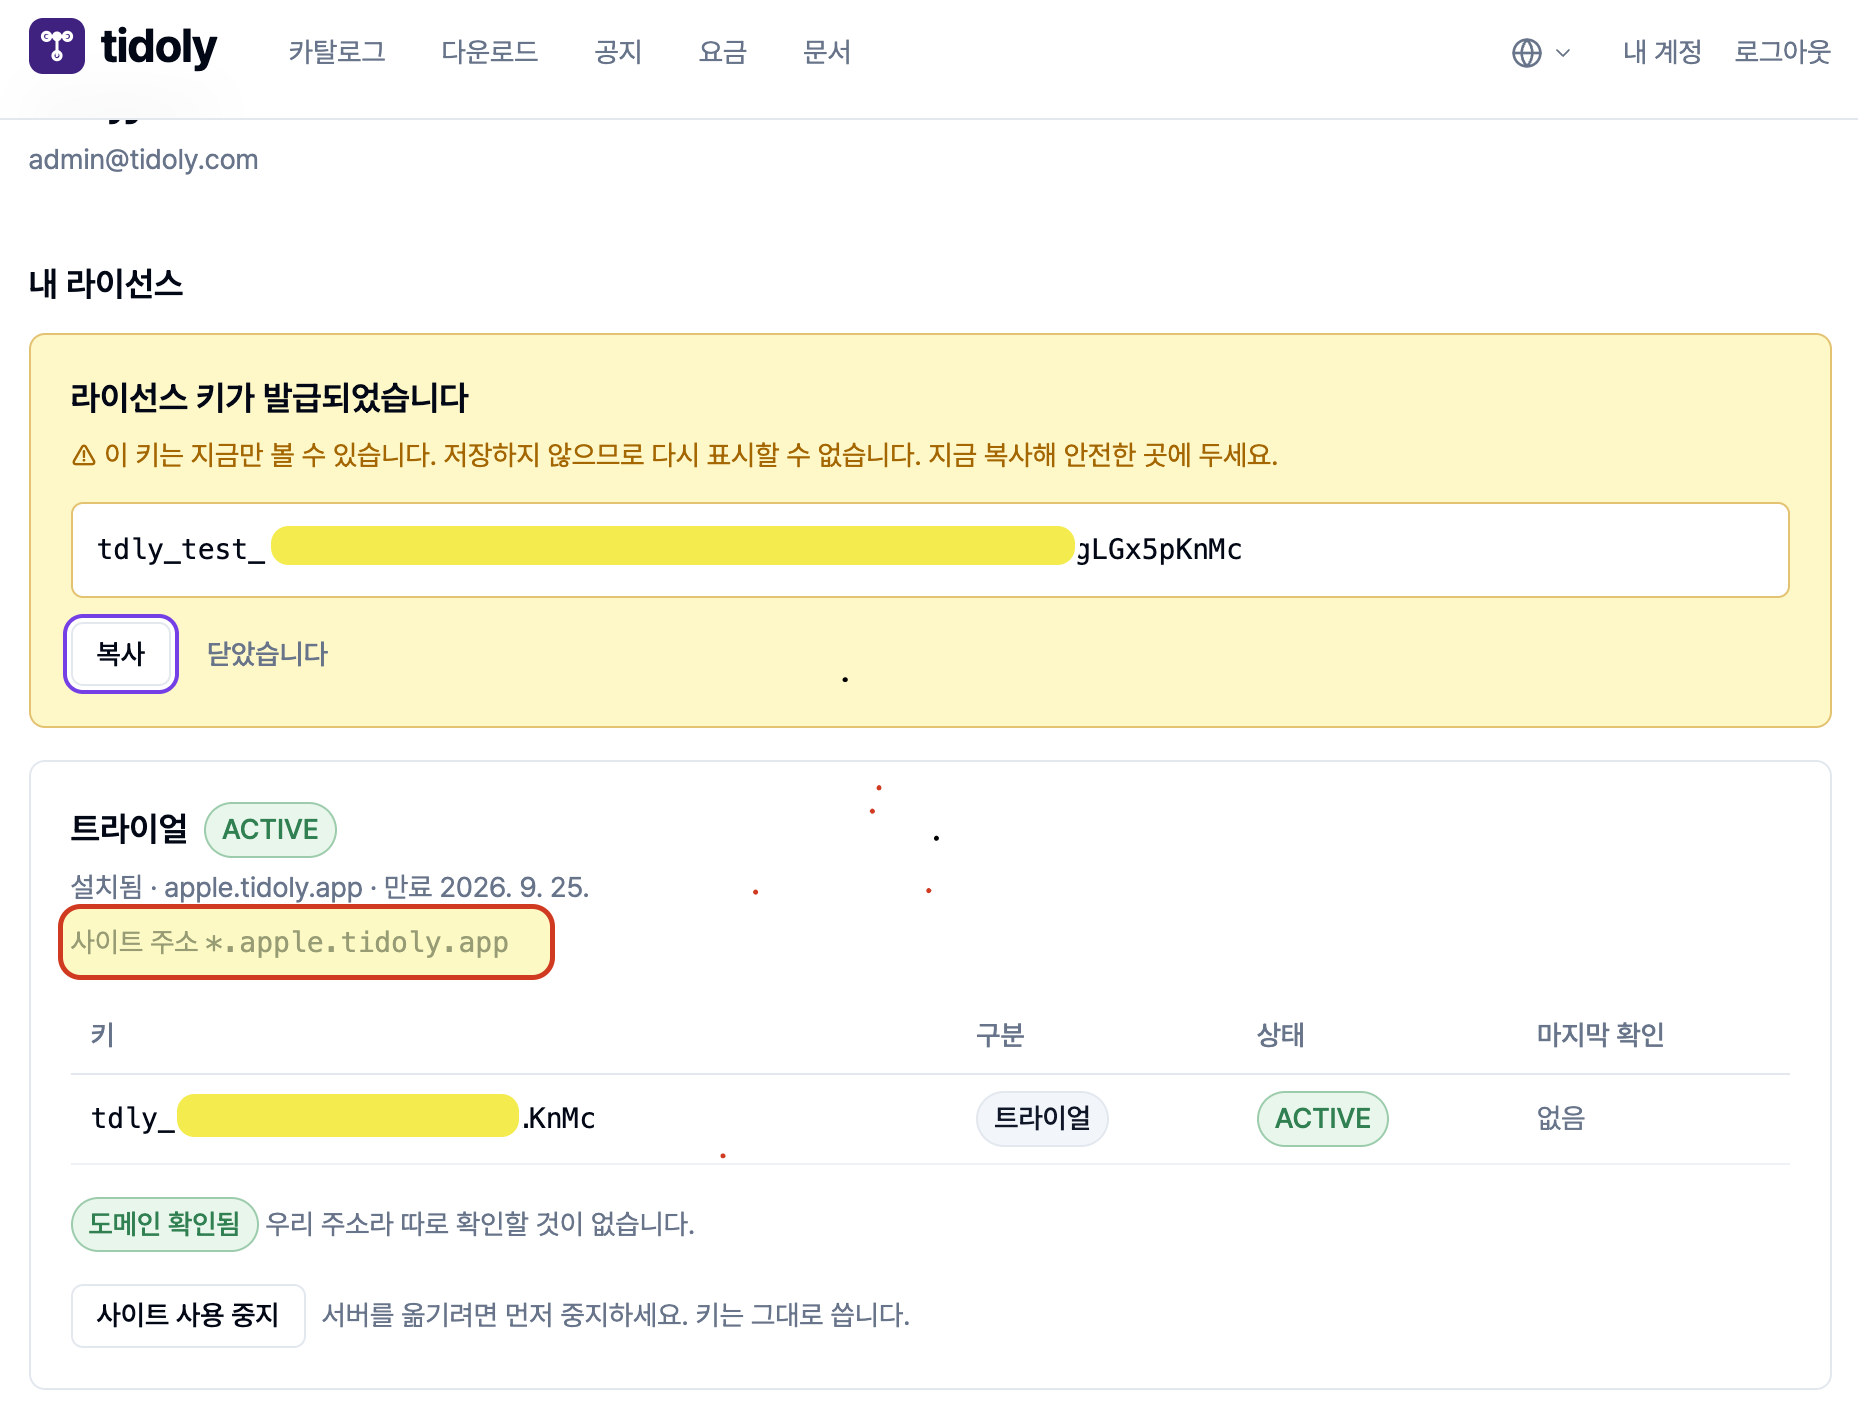
The license key is not shown again
The license key is shown on screen only once, right after issuance, and is not stored. Copy it immediately after issuance and keep it somewhere safe. If you lose it, you have to go through reissuance.
2. Choose an address (domain)
On the issuance screen, choose one of the 3 options below. This choice determines who issues the SSL/TLS certificate.
| Option | When to use | Certificate issued by |
|---|---|---|
tidoly 주소를 쓰겠습니다 (Use a tidoly address) | When you want to use it right away without buying a domain | We handle it |
내 도메인 + tidoly 연결 (My domain + tidoly connection) | When you have a domain but can't use a public IP or configure your router | We obtain it on your behalf |
내 도메인 + 내 고정 IP (My domain + my static IP) | When the server can be exposed to / reached directly from the internet | That server obtains it directly |
For details on how certificates are issued, see Chapter 9 · Who issues the certificate.
Setup screen for each option
| Using a tidoly address | Using your own domain |
|---|---|
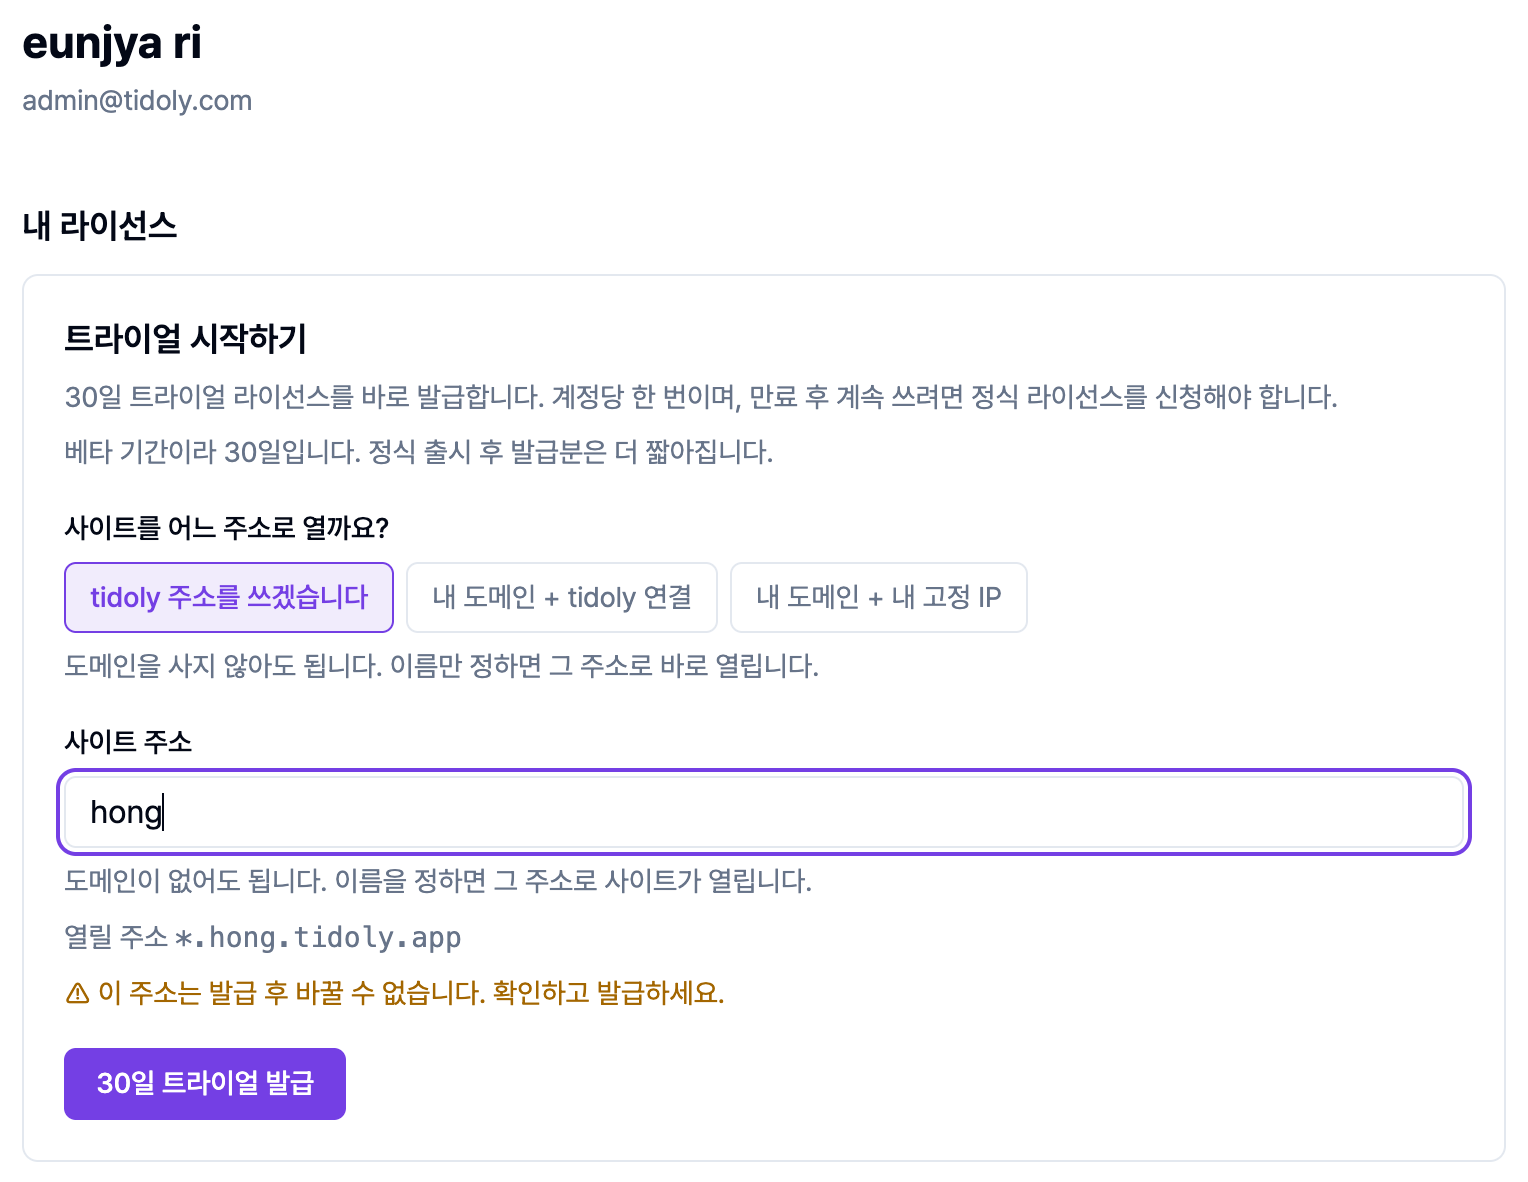 | 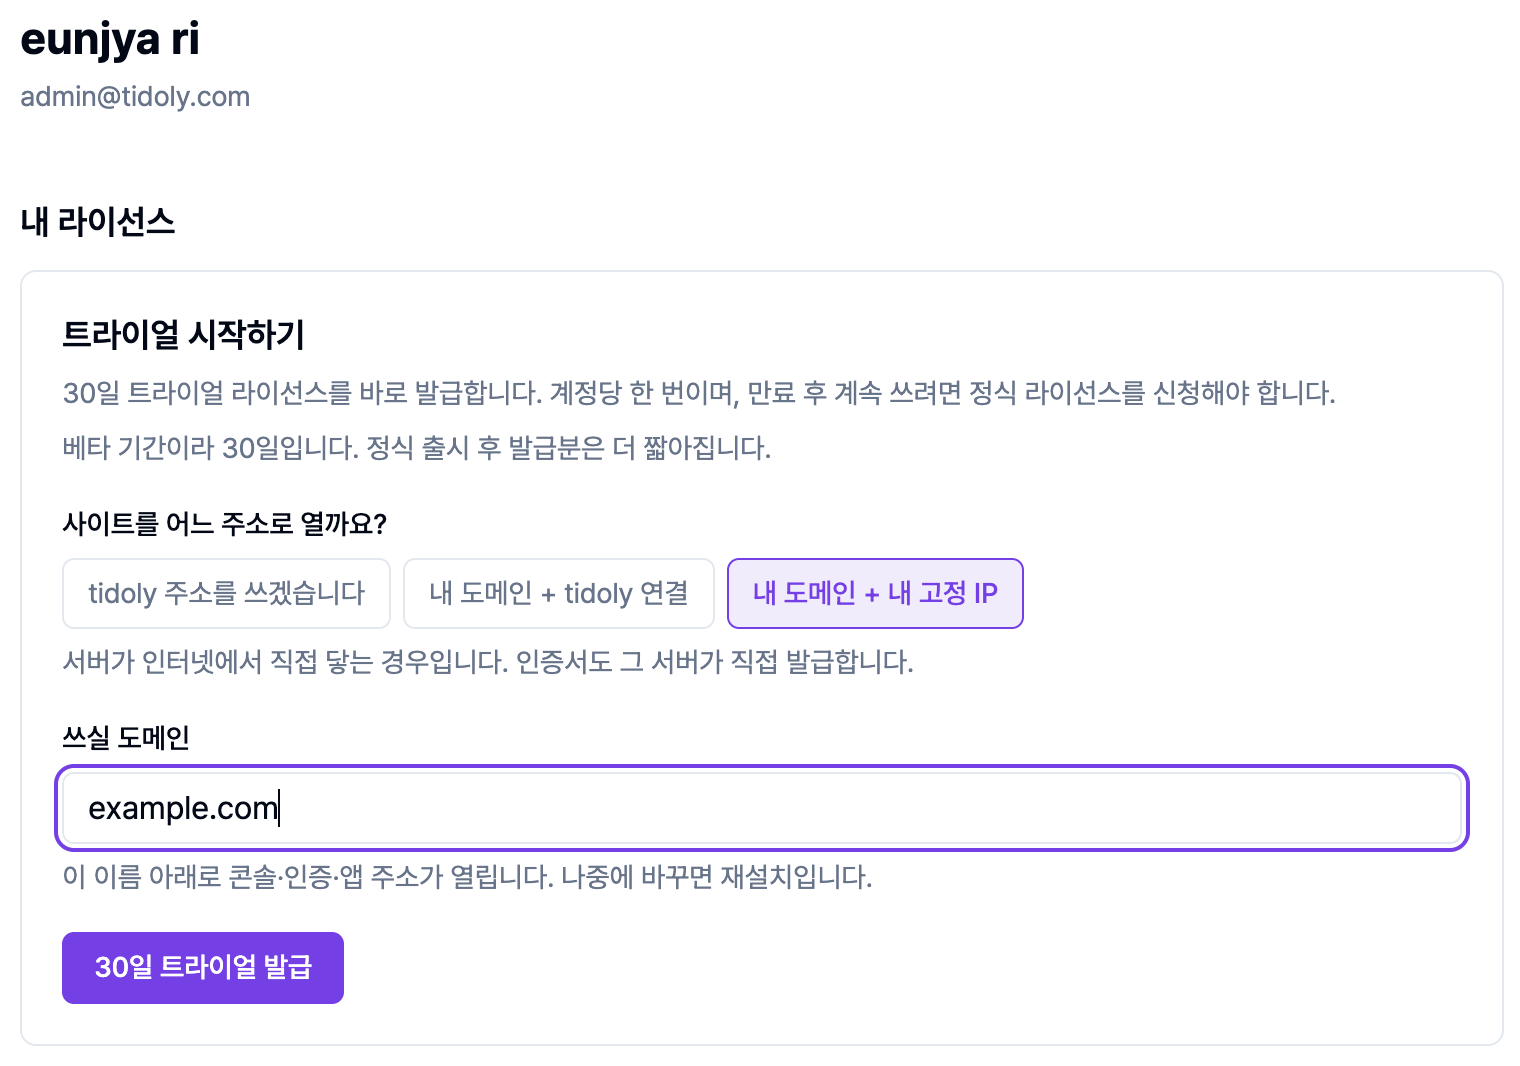 |
| Just enter a name and the address to use is generated immediately. | Console, auth, and app addresses open under the domain you set. |
If the name is already in use, the message 이미 사용 중인 주소입니다 (This address is already in use) is shown. In that case, enter a different name.
The address cannot be changed after issuance
As the screen says — "이 주소는 발급 후 바꿀 수 없습니다. 확인하고 발급하세요." (This address cannot be changed after issuance. Check it before issuing.)
The same applies when using your own domain: changing the address requires a full reinstallation. Be sure to finalize it before issuance.
3. After issuance and license management
Once you've finished copying the license key, only the license card remains on the management page.
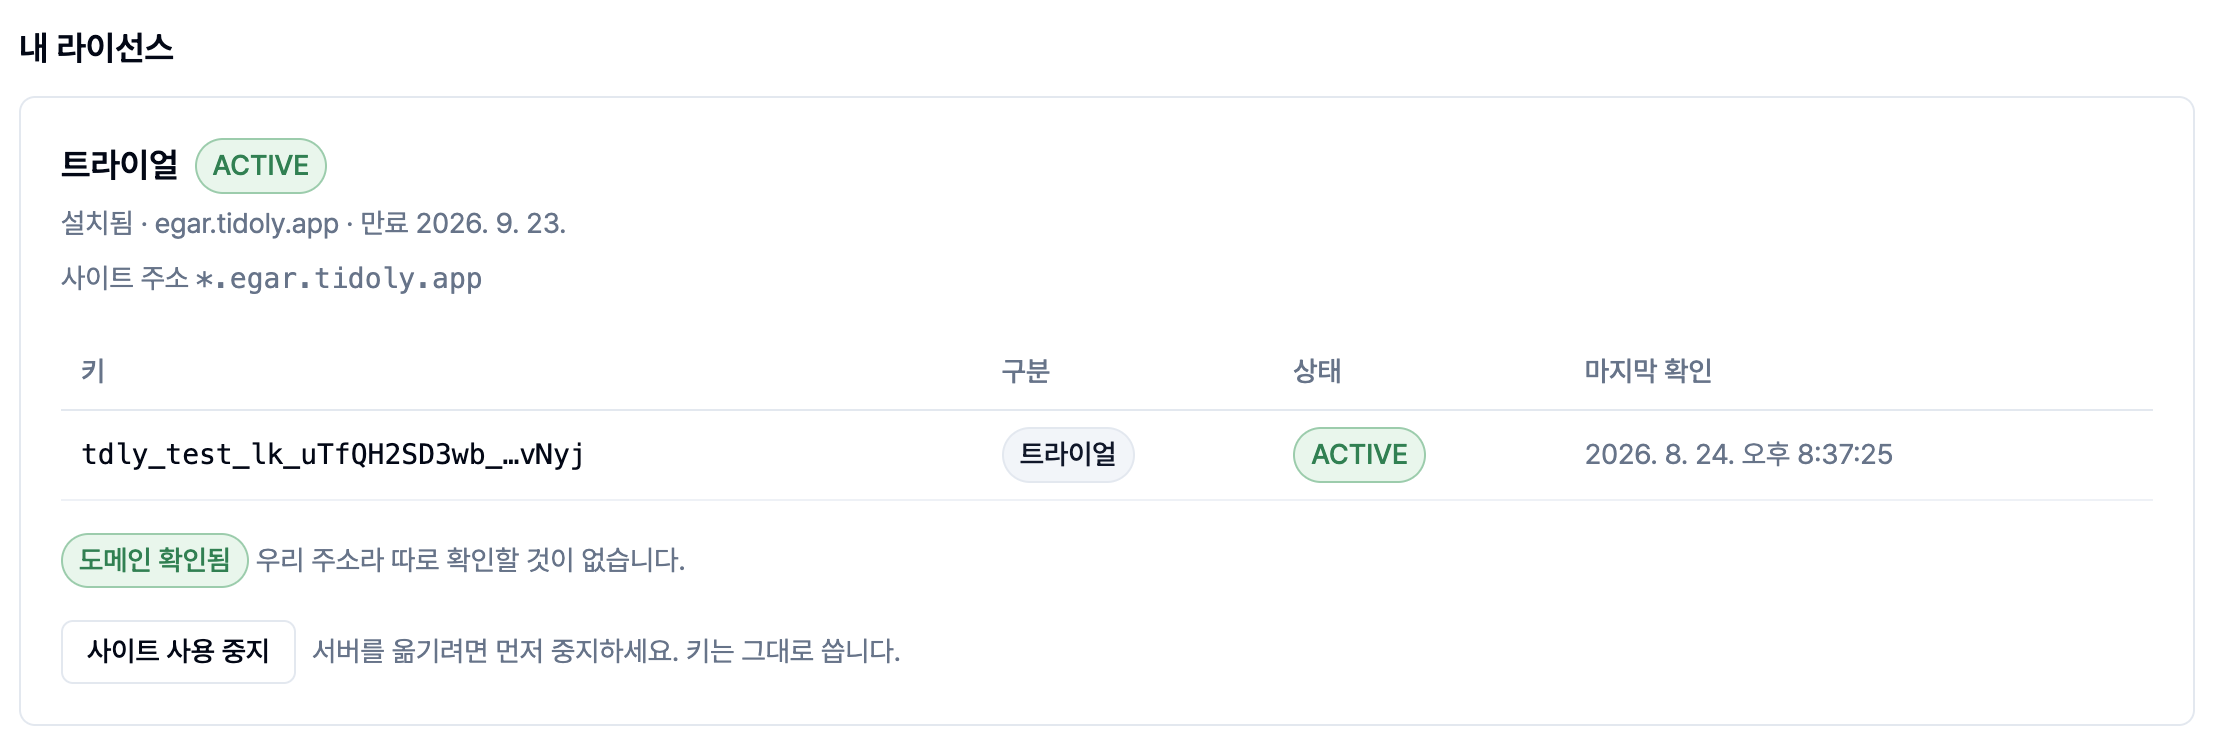
- Wildcard address method (
*.<name>): Even when you add more services, their addresses are prepared automatically.
Stop the site first when moving servers
When moving the server to another environment, first press 사이트 사용 중지 (Stop using site) and then move it. Your existing license key stays valid, and there's no need to get it reissued.
4. DNS setup for your own domain
If you use your own domain, you're done after adding just 2 DNS records. Copy the names and values shown on screen as they are and register them in your domain's DNS settings.
Required records
| Purpose | Record name | Record value (Value) |
|---|---|---|
| Traffic edge connection | *.<your domain> | The CNAME value shown on screen |
| Domain ownership verification | _acme-challenge.<your domain> | The CNAME value shown on screen |
Verification steps
Before adding the records: The status shows
CNAME 확인 필요(CNAME check needed), and the values to enter are displayed.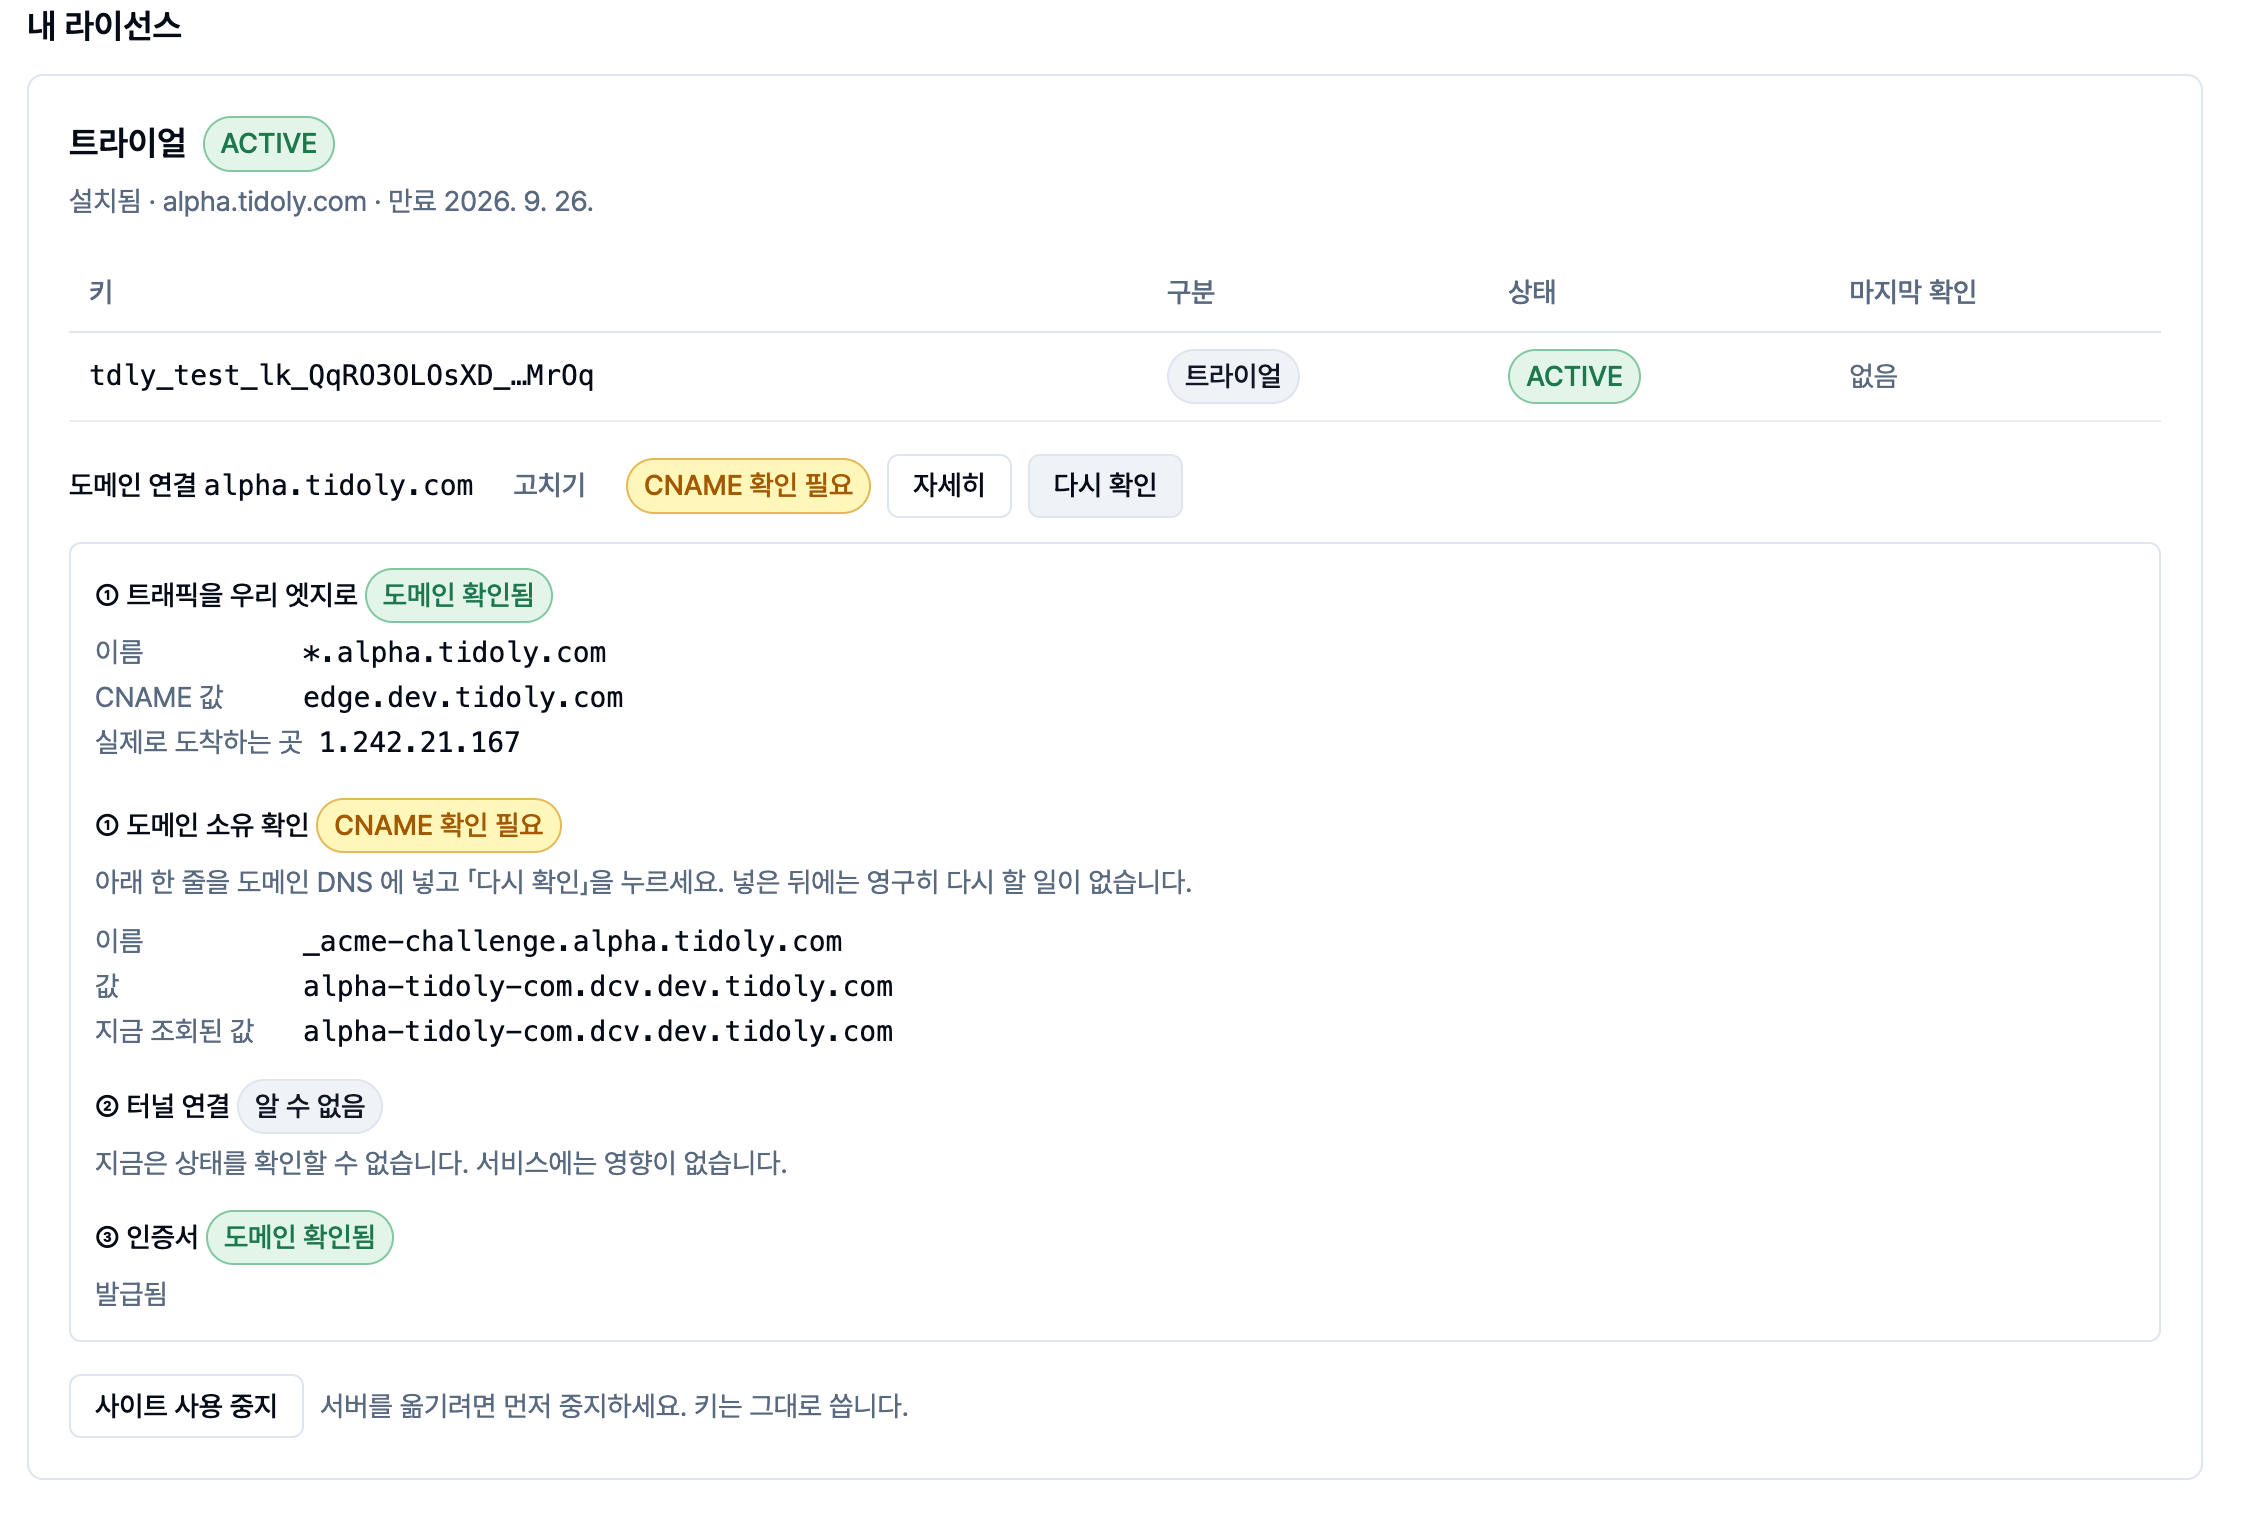
After adding the records: After setting them, press the
다시 확인(Check again) button and the status changes to도메인 확인됨(Domain verified) (green).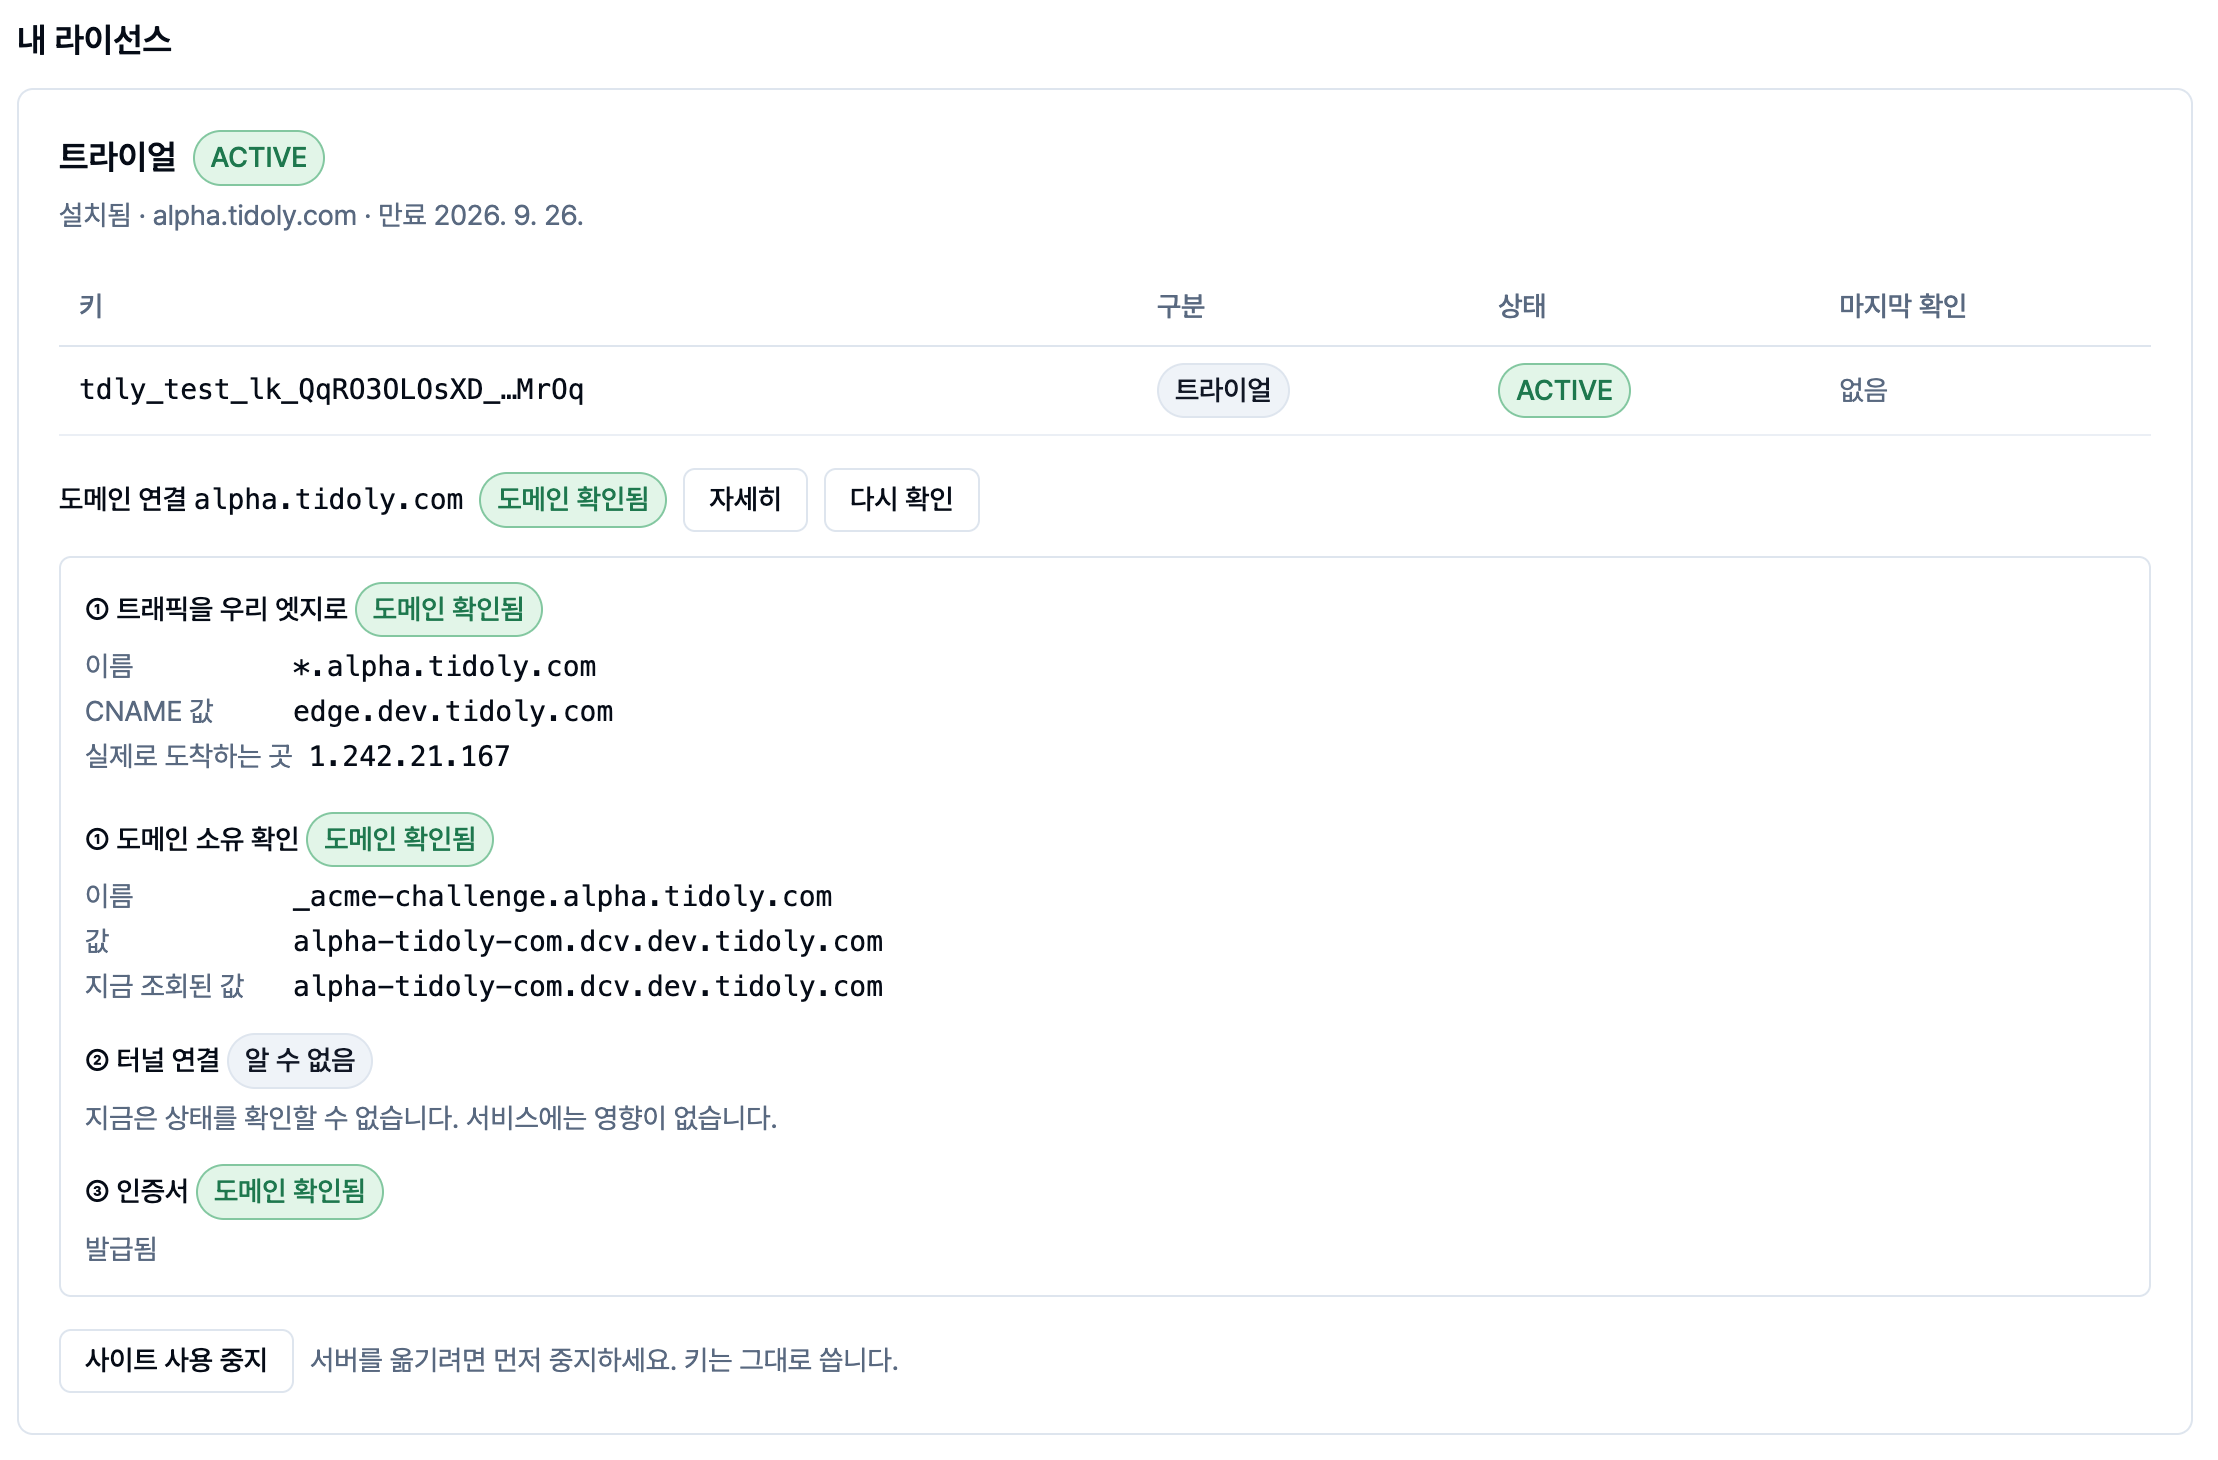
- Set once, stays set: Because the ownership verification value points to our CNAME, we handle it even when the value changes during certificate renewal. As the screen says — "넣은 뒤에는 영구히 다시 할 일이 없습니다." (Once added, there's nothing more to do, ever.) However, if you delete the registered DNS records, certificate renewal will fail. (Chapter 9 · When renewal fails silently)
- Don't enter the IP directly: The
실제로 도착하는 곳(IP)(Where traffic actually arrives (IP)) shown on screen is for reference only. Our addresses can change, and when they do, only places pointed at the IP break. - When using the domain apex (root domain): If your setup doesn't allow a CNAME there, use an
ALIAS/ANAMErecord or use a subdomain.
- Step-by-step diagnostics: The steps are split so that when something doesn't work, you can see right away where it stopped — ownership verification (your DNS), tunnel connection (your server), or certificate (our side).
- Tunnel connection status
알 수 없음(Unknown): As the screen says, it has no effect on the service.
5. Status indicators and troubleshooting
If a status message looks odd, refer to the table below and take action.
| Status shown | Cause and fix |
|---|---|
CNAME 확인 필요아직 조회되지 않습니다 (Not found yet) | The DNS records haven't been entered or are still propagating. Wait a moment and press 다시 확인. |
| 아직 한 번도 연결된 적이 없습니다 (Never connected yet) | The server has never connected — most likely a configuration problem. |
| 알 수 없음 | Not a problem. We just couldn't read the current status on our side; the actual service is not affected. |
알 수 없음 is not a red light. Our lookup failed; your configuration isn't wrong. If you treat this as a problem and change DNS that's working fine, you'll only make things worse.
Tip when changing DNS (TTL setting) — if you're connecting a domain name that was already in use, lower the TTL value of the existing records in advance before making the change. Otherwise, propagation delays can cause a few minutes of access outage. (Advanced · DNS)
Next → 2. Install the system